Office Tetris – The Iso-Posts #5

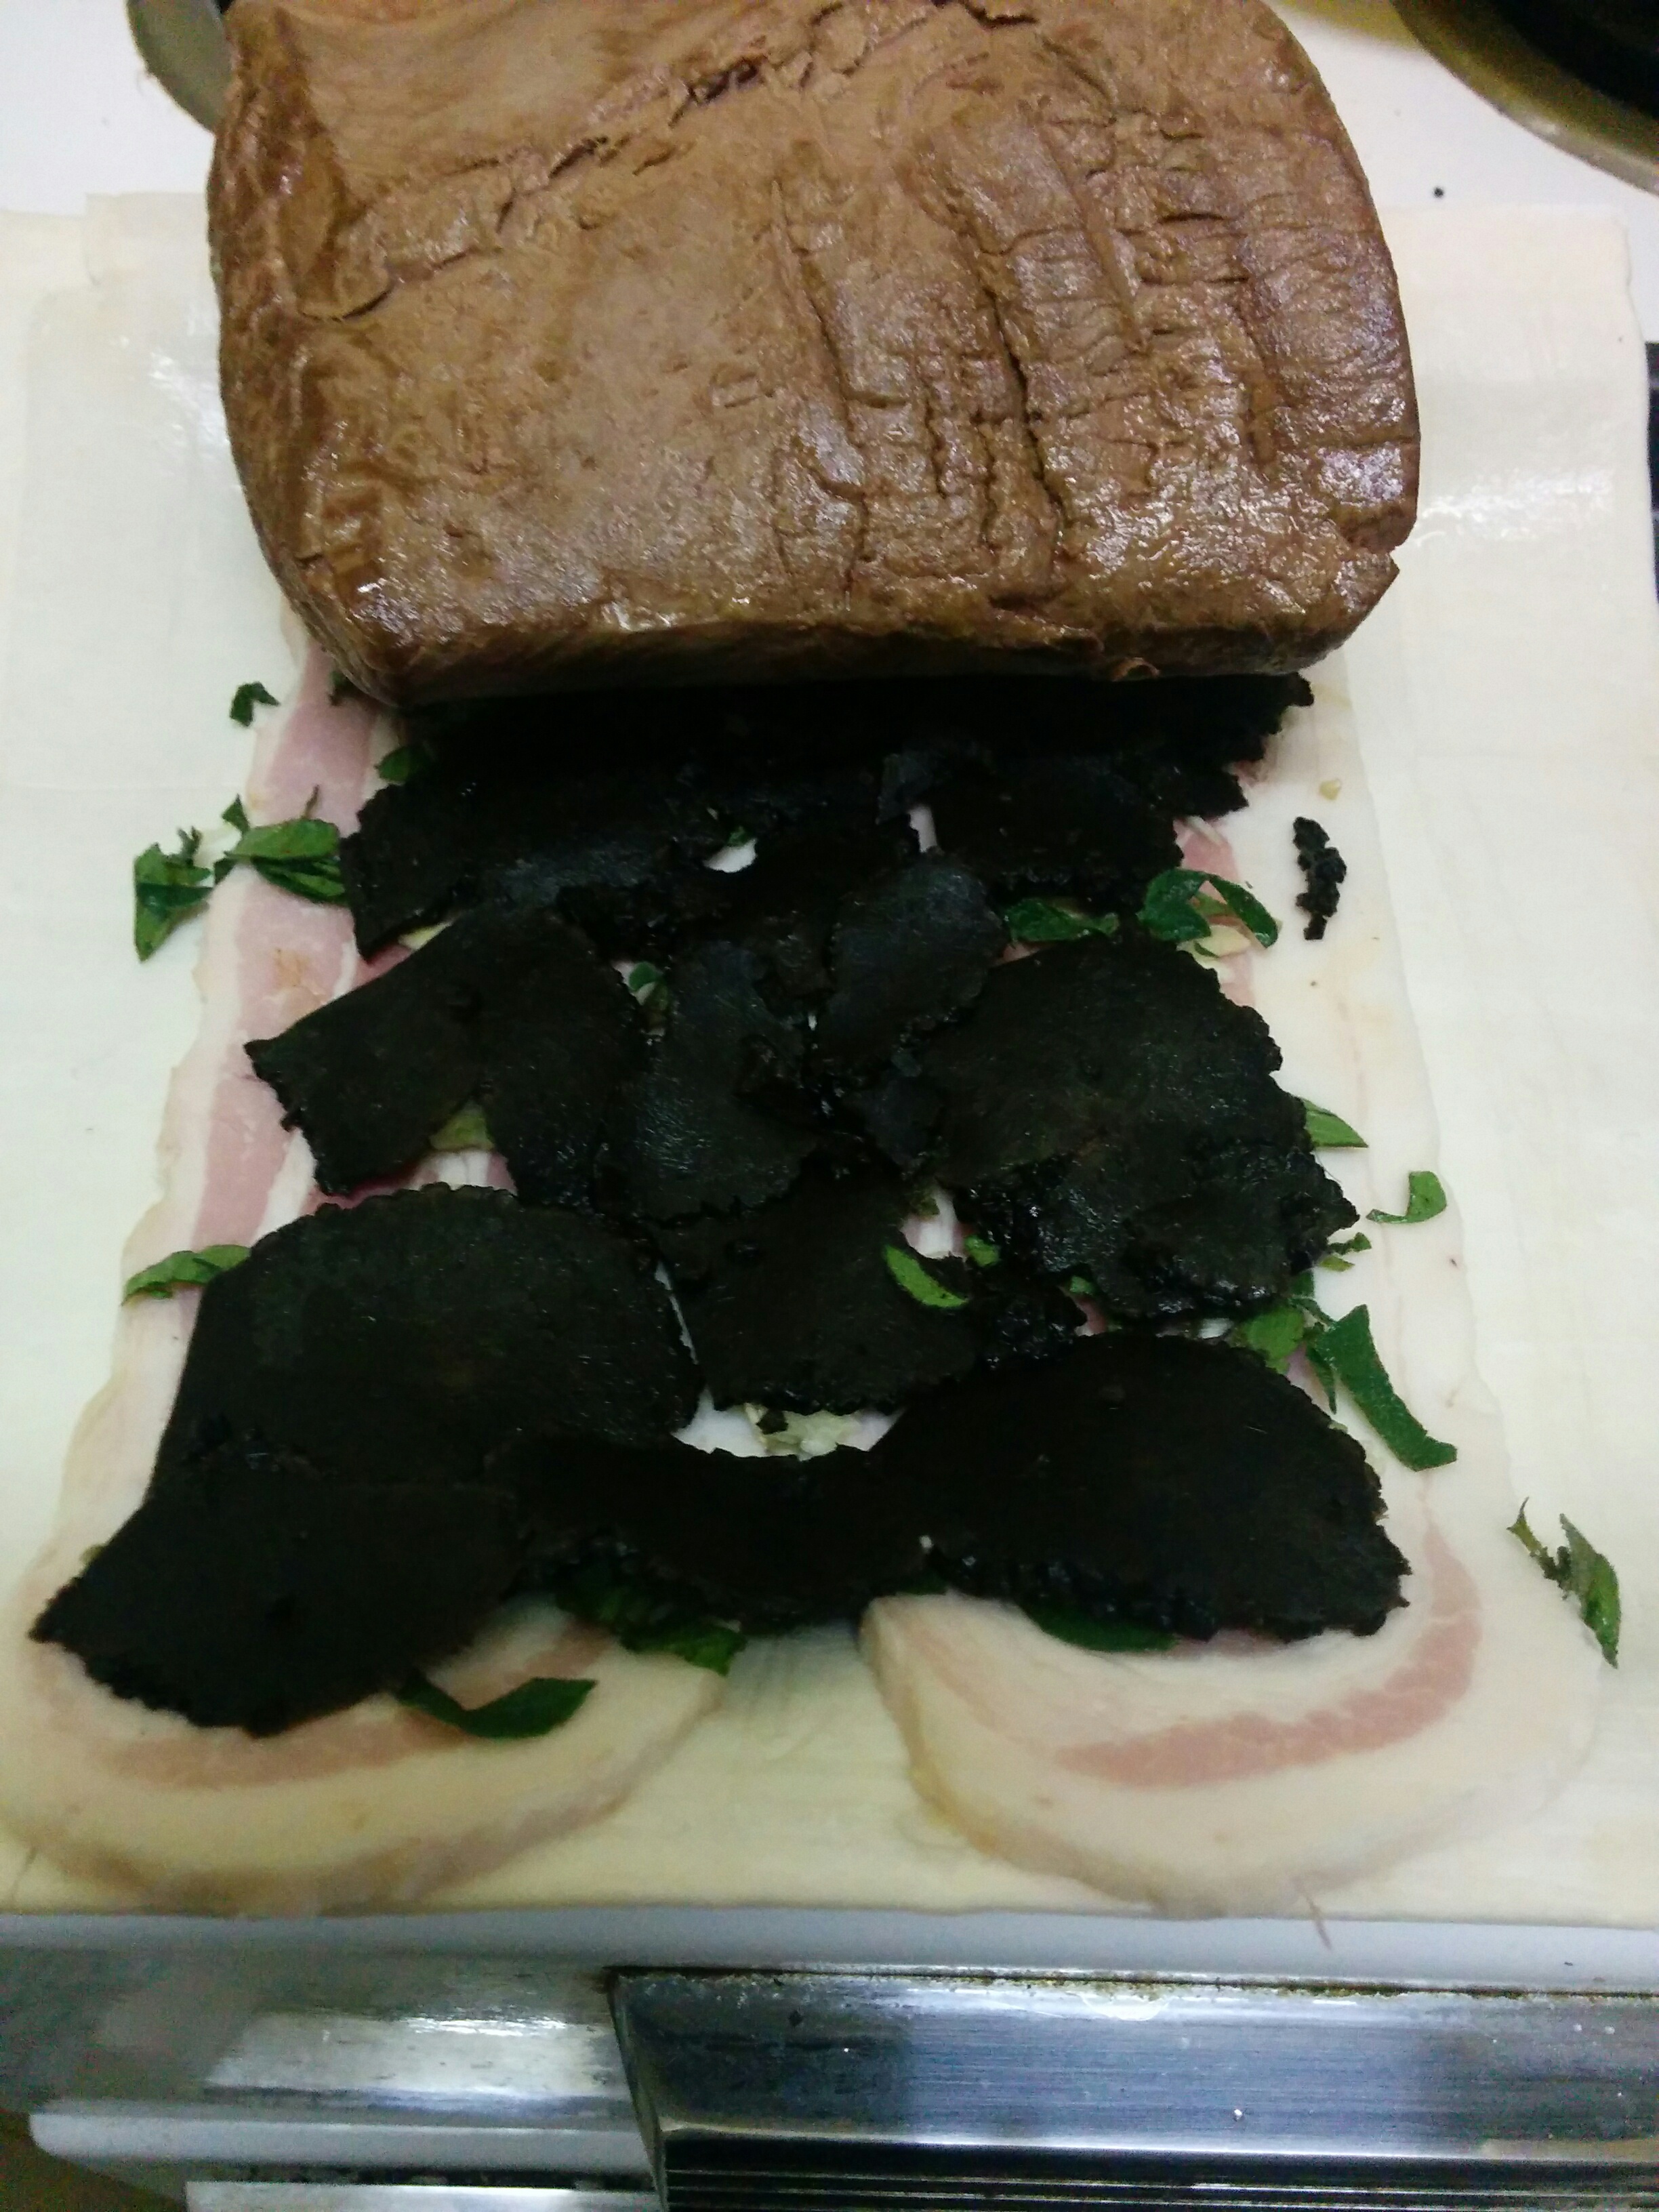
The simplest of dinners – sourdough rye, home grown salad and fresh home made sausages

As promised in yesterday’s post, here’s a pic of the finished meal and it was delicious. I was really pleased with the sausages – flavour and texture were perfect!

Today has been a day of choices, discoveries and some sadness.

I’d only realised last week I was out of seed of my favourite endive “Bionda a curore pieno” and ordered a packet online from The Italian Gardener along with Lettuce Leaf Basil for next spring/summer. That prompted me to check stocks of other seed and do a top up with my local suppliers, Seed Freaks. They specialise in open-pollinated and heirloom varieties and I’ve had tremendous success with their seeds.

Anyway, after my morning feeding of the beasts and chili/basil check, I was picking veggies for tonight’s dinner and weeding the silverbeet. There I discovered a clump of self seeded endives pushing up through the straw and I imagine there’s a few Bionda in there. This is one of my favourites – it’s tangy flavour and great texture add so much depth to winter salads. The extra seeds coming in the post won’t go astray, I’ll just plant a few more 🙂

Later in the morning, I decided to tackle the shoe-box that is my office. It’s served as my music rehearsal space and teaching area, sewing room, writing den and main library for over a decade – effectively three rooms crammed into a tiny space barely big enough to swing a cat! It was high time to rearrange things so I can add more bookcases and start making some hard choices about how to both make the best use of the space and discard bits and pieces I’ve had boxed up in there for what seems like forever.

I found photographs of friends, some of whom are no longer alive, cables (so many cables!), old guitar strings, jars of beads that I meant to restring, demo recordings, little cards from my son when he was small and festival programs going back years. I started to feel a sadness that life is never really going to be the same again, and uncertain about what the future might hold for people like me in the creative industries.

It was more that a little overwhelming. But I also acknowledge there’s nothing at all I can do about it but reorganise my space – internally and externally – keep going and make the best of what I have and what I’m capable of doing. It was wonderful to fit in the new/old bookcase, and realising I could fit a box of my fabric stash on top was a bonus. Certainly like playing Tetris, moving things from one room to another, but incredibly satisfying that it fitted (just!) and made me feel like I’d achieved something important by getting it all to work.

From the crammed shelves of my main film library to the wide open spaces of that empty bookshelf – with a box of fabric for good measure!

Despite my generally upbeat nature, I think it’s important and healthy to acknowledge when I feel down or sad. Sometimes in the past I’ve repressed those feelings with spectacularly awful results – I think it’s like that for most of us. So please don’t be afraid to talk about your fears or sadness with people who matter – and I believe we all matter!

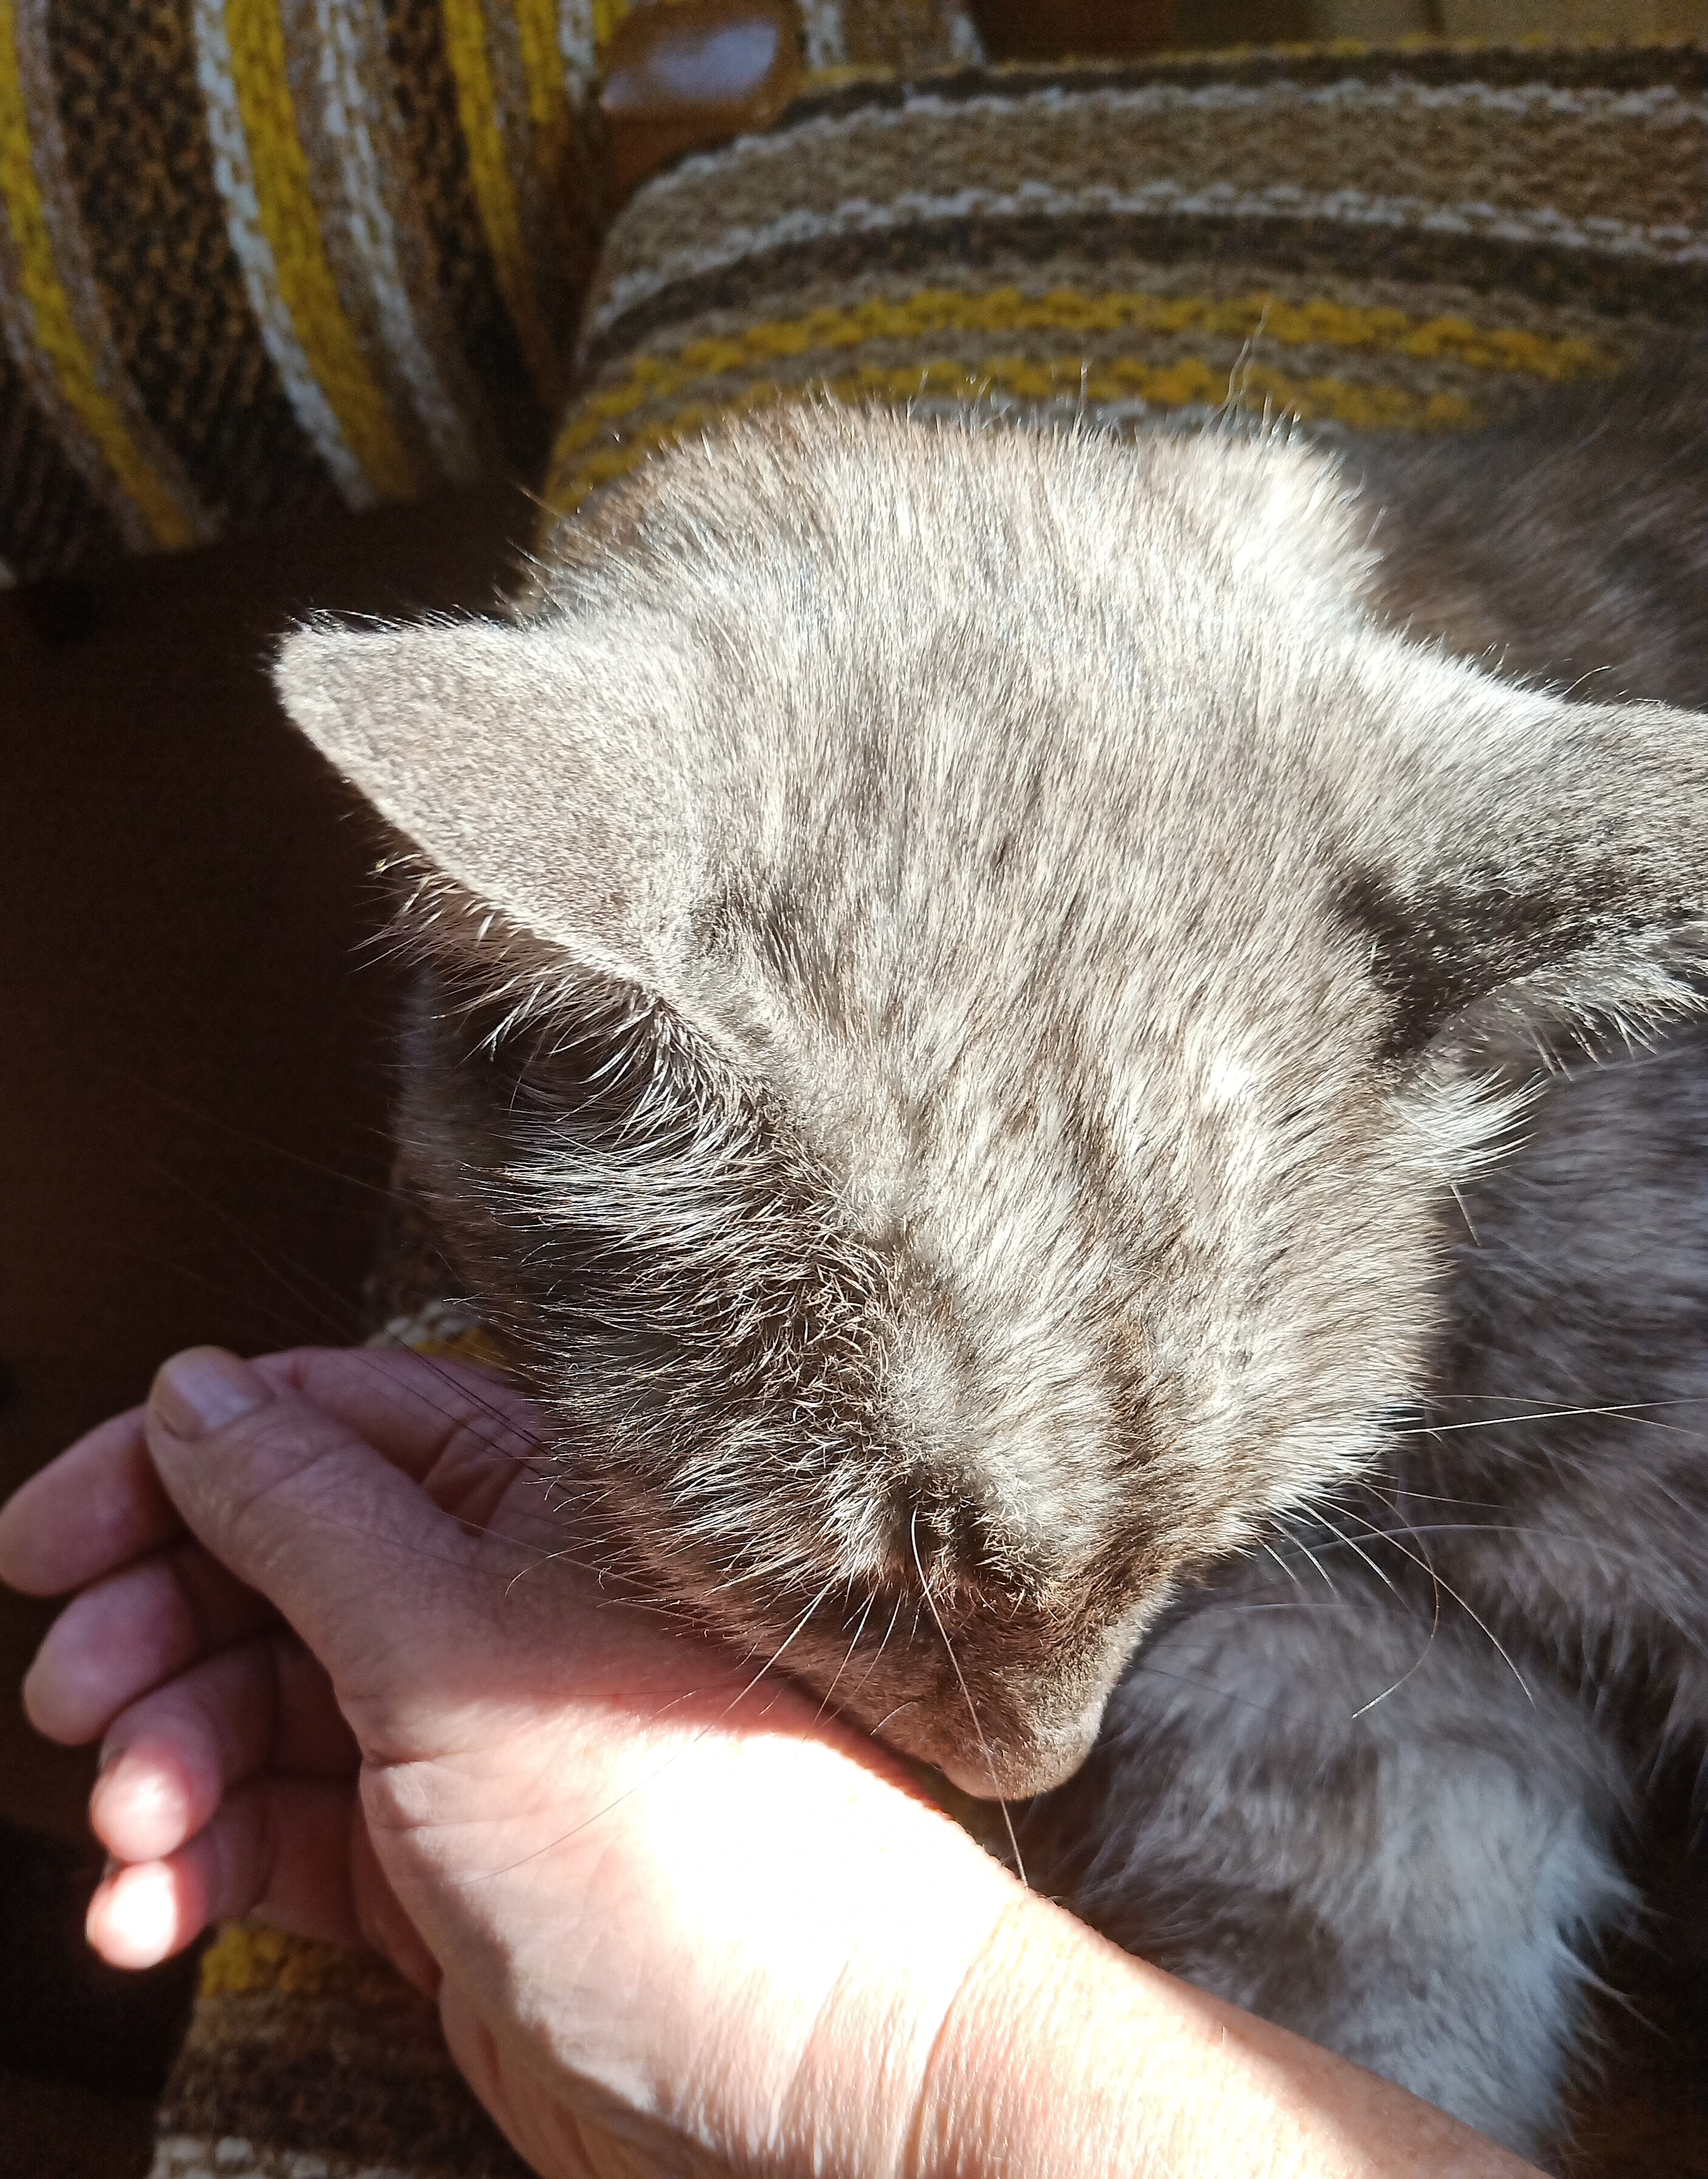
It’s definitely colder today but I’ll leave you with this little image, one I see every morning – the silhouette of a small, grey cat who likes to sun himself on our east-facing doorstep while I’m getting ready to feed him breakfast ❤


Sausages! – The Iso-Posts #4

Despite everything that’s going on right now, I personally feel I have a lot to be grateful for. I have a secure roof over my head, plenty of food, the most practical person on the planet to be in isolation with (aka He-Who-Must-Not-Be-Listened-To), a rich life of the mind, animals and gardening to keep me active, comparatively good health and a swag of friends and family around the world who like to check in with me via social media. In many ways I feel I’m doing this pretty easy.

Here in Hobart, the days are getting shorter and Daylight Saving finished today. This is traditionally the end of summer and the start of autumn proper – and today didn’t disappoint! It was much colder, and this morning there was even a dusting of snow on kunanyi/Mt Wellington but it was good to run around outside and feel the crisp air of proper autumn again. But with the onset of cooler weather comes less light and I for one, struggle with shorter days. We can all get through this, but only if we do it together. If you’re struggling, please say so. Reach out to family, friends and let them know you need to talk!

A few days ago a farming friend put out the call that he had fresh organic beef for sale and was prepared to make a delivery run to those of us in the greater Hobart area. We very gratefully said yes, it’s topped up the freezers and meant I don’t have to worry about shopping again for a while. So with a load of meat in the fridge, today we got creative and made sausages!

There was some venison I’d put aside for this plus a bag of pork back fat and a pouch of salted sausage casings that I bought some time ago for just such an occasion. (They will keep for up to two years in the refrigerator). After taking a guesstimate of how much of the casings we’d need, I cut a length off, soaked them in warm water for a couple of hours and trekked off into the garden to gather some fresh herbs. Returning with this lovely bouquet, I peeled some fresh Tasmanian Purple garlic, thoroughly rinsed the skins and set up the mincer that attaches to the front of my stand mixer.

When I used to make sausages years ago, I did the whole thing with a hand mincer and stuffed skins with an old caulking gun frame I’d rigged with a special food grade plastic tube. Living in the bush was peaceful but hard work – things like this used to take me the best part of a day. Today’s effort was relatively small (only a couple of kilos of meat in total) but took only about an hour to mince and stuff the casings. We opted for a fairly simple sage & garlic mix with the venison but went a little bit further with the beef, with lots of oregano, chili, garlic and smoked paprika for a more chorizo-style but without the traditional fermenting and curing.

The end product looks and smells great and I discovered that I haven’t forgotten how to do links! The test will be how they taste tonight with some home grown salad and a slice of rye sourdough.

And on cleaning out the mincer attachment, it looks like there’s enough for me to make a large sausage roll that’ll make a very nice lunch 🙂

Meanwhile, there was a very disgruntled grey cat, who was quite upset he wasn’t invited in to taste test the sausage meat. Eventually though, all was forgiven and Neko curled up on a favourite chair with me to catch some afternoon sun.

Stay well everyone, and keep talking to each other over social media, text and phone calls – we can do this ❤

PS: Dinner was fabulous, the beef chorizo-style was suitably spicy and the venison sausages had all the warmth and depth without tasting gamey – I’ll put up a photo tomorrow 🙂

Lazy Saturday – The Iso-Posts #3

I love Saturdays.

It doesn’t matter if they’re sunny and I’m in the garden or wet and miserable and I’m curled up on the couch, I just love Saturday at home.

Given our current circumstances, there’s no other place to be – and today’s been what my late father would’ve called a “pearler”. That is, a beautiful example of what a Saturday should be.

It’s been very grey and wet most of today, so this morning’s feeding of the animals was fairly rapid and required a heavy duty raincoat and my trusty steel capped gumboots. No planting for me today and I didn’t see my new friend over the back fence, but I did stop off in the greenhouse to do my daily basil and chili inspection. Pictured below is a most unusual fruit on a chili plant I grew from seed. Looking back through my notes, it’s named as a multicoloured Bishop’s Crown (Capsicum baccatum). It’s supposed to have a more blocky base and finish up a fresh orange red, but I’m not sure if it’s been mixed with something else.

Chilies are notorious for cross pollinating and serious seed collection means hand pollinating with a brush and enclosing flowers in mesh to avoid contamination. I’m never usually that fussy as I don’t sell plants or seed anymore but I’m very curious to see what this becomes as it ripens and (most importantly) what it tastes like!

Speaking of taste, we decided to do a full Super Saturday roast, and as I type, the rich, delicious aroma of roasting venison is wafting through the house. It’s been in the slow cooker since this morning with half a bottle of shiraz, a head of garlic, some dried chili from last year, a handful of button mushrooms and a bouquet of fresh thyme, sage and oregano. The joint is sitting above the rich liquid on a trivet of halved onion and carrot and it’s almost time to go and prepare some potatoes and carrots for roasting and finishing the meat off in the oven, while I make a sauce from the slow cooker. The smell is intoxicating!

This afternoon I indulged myself in some of my favourite Saturday things. I bought some books (online of course) from my local independent bookstore, Cracked & Spineless. I love this place so much and besides going to the cinema, I miss visiting Richard and the overflowing shelves and stacks, but he’s going to do a delivery for me sometime soon. Definitely an essential service in these strange days!

I depleted the bank account further when I discovered a heavy duty KitchenAid stick blender on special. It’ll be perfect for winter soups, making single smoothies, small batches of salsa, wet spice mixes and sauces – and far easier to clean up than my big food processor.

Finally, I started reading the new biography of New Zealand Prime Minister Jacinda Ardern and it’s pretty good so far. Ardern has certainly shown herself to be a compassionate and caring leader since she came to office! I’ll be reviewing it shortly for The Tasmanian Times and will put a link here when it’s published.

So, a lazy day of unusual plants, buying books and things for the kitchen, happily indoors out of the rain, reading a new book while anticipating a spectacular dinner. A pearler of a Saturday! The only thing that could’ve made today better is if there was proper Australian rules football on the radio or television. I miss my footy too.

What are you missing most? And what’s the first thing you’re going to do when things get back to normal?

Late afternoon and clearing skies

Self Isolationist Life – Notes From the Back Rows – The Iso-Posts #1

Reflection of sunrise from my backdoor

I’ve been in self isolation for over two weeks because of the COVID-19 pandemic (I have multiple risk factors) but that doesn’t mean I’ve been sitting here twiddling my thumbs! Sadly, I haven’t written anything for weeks, so forgive me regular readers! I’ve been a little preoccupied what with one thing and another. Despite being at home, I’ve found myself incredibly busy, and by the end of the day I’ve been too tired to do much of anything.

It’s autumn here in southern Australia, though the weather has mostly been balmy these past weeks. In fact, it’s been so warm, basil plants are still putting on new growth in the greenhouse and I’ve taken to knocking off any new flowers on the chilies while waiting (impatiently, I admit) for the Habaneros to ripen.

I made a batch of fermented hot sauce last month and I’ve got another jar underway at the moment. This ridiculously simple recipe has become something of a staple here over the last couple of years and it’s perfect anywhere you’d normally use tomato sauce. If you’re interested in the recipe, it’s here in a blog post from a couple of years ago.

Meanwhile, I’ve been going gang-busters in the kitchen making stock for the freezer, something I like to do every autumn in preparation for the colder months. But family members went hunting just before I locked down so I had to find room for venison roasts and even more stock – it was like playing Tetris with the freezer! I resorted to reducing some of it down so I could fill ice cube trays with incredibly rich, condensed stock. I anticipate one cube will be enough to feed four!

It’s been equally busy in the garden, planting out a bed of garlic, loads of seeds for winter salad (spinach, brassicas, mache/corn salad, endives etc) and trays of peas and broad beans for late winter/early spring cropping. Yesterday I was trying to liberate the cabbages, beetroot and caulifowers from their layer of living mulch (aka weeds) when I pushed a little too hard and I’ve found myself today with very sore hands, a mark of the arthritis that always comes with the end of summer. Thankfully, it’s been raining today so I couldn’t have done anymore even if I’d wanted too!

Instead, I’ve rested up, done lots of stretching exercises, dipped a little into social media, watched some YouTube videos, played with the cat (who also thought it too wet to be in the yard) and called a former fellow student who’s up in NSW. We’ve never met in person (yet!) but it was lovely to chat about families, writing, gardening, putting food by and the joys of modern technology in these days of lockdown.

I DO miss going to the cinema and will be at The State as soon as they reopen but in the meantime, I’m enjoying watching movies online, catching up on reading and getting the garden ready for winter. It’s my hope that we’ll come out the other side of this difficult time with a greater appreciation for the things that matter and a willingness to tackle other important issues as a community.

In truth, I’ve really begun to think of my life and natural introversion as my greatest superpower (talking underwater is the other one, thanks for asking!) After six years of online study, an urban farm to deal with and a predilection for home grown/cooked/made cuisine, I don’t feel put out by being at home. Rather than “shut in”, I feel “safe” here at home.

Talk with you all soon. Meanwhile, stay safe friends and be like Neko (aka Lord & Master, aka The Cat Who Came to Stay) – stay home ❤

Lord and Master, Neko in his cat igloo

One Last Radio Interview for 2019 & Seasons Greetings

Rainbow across kunanyi/Mt Wellington from my backdoor a few weeks ago

Tomorrow is Christmas Eve and I probably won’t be writing much for the blog between now and next year. 

But I have been asked to come in and talk to the wonderful Ryk Goddard on ABC Radio Hobart about the year in film, my high points and what I’m looking forward to seeing next year. If you’re not in Hobart (or even Australia) the ABC offers excellent ways to listen online, either through their app or via the website for Ryk’s program (which also has an archive of shows). I’ll be on air about 9:10 am (Australian Eastern Summer Time) if you’d like to listen in live or catch the interview afterwards. 

I’d also like to take this opportunity to thank you all for bothering to read my meandering musings – more about films at the moment than anything else! – but there are other exciting (to me at least) projects on the horizon for the new decade, so stay tuned. All in all, it’s been a tough year and your ongoing support means so very much to me – so huge thanks from me!

Over the southern summer, I’ll still be watching movies in between harvesting fruit and vegetables, making pesto from the jungle of basil and reading books for pleasure again – probably in my old deckchair under the chestnut tree. There might even be blog posts about some of my other creative pursuits – who knows?

Meanwhile, I wish you all a peaceful and relaxing holiday wherever you are on this wonderful planet ❤ 


Winter Warmers Part 1 – Boeuf en Croute

Moon set at sunrise over kunanyi/Mt Wellington 30th June 2018

Now we’re past mid winter’s day the weather has taken a much chillier turn (very common for this time of year) and unfortunately it’s wet as well. Normally, most Australians south of the tropics would welcome rain but tanks are full, garden beds are waterlogged (very bad for the garlic crop!) and the chicken’s yard is rapidly turning into a quagmire.

The biggest issue is that it’s kept me housebound. As a rule, winter in Hobart is much drier and colder but we are blessed with crisp, clear blue days, ideal for outdoor activities. Winter is normally the time of year when I want to do things with fruit trees, sharpen spades and secateurs, clean out the greenhouse, prepare beds for spring planting, and generally charge around the yard, doing things to keep warm.

So, although it’s been milder than usual, it’s just been too wet to do a great deal out of doors on the days when I’m home to do so. As a result, I’ve been cooking more and watching a lot of movies!

Last weekend, I started half heartedly taking stock and cleaning out the freezers (yes, I was that desperate to be doing something). There were lots of treasures for winter meals – home made pork and chicken stock, roasted and peeled chestnuts, slow cooked beans in meal size portions, leftover servings of curry and soup and bones from the christmas ham that need using very soon. To my horror, I discovered the last beautifully packaged piece of truffle that was lurking in the back corner of a freezer. I buy a Tasmanian truffle every winter and try and make the most of it fresh and then spend the rest of the year dreaming about truffles, so I was horrified to think I’d neglected this exquisite morsel, hoping it hadn’t denatured or suffered freezer burn. Thank goodness I wrapped it so well – it was fine!

I had a piece of beef fillet that was looking for a good recipe too, and a need to do something special for myself as well as my long suffering partner (aka He-Who-Must-Not-Be-Listened-To). So I decided to make a rather spectacular but remarkably easy dinner. The preparation is everything with this but in my opinion, the easier you can make the flavour profile, the more clearly the core ingredients can shine through, in this case the truffle and the beef. I think it’s worth making just for the aroma. My house smelled amazing for days after ❤

Before we get into it, I just want to talk about expense. At first glance this looks incredibly expensive, and compared to most of the food I share here, it probably is. I did a rough costing and (without wine or power allowances) this comes to approximately AU$70 of ingredients for two generous serves. Given that a quality pub meal in Hobart can vary from AU$25-35 for steak per person and something like this in a restaurant would be more in the order of AU$45-65 per serve, I think this is really good value for something exceptional that most home cooks can easily manage. Now, let’s crack on!

Boeuf en Croute (serves 2)

Beef fillet piece (approximately 500g/1 lb)

1-2 sheets frozen puff pastry

2 rashers of good quality bacon

Truffle (my piece would’ve been just under 20g)

1 clove garlic (optional)

Fresh herbs (I used oregano and sage)

Salt and pepper (optional)

Method:

Heat a skillet to high and sear the beef on each side quickly. The idea here is to seal the meat, not to cook it through, so make sure the skillet is very hot. Remove the meat once every side (ends included) has seen the pan and set it aside to cool completely. (I left mine for about an hour).

Preheat an oven to 180 C (350 F). Lay the pastry sheet(s) out on a parchment covered board to defrost. How much pastry you need is determined by how big your piece of beef is and how much you like puff pastry. Once defrosted you can roll the pastry out a little to make it fit or be lazy (like me) and make a patch with another piece of pastry.

On a clean board remove the bacon rind, chop the garlic and herbs finely and slice the truffle. On a defrosted pastry sheet, lay out the rashers of bacon side by side and cover with the chopped herbs and shaved truffle. I don’t have a proper truffle shaver but find the slicing blade of a box grater does very well. Also, I don’t generally use salt and pepper but if you do, this would be the spot to use it.

Now for the tricky bit! Position the beef on the top side of the pastry sheet like this –

Use the parchment to help make a tight roll. Also, I find rolling towards yourself lets you see what’s happening and poke any stray pieces of truffle or herbs back into place. I used a little water and a pastry brush to tack an extra piece of pastry to one edge and finished the roll, using this as the surface the roast sits on. At this stage, I also trimmed a little excess pastry off the sides and folded the sides tightly, making sure the meat was completely sealed in the pastry. I put a few decorative slashes on top to give some indication where to slice for serving but you can decorate it any way you like.

Place on a small roasting tray and bake on the middle rack for 35-40 minutes. Everyone’s oven is different so adjust your cooking time accordingly. Mine came out medium rare though it looks more like well done in the photograph (and the pic of the pastry lies too – it was nowhere near as dark as the photo!)

Leave the meat to rest for 10 minutes and then carve carefully into four slices. Serve on a bed of wilted spinach or silverbeet (Swiss chard) and a glass or two of good red wine.

Next time, I’ll share how I used the ham bones to make home made Baked Beans – one of the cheapest and heartiest meals ever. Although it costs far less, it actually takes more time to make than Boeuf en Croute!

Also, please let me know if you try this recipe – I always love to hear from you 🙂

Winter Love

Sunrise 19th June 2018

For the most part, I really like winter. Here in Hobart it brings the Dark MOFO festival, which always leaves me enriched emotionally but (happily) broke from concert fees. This year I saw one of my favourite German bands Einsturzende Neubauten again, Australian treasure Tim Minchin for the first time and the magnificent multimedia artist Laurie Anderson live in concert.

The chickens aren’t laying much and I miss the long days in the garden admittedly, but I like the short, crisply sunny days and love the smell of soup or hearty stews in the slow cooker (usually served with a robust winter garden salad) and although me and mine aren’t big on sweet things, we love the occasional winter pudding. Lemon Self-Saucing Pudding is one of the first things I ever baked on my own when I was very young, baked in an old Metters wood stove and supervised by my mother and grandmother. Over the years I’ve tweaked this recipe a lot, ensuring there’s a reasonable balance between the light and golden sponge to rich and luscious sauce, even adding little touches like very finely grated ginger to shift the flavour profile.

Having home grown lemons and limes has encouraged me to bring this beauty out again and I think this is something of a triumph in terms of flavour/texture balance. I hope you enjoy it ❤

Deb’s Lemon & Lime Self-Saucing Pudding

75g butter

1 scant cup of sugar

2 cups milk

¼ cup Self Raising flour

1-2 lemons (see note below)

2-3 limes (see note below)

3 eggs

Preheat an oven to 160-180 C (320-350 F). Cream the butter and sugar very thoroughly. In a clean large bowl, separate the egg whites and mix the yolks with the creamed butter and sugar.


Grate the lemon and lime rind, juice the fruit and add this to the batter. Add a little of the milk to the mix and once it’s well combined add the flour. Mix this through, ensuring there’s no lumps and gradually add the rest of the milk.

Beat the egg whites until they hold soft peaks and fold this carefully through the mixture.

Pour into a greased 6 cup soufflé dish and bake for 30 minutes or until the top is golden and the pudding has pulled away from the edge of the dish. If the top has browned but it seems like there’s too much liquid, leave the pudding in the oven (switched off) for another 10 minutes. Serve as is or with a dash of cream for extra richness.

NOTE: My family like very tart citrus flavours and less sugar, so I used 2 lemons and 3 small Tahitian limes to a scant cup of sugar in this recipe. Feel free to adjust to your taste! I also picked the fruit a few days ago, so they’d had a chance to relax a little and reach maximum juiciness.

Let me know if you try this and how it behaves for you. And as always, feel free to add or reduce sugar levels to suit your personal taste 🙂

Summer in a Bottle – Fermented Chilli Sauce


img_20180224_134756.jpg

I’ve had a fabulous crop of chillies so far and this season I really wanted to experiment with fermenting for flavour.

The Habanero chillies in particular have been really prolific this year and while not as hot as past seasons, incredibly flavourful, with a citrus tang that I thought would make a great sauce.

So, here’s the recipe I developed for the ferment and the subsequent sauce. I’ve tried to include as much detail as possible about my process, but as always, please ask if there’s something I’ve missed that needs clarification!

Fermented Hot Sauce 


Ingredients:

Fresh chillies (I used ripe Habaneros from my garden)

Salt (cooking or kosher salt without additives is best)

Water (filtered or rain water boiled and allowed to cool to room temperature)

(For the sauce) Lemons, vinegar or citric acid (available in most supermarkets as a powder in the baking needs section).

You’ll also need gloves (if the chillies are Habaneros or hotter this is necessary!), some reasonably accurate kitchen scales and measuring spoons, a scrupulously clean jar, a weight to hold the chillies down and a lid that can accommodate an airlock or similar. Even with small ferments, I prefer to exclude any organisms other than what’s on my fruit or vegetables. I’d also recommend a book of litmus paper (available from most chemists) to check pH levels of the final product, especially if you’re not planning to put the sauce through a water bath.

Ferment Method:

Before starting, clean everything – otherwise your ferment can pick up organisms you might not want! Sterilise jars, lids, weights, measuring spoons and anything metal in boiling water, thoroughly clean chopping boards, knives, bowls and gloves in hot soapy water and rinse thoroughly.

Wash the chillies and dry them carefully. With gloves on (if you’re using hot chillies) remove the stalk and chop the chillies. I like the heat, so I left the seeds and membrane in, but if you’re looking for a more mellow and somewhat smoother sauce, cut the chillies in quarters and scrape out the seeds and inner membrane with a paring knife.

Weigh the chillies and pack them tightly into the clean jar. You can either sprinkle the salt over the chillies (which I did) and pour the cooled water over them or mix the salt until it’s fairly well dissolved in a small amount of water. I went for a roughly 8% solution and had 200 g (7 oz) of chopped chillies. This meant needed 16 g salt, which is a scant tablespoon. (My old spring loaded kitchen scales aren’t designed for very small amounts but digital scales are perfect for this job).

IMG_20180224_141454

Once you’ve added the brine, it’s important to twist the jar a few times or push the chilli pieces around with a clean skewer to remove as many air bubbles as possible and weigh the chillies down so they are entirely submerged. I use wide mouth Mason jars with easy to clean glass weights and a silicone Pickle Pipe – a waterless airlock that allow ferments to release carbon dioxide, without allowing air (and unwanted organisms) in. Then cover, label and leave in a dark, cool place for about a week.

I keep my ferments in pantry shelves that I walk past all the time, so I tend to check them once a day. It never ceases to delight me, seeing bubbles, smelling the wonderful aromas and particularly with this ferment, seeing the colour really develop. It’s also a good habit to check your ferments to make sure nothing has risen above the level of the brine and no unwanted moulds have developed.

IMG_20180224_142433

Fermenting Habanero Chillies, weighed down with a glass insert and covered with a Pickle Pipe.

After a week to ten days, check your chillies (I left mine for a week). They should still be submerged and reasonably crisp, and the brine should smell good and taste spicy and salty. It’s quite normal for a thin film to form across the top of the brine and I recommend removing this carefully with a spoon. If any chillies aren’t submerged and showing signs of mould, I would recommend removing the uncovered ones carefully from the brine (toothpicks are good) and composting them. The rest of the ferment should be fine. Of course, if you’re assailed with funky smells and your chillies are slimy, don’t take any risks – throw the whole lot in the compost bin – food poisoning is not to be trifled with!

If you’re happy with the ferment, here’s the rest of the recipe:

Sauce Method: 

Once again, assemble all your tools first and make sure they’re ridiculously clean – preferably hot water or heat sterilised. You’ll need a non-reactive sieve and bowl, a food processor or blender, a small funnel, bottles and caps and (if you opt for lemons) a grater and hand juicer or citrus press.

Remove the weight from your ferment and sieve the brine off the chillies into a bowl. If like me, you’re chilli-obsessed, reserve the brine (it’s deliciously spicy!) put it in a clean bottle, cover and refrigerate. It will keep for a few weeks in the fridge and I use it in curries, stir fries, soups or stews for an extra kicking salt replacement 🙂

Put the chillies into a blender jar or food processor with either vinegar, fresh lemon juice or citric acid powder and pulse to the desired consistency. I also added a tablespoon or two of the brine. The target here is to bring the sauce to around 4.5 pH – quite sharp. I used the juice of 3 lemons and, for extra citrus notes, the grated zest.

IMG_20180305_181249

Next, carefully put this into the sterilised jars and seal immediately. It’s possible now to put the jars in the refrigerator where they’ll last for months and be full of probiotic goodness, but I’m here for flavour – so I opted to do a water-bath sterilisation for 10 minutes This stabilises the sauce, guaranteeing longer pantry shelf life.

This sauce is sensational with – well, pretty much everything! My original 200 g of chillies made two 125 g bottles plus a few tablespoons that I’ve put in a sterilised jar and refrigerated. It’ll be interesting to see if there’s any significant flavour difference between the water-bath processed sauce and the refrigerated version.

IMG_20180306_074802

The finished product after water-bath processing – that beautiful colour!!!

I think this basic fermentation would work with any chilli and I’m going to start one with Cayenne chillies and garlic later this week that I plan to finish with my home made Apple Cider Vinegar.

Let me know if you try this recipe, what flavour combinations you use and how it works out – I always love to hear from you 😀

Meanwhile, take care wherever you are on this beautiful planet ❤


An Ode To The Humble Plum

Well, it’s been another incredibly busy week! The weather – always a mixed blessing in Tasmania – has gone from the height of summer to feeling like an early autumn in a few short days. Mind you, I’m not complaining too much about the rain. Although I’m on the usual suburban mains system in the house, I only water the garden area from tanks and a small pump, with an extra line I put in to gravity feed down to the greenhouse. With a lot of mulch, it’s a pretty efficient system, but usually by mid-February, the levels are getting very low. This year, tanks are full again!

On the other hand, the accompanying wind has played havoc with some of the fruit trees, with lots one of my dwarf apples toppled in its tub Thursday. I’ve anchored it firmly back and staked it, so hopefully it will survive.

This week has also been full of plums, with most of the tree picked, dried and (for the first time) even sold and traded on. When I first came here eight years ago, there were some extremely neglected fruit trees that were mostly in a pretty woeful state. There was a lot of brush cutter damage to trunks, effectively ring barking some, brown rot in many and everything literally overrun with weeds. Some I couldn’t save but right down in the back corner, furthest from the house, was a very old plum tree, strangled by blackberries, English ivy and yet, in spite of everything, covered in small unripe fruit. The main trunk was split, it had been very poorly pruned, allowing some rot to set in but I realised it was a very old European prune plum and therefore, most definitely worth saving!

What it was – the jungle plum!

After several years of regular weeding, careful hand removal of blackberry suckers and some judicious pruning (initially with a chain saw) this tree has come back into its own. A couple of years ago we laid lots of cardboard, sand and finally pine bark to suppress weeds and it’s been a very successful makeover.

What it became – well cared for!

So much so, that I always have way too many plums for my household. They’re not the most wonderful plum to eat fresh, but I love making things with them. Some years I make a few jars of jam or sauce and one year I made a quite delicious perry from the yellow fleshed fruit – but always there’s lots of dried fruit – prunes to chop up for muesli, add to apple cobbler or even savoury dishes like Moroccan lamb stews. Best of all, as I walk past my pantry shelf on the way to the laundry and the back door, I pop a few in my pocket to have as a sweet snack on those cold winter mornings, a little memory of summer that was, and the promise of summer to come ❤


Summer in the City – Home Made Tempeh

It’s been hot and steamy the last few weeks in Hobart – well, hot by the standards of the most southerly capital city in Australia. Many mainland Australians think Tasmania is just cold all the time but (as a South Australian who has lived and worked in desert conditions) I rather think we have proper seasons (sometimes all in one day) and because this is an island, when the temperature rises as it did here today to 31 C (88 F) it’s the equivalent of 36 C (97 F) anywhere else on the mainland.

As I type (early on a sticky Saturday evening), the rain has finally come after days of teasing, topping up the water tanks and bringing much needed relief to my vegetables and fruit. In my tiny kitchen the dehydrator’s been running all week and I’ve dried nearly all of the nectarine crop and made a start on the prune plums.

Dried, home grown nectarines

Consequently, it’s been very warm in there and I took the opportunity to try out something I can only do this time of year – make my own tempeh. Although I’m not a vegetarian or vegan, I love tempeh sliced, marinated and fried. I then use it in stir fry or just on its own with a fresh garden salad. My friend Heather says it’s fabulous fried and used in veggie burgers, so I’m going to be trying that very soon!

There’s heaps of YouTube tutorials available but when I was researching this I really liked this from Veganlovlie and took her advice to buy a reliable starter from her source, Top Cultures in Belgium – oh the joy of online shopping!

Two important things to note before we start (so I’ll put them in bold)

  1. Like any food preparation, cleanliness is paramount. In the case of working with a specific ferment, this becomes critical. Make sure everything that comes in contact with your precious beans/tempeh is scrupulously clean.
  2. I haven’t pasteurised my tempeh, so for all intents and purposes it is a raw product and must be cooked before eating.

Anyway, this is what I did.

Home Made Tempeh (makes 4 blocks)

2 cups soy beans (washed and soaked)

5 tabs apple cider vinegar

1 teas dried rhizopus starter culture

Bags or moulds with drainage holes for the tempeh

Method:

Wash the beans thoroughly, rinse and repeat. Soak them in clean water for at least 8 hours (or even overnight).

At this stage, while the beans are soaking, I suggest prepping the bags or containers you intend to use for processing the tempeh. I opted for zip-lock plastic sandwich bags because I had some on hand and I can reuse them but I’ve been making vegetable bags out of baby muslin and I’d like to try something like that as a more sustainable option. Bags are easy to clean and afford a great view of the process but the problem with plastic (apart from the waste issue) is potential sweating, turning your lovely soy beans into a smelly mess, so I used a skewer and poked holes every couple of centimetres (about 1 inch) all over four bags.

After soaking, drain the beans, wash and cover them with clean water. Cook in a large pot over medium heat until they’re nearly done. (This took about 30 minutes) Add the vinegar and stir it through. Continue cooking and when the beans are cooked to your taste, (about another 10 minutes for me) drain most of the water off. Return the pan and beans to a low heat to cook off the rest of the water. Stir continually at this step to stop any sticking. Your beans should be moist but with no residual water in the bottom of the pan.

Allow to cool to about 35 C (95 F) and add the teaspoon of starter. I suggest take your time and mix this through very carefully. I’ve made quite a bit of cheese over the years and found out the hard way that ensuring the starter is evenly distributed is a really critical step.

Next, evenly distribute the beans into the bags (mine made just under 500g cooked beans per bag) and working as fast as possible, carefully shape them into small rectangular cakes, expel excess air and zip-lock them. Finally, put the cakes on a clean board or non-metallic tray and weigh them down with another board, keeping them somewhere warm and draught free for at least the first 12 hours. After that, the fermentation will generate enough heat to keep it going.

I put a scrupulously clean wooden board on top of my monster dehydrator (to take advantage of the escaping heat) and placed the bags on the board, weighing them down with my old and very heavy ceramic lasagne dish.

Within 12 hours, it was clear there was fermentation and the bags were quite warm, a great sign!

By 24 hours the fungus was clearly visible and looked very clean, white and with no discolouration – more great signs!


By 36 hours I called it as a successful experiment and carefully removed the first cake from the plastic bag and sliced it up.

It worked out incredibly well and it was a very easy way to make one of my favourite foods. I’ll certainly be making more of this while the weather stays warm and freezing it for use in the cooler months. Next, I want to try making chickpea tempeh.

But tomorrow night, Tempeh Stir Fry for dinner!

Previous Older Entries