Hooray for Cider! – A Book Review

This is an extended version of a review I posted on Goodreads this morning. 

I bought my copy online and if you’ve read this book, please let me know what you think – I always like to hear your opinions!

Cider: Making, using & enjoying sweet & hard cider, 2003 (1980) 3rd Edition, by Annie Proulx and Lew Nichols, Storey Publishing, MA. 

Cider

Cider by Annie Proulx
My rating: 5 of 5 stars

This is possibly the most informative and inspiring book on cidermaking I’ve ever come across. Admittedly, it’s aimed at North American readers, but I still found plenty of fascinating and relevant information that I can adapt and use on the other side of the world in Tasmania AU.

I picked this up online and secondhand, but why anyone with even a passing interest in all things cider would part with it is beyond me! My intention was to use it as a reference book, something to dip into as I needed to look particular things up, but it’s incredibly well written and readable – I found myself engrossed in the text and really couldn’t put it down.

Yes, there’s probably a good deal about things I’ll likely never need to use, aimed at orchards on an acreage. At the moment on my little urban farm, I have four dwarf sweet multipurpose apples, a baby Huon Crabapple (all in tubs because of space limitations) and at most, I’ll probably expand it out to ten dwarf trees with cider varieties. So it’s highly unlikely I’ll ever have the need or inclination to learn how to set up and care for large wooden barrels. After reading this book though, I can see the benefit of a small cider press for future crops.

The bottom line is, I was fascinated with the information and how it was delivered. Annie Proulx is one of my favourite fiction writers and I think her influence and love of the subject makes the text flow. Lew Nichols is a professional cider maker and his understanding of the science shines through. And it should be noted there is a quite a lot of science in this book, but it’s written in a way that’s accessible and easily understood by anyone with even the merest grounding in high school chemistry – notably me! The diagrams and charts are relevant, practical and well connected to the text, and many of the old photographs and illustrations are really lovely to look at. Reading the acknowledgements shows they sourced information from many specialists across a wide range of disciplines.

Despite there being a number of reviews on Goodreads about how irrelevant this book is to backyard cider makers, I beg to differ. As an occasional maker of perry, cider, apple cider vinegar and fruit wine, I found a tremendous amount of information here that is very relevant to me, and it’s given me ideas of how to improve my brewing and horticultural practices.

I’m sure this is a book I’ll treasure and keep going back to year after year. Now excuse me please while I go and gather some timber – I want to make a cider press 🙂

View all my reviews

My secondhand copy from the UK

Apples and Anticipation

If I could, I think I’d be a fruitarian. My incredibly tolerant GP and my always dodgy iron levels would have a fit, but (with an occasional green salad) I’d be perfectly happy – especially this time of year! At the moment, besides all the vegetables, I’ve just finished eating fresh apricots and berries and I’m waiting on big crops of plums and nectarines.

In anticipation, I picked about 2 kg of unripe plums yesterday to thin the tree out a little and a big handful of Green Shiso leaves from the greenhouse. Though these are a European prune plum, I’m going to try and make Umeboshi with them, using this recipe I found on Makiko Itoh’s site. I love the salty, sour taste and I think the sake will add a really interesting note to this ferment.

2 kg unripe plums and aromatic green Shiso leaves – aka Beefsteak Plant

After washing, removing stems and soaking the plums most of the day, I packed them in sterilised glass jars, layered with washed leaves and a fairly high percentage of cooking salt (about 12%). I covered them all with a half bottle of good sake that was never finished (shameful, I know!), weighed them down firmly and capped the jars with pickle pipes that allow gases to escape. The three jars are now on my pantry shelf and this morning I increased the pressure on the fruit, the liquid has risen and they’re starting to look and smell like a good ferment. I have no idea if my makeshift adaption of this simple Umeboshi recipe is going to work – but it’s going to be fun finding out 🙂

Over the last few years I’ve been seeking out interesting fruit trees on dwarfing rootstock that I can grow in wicking barrels. I’ve been experimenting with citrus trees, but living in Tasmania (traditionally called “The Apple Isle”), the obvious choice was a few bare-rooted apple trees that I bought from Woodbridge Nursery and put into wicking barrels. After seeing some very healthy growth and knocking all the embryonic fruit off last year, I thought I’d let them go this spring and see what happened. These strong little trees have all flowered and set fruit – and despite my thinning and some wind damage – the results have been outstanding. Unfortunately, I didn’t get to dealing with codling moth in early spring and will need to put it on my monthly garden schedule from now on.

The flavour of any apple you’ve grown yourself is a lovely experience and something I recommend everyone try if you have the opportunity. I’ve been fussing around the trees like a mother hen, gathering a few Royal Gala windfalls the past couple of weeks and found for the most part, they’ve been quite ripe and incredibly sweet. (Brown seeds are a great indicator of ripeness).

I’ve mainly concentrated on dessert apples such as Royal Gala and Pomme de Neige with a couple of crossover later varieties like Sturmer Pippin and McIntosh to extend the season and for cider. So, when I discovered a McIntosh windfall this morning, I wasn’t expecting it to edible let alone ripe!

The McIntosh is a very old Canadian late variety that’s popular as a dessert apple in the US but never really took off here in Australia. I recall having one as a kid and remembering the name and the flavour, as I have McIntosh forebears from Edinburgh. It’s also listed as a great blending apple for cider, providing copious amounts of sweet juice. Well, I can certainly attest to that! This beastie was a wonderful thing to eat, full of rich flavour and beautifully crisp.

Fresh McIntosh apple slices for morning tea

I also have a Medlar, Fig, Oranges, Pears, even a Lime and a gorgeous Huonville Crabapple all in tubs and growing well. Today’s experience has convinced me to get a few dedicated cider apples to join my mini orchard next year. I’m also currently reading Annie Proulx and Lew Nichols excellent book and being a cider lover from way back, I’m pretty sold on the idea 🙂

Sadly, the last few days have brought quite awful news from the north of the state with respect to all fruit and vegetable growers here. Larvae of the destructive Queensland Fruit Fly (Bactrocera tryoni) has been discovered at Spreyton (a major commercial fruit and vegetable growing area) on a backyard apricot tree. To give you some idea of what devastation they can cause, my friend Rob in Queensland (one of the best gardeners I know) can show you better than I can describe it! (As an aside, Rob’s YouTube channel is an absolute must for any urban farmer and where I initially learned about making self-watering wicking containers!)

I’ve searched over my ripening chillies, nectarines and plums as best I can but will be setting out syrup traps in the next couple of days to see exactly what’s coming in to my yard and greenhouse. I just hope that as a fruit loving community, we here in Tasmania can rally together to keep a vigilant eye out. This is an insect we can well live without!

My first home-grown McIntosh apple!

Handy Work – Home-Made Dishcloths and Scourers

My mother and grandmother were incredibly capable women. Both were knitters, my grandmother could crochet and my mother was an experienced seamstress and needlewoman. I remember as a very small child helping with edging blankets, learning how to hand embroider, mend and being ever so proud when I learnt to knit and made my first diagonal dishcloth.

I don’t knit much these days, apart from the occasional scarf or beanie. But a couple of years ago I decided to ditch plastic dishcloths, which (apart from being bad for the environment) aren’t ideal for fine china and glassware when the cloths get older and brittle. So I made a set of beautiful soft cotton cloths again and branched out to smaller versions in jute string as scourers. The cloths look impressive, they’re very quick to make, incredibly durable (I machine wash mine) and it’s still the best way to learn how to increase and decrease with a decorative eyelet. A set of four or five cloths can also be a functional present. I made a set for a family member who’d recently renovated her kitchen and picked tones that matched her decor.

You’ll need a pair of knitting needles, and this is determined by the yarn you use and how tightly (or loosely) you knit. I tend to be quite a tight knitter to I use 4 or 4.5 mm needles (US size 6 or 7) for this kind of work. Some of the cotton yarn I salvaged was quite fine, so in some cases I doubled it to make a

Dishcloth from salvaged yarn – straight from the clothes line!

The basic pattern goes like this:

Cast on 2sts

1st Row: Knit 1, yarn forward (yfwd), knit 1 (3 stitches)

2nd Row: Slip 1, knit 1, yfwd, knit 1 (4 stitches)

3rd Row: *Slip 1, knit 1, yfwd, knit to end (5 stitches)

Repeat from * until the work is half the size required. I like about 25-30 stitches for jute scourers and about 55-60 stitches for cotton dishcloths.

(Decrease rows)

*Slip 1, knit 2 together (k2tog), yfd, k2tog, knit to end

Repeat until 2 stitches remain.

K2tog, and (if you want to hang your cloth) chain 12, cut thread and tie off. With a darning needle, sew the end of the thread into the base of the first chain to make a loop. Over sew a couple of times and trim.

Because they’re quick to make and a very simple pattern, I can easily make one cotton cloth in an evening watching television or several jute scourers. I prefer to get my cotton from Op Shops rather than buying new, it goes well with the reuse/recycle ethic I try and live by. I’ve even made some from a cotton top that I unpicked, washed the hanks of thread to take some of the kinks out, and dried in skeins.

Many fabric or yarn shops sell string but the best jute I’ve found is in the gardening section of my local hardware store. It’s a little harder on fingers to work the stiff threads but they are brilliant for scouring pots and pans and once they’re worn out they can go straight into the compost instead of landfill.

Have fun and please let me know how you go with this simple, practical craft project 🙂

Dishcloth and scourer


Apricots and Eggs – A Story of Summer Glut

I had a day off yesterday and it was hot here in Hobart, so I decided to whittle down the egg glut a bit and bottle some of the bowls of apricots that were starting to take over the kitchen!

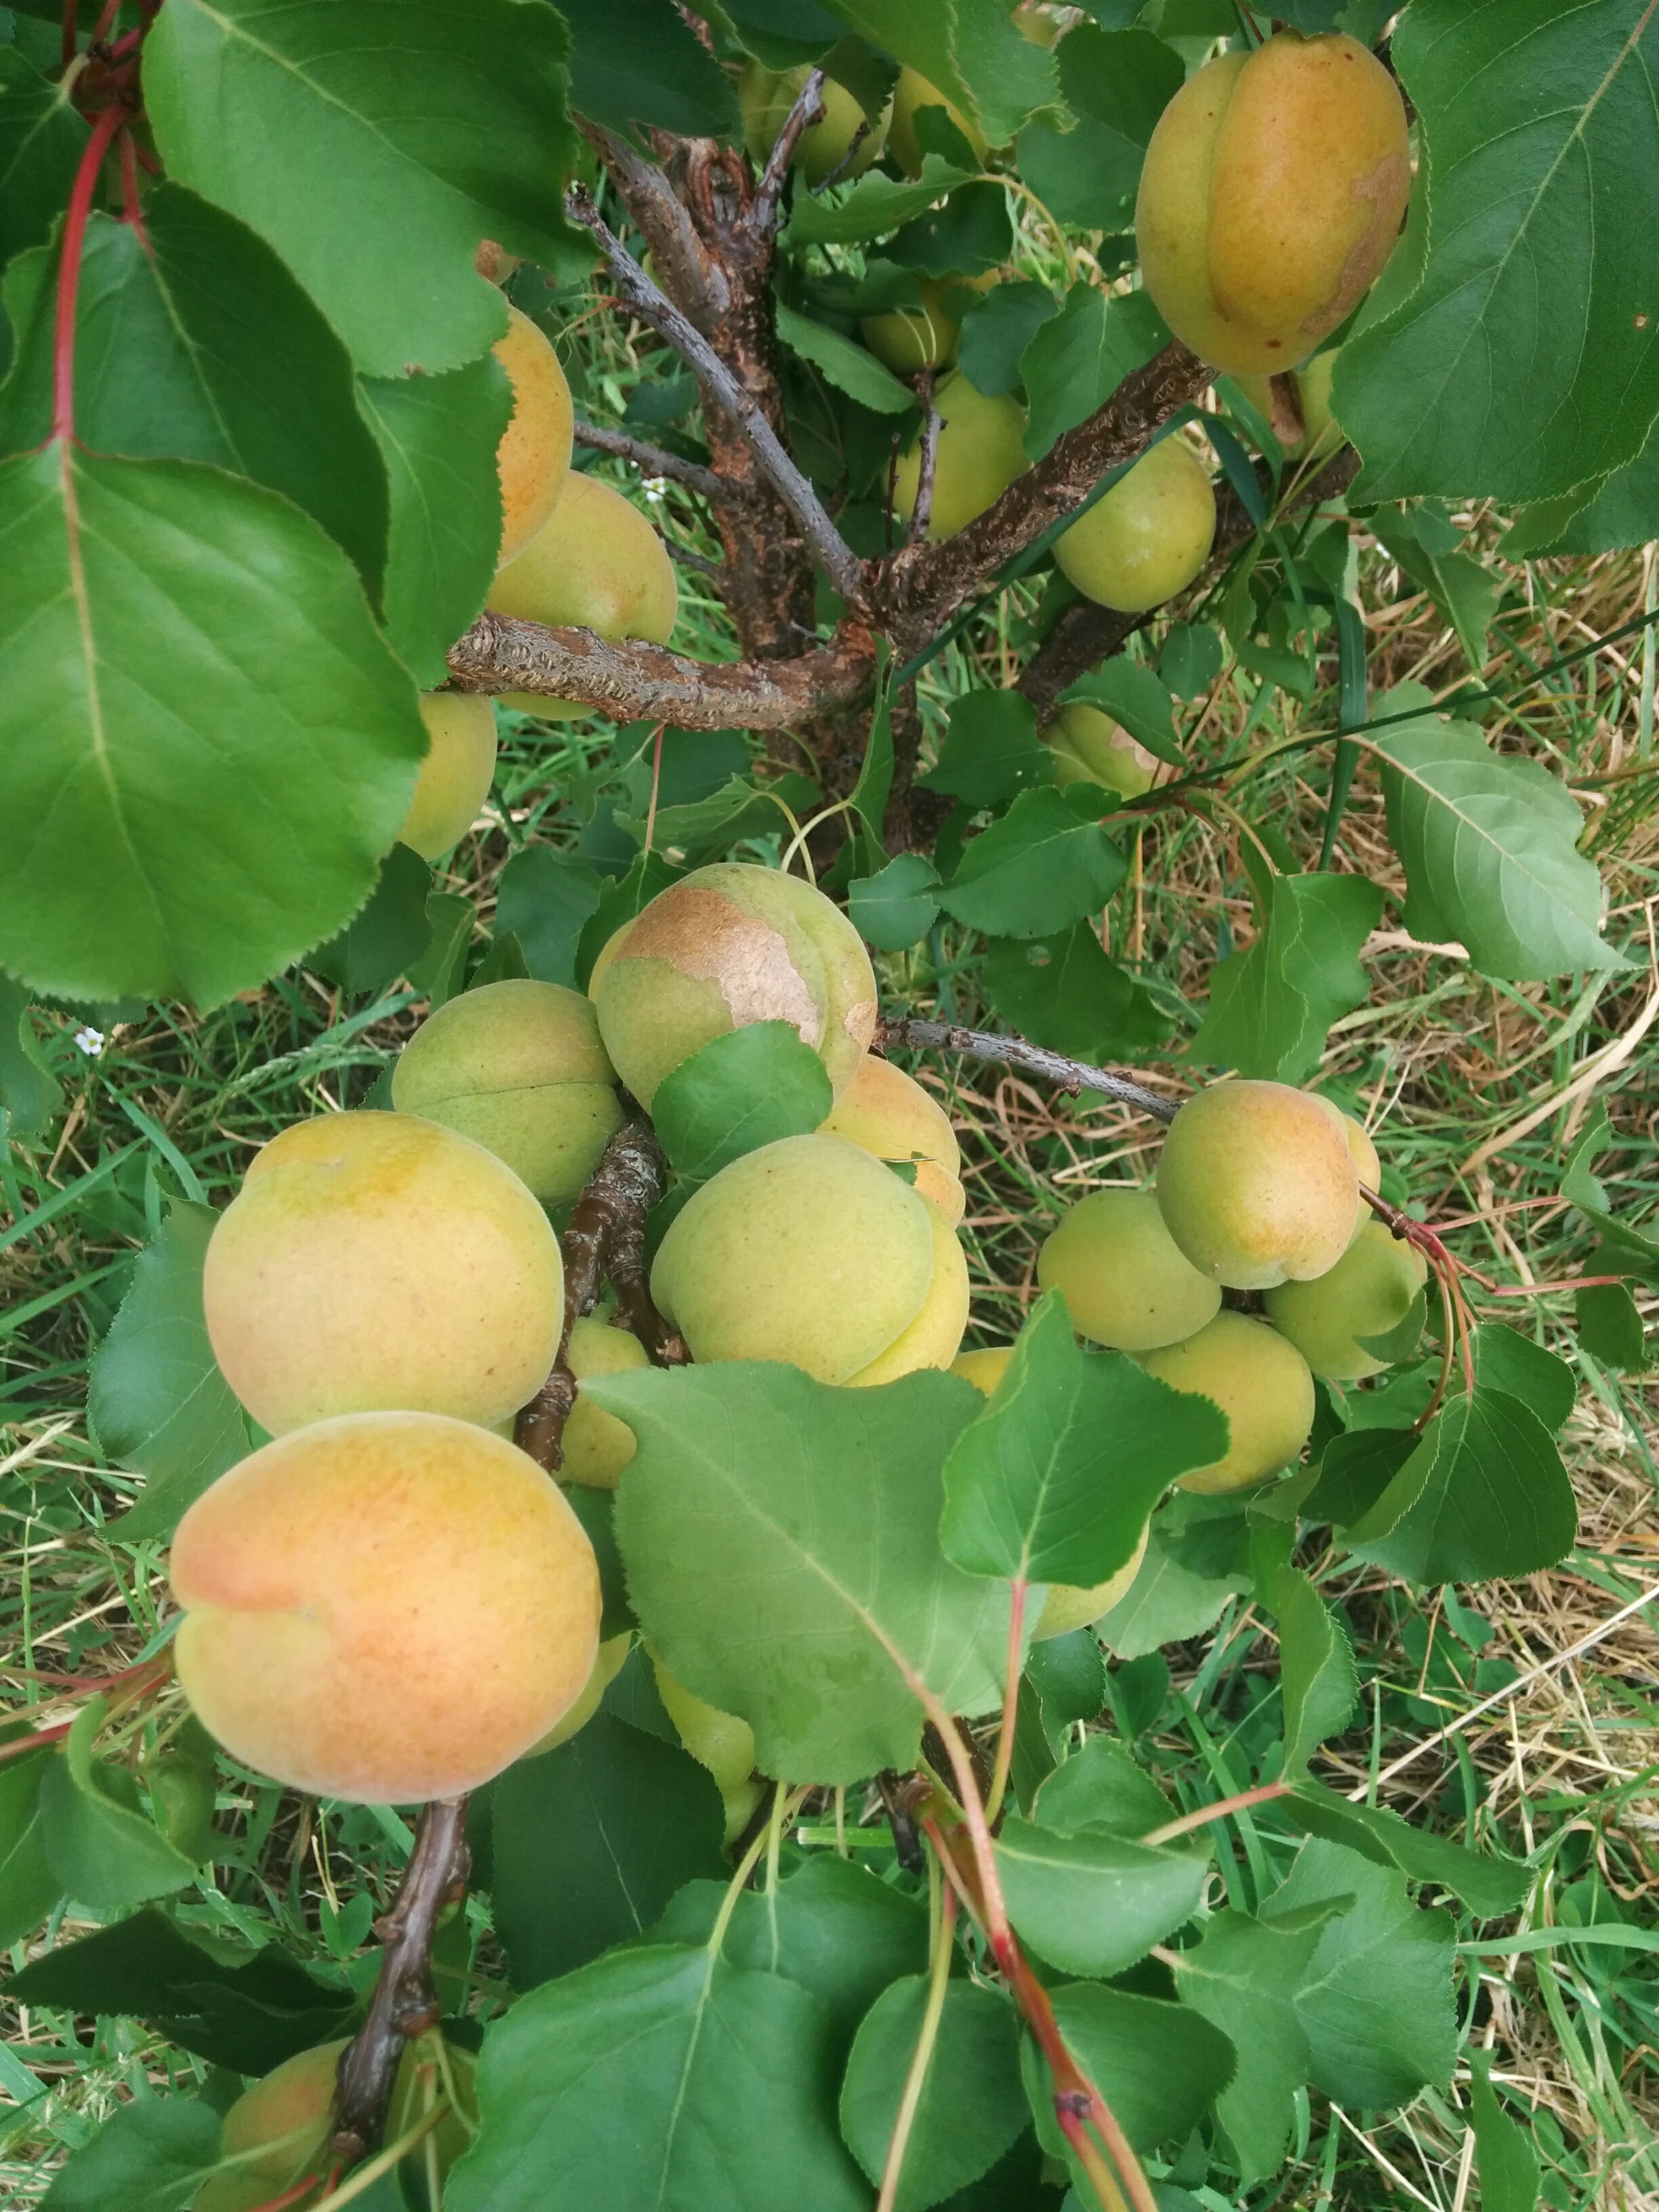
Apricots are my favourite summer fruit and I love growing my own. Sadly, the old Moorpark apricot tree that was in the yard when I arrived had brown rot and despite all my efforts, I had to cut it down two summers ago. Knowing I was fighting a losing battle, I planted a new tree about two and a half years ago, an improved Moorpark variety called “Brillianz”.

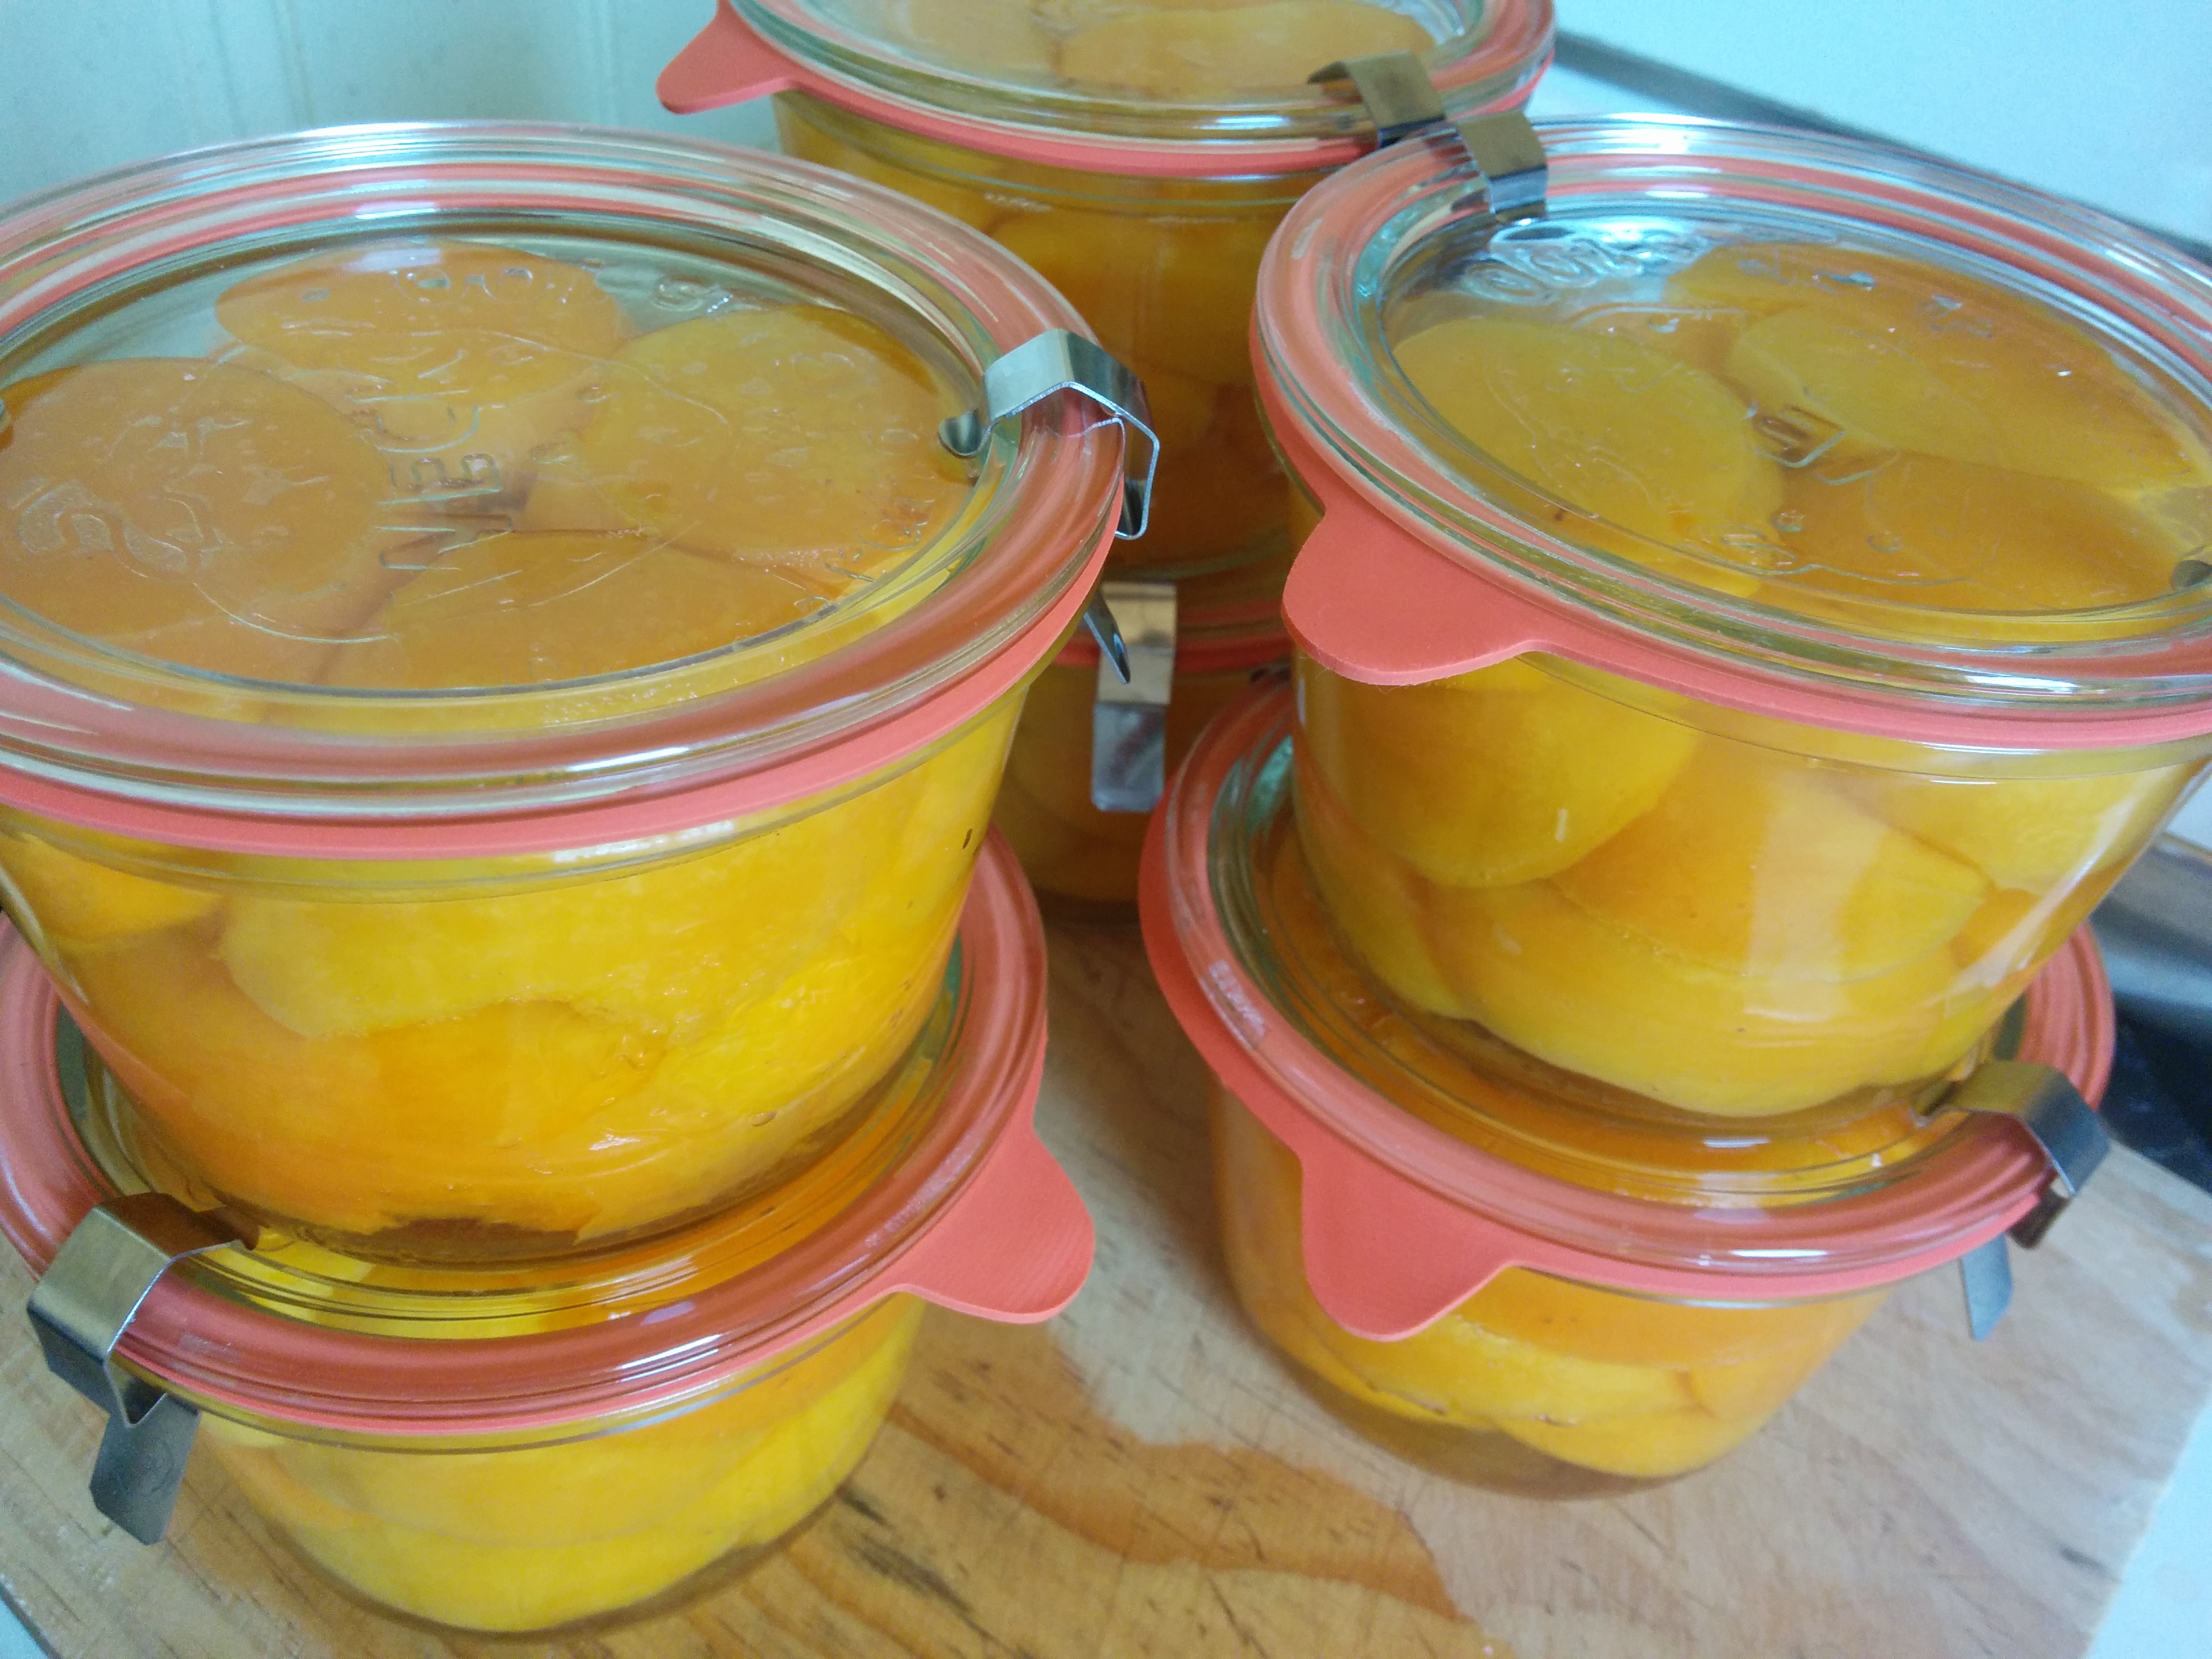
This is the first year I’ve let this little apricot tree set fruit and wanted to give it an opportunity to establish before taking on the burden of producing a full crop. It’s a lovely fruit to eat fresh but I also had a box of beautiful Weck preserving jars I wanted to fill up, and there’s nothing quite like opening a jar of apricots in the middle of winter to have in a pie or with custard – it’s like summer in a bottle!

The littlest apricot tree a few weeks ago


Bottled Apricots (aka Summer in a Jar) 

Traditionally in my family, summer preserving was a family event, with everyone getting involved but we would often be processing very large amounts of fruit. Bottling (or canning as it’s called in the US) a couple of kilos of apricots is ridiculously easy and something I encourage everyone to do if they have the opportunity. They taste so much better than store bought and (particularly if you’ve grown the fruit) you’ll know exactly what’s in your jars. If you have access to home grown fruit and some reasonable bottling jars (they sometimes come up secondhand), your biggest investment is time. If I’m working alone, I like to put a podcast on or some favourite music to listen to while I work. Dancing in the kitchen is mandatory 🙂

Apart from the fruit, you’ll need the following;

Good quality preserving jars, lids/seals and bands/clamps

A large stockpot

Clean tea towel

Filtered or rain water

Tongs or bottle clamps

Cooking thermometer (I prefer the ones that attach to the edge of the stock pot. They’re inexpensive, easy to clean and easy to read)

I always start with the jars, lids, seals and/or bands, washing them thoroughly, checking for any chips or sharp points on the glass and rinsing them thoroughly in clean hot water. This simple step is possibly the most important in getting good results from bottling. Then it’s time to go over the fruit and with apricots, I always use slightly under or just ripe fruit. Over ripe apricots turn to mush with processing and are better eaten fresh or stewed and frozen.

And while I’m in the realm of “tips and tricks”, despite what many people say, it isn’t necessary to use syrup to bottle fruit successfully. I’ve always processed mine in just plain water (filtered or rain water) and never had a problem with either storage or flavour. Apart from being much healthier, it cuts down on cost and time.

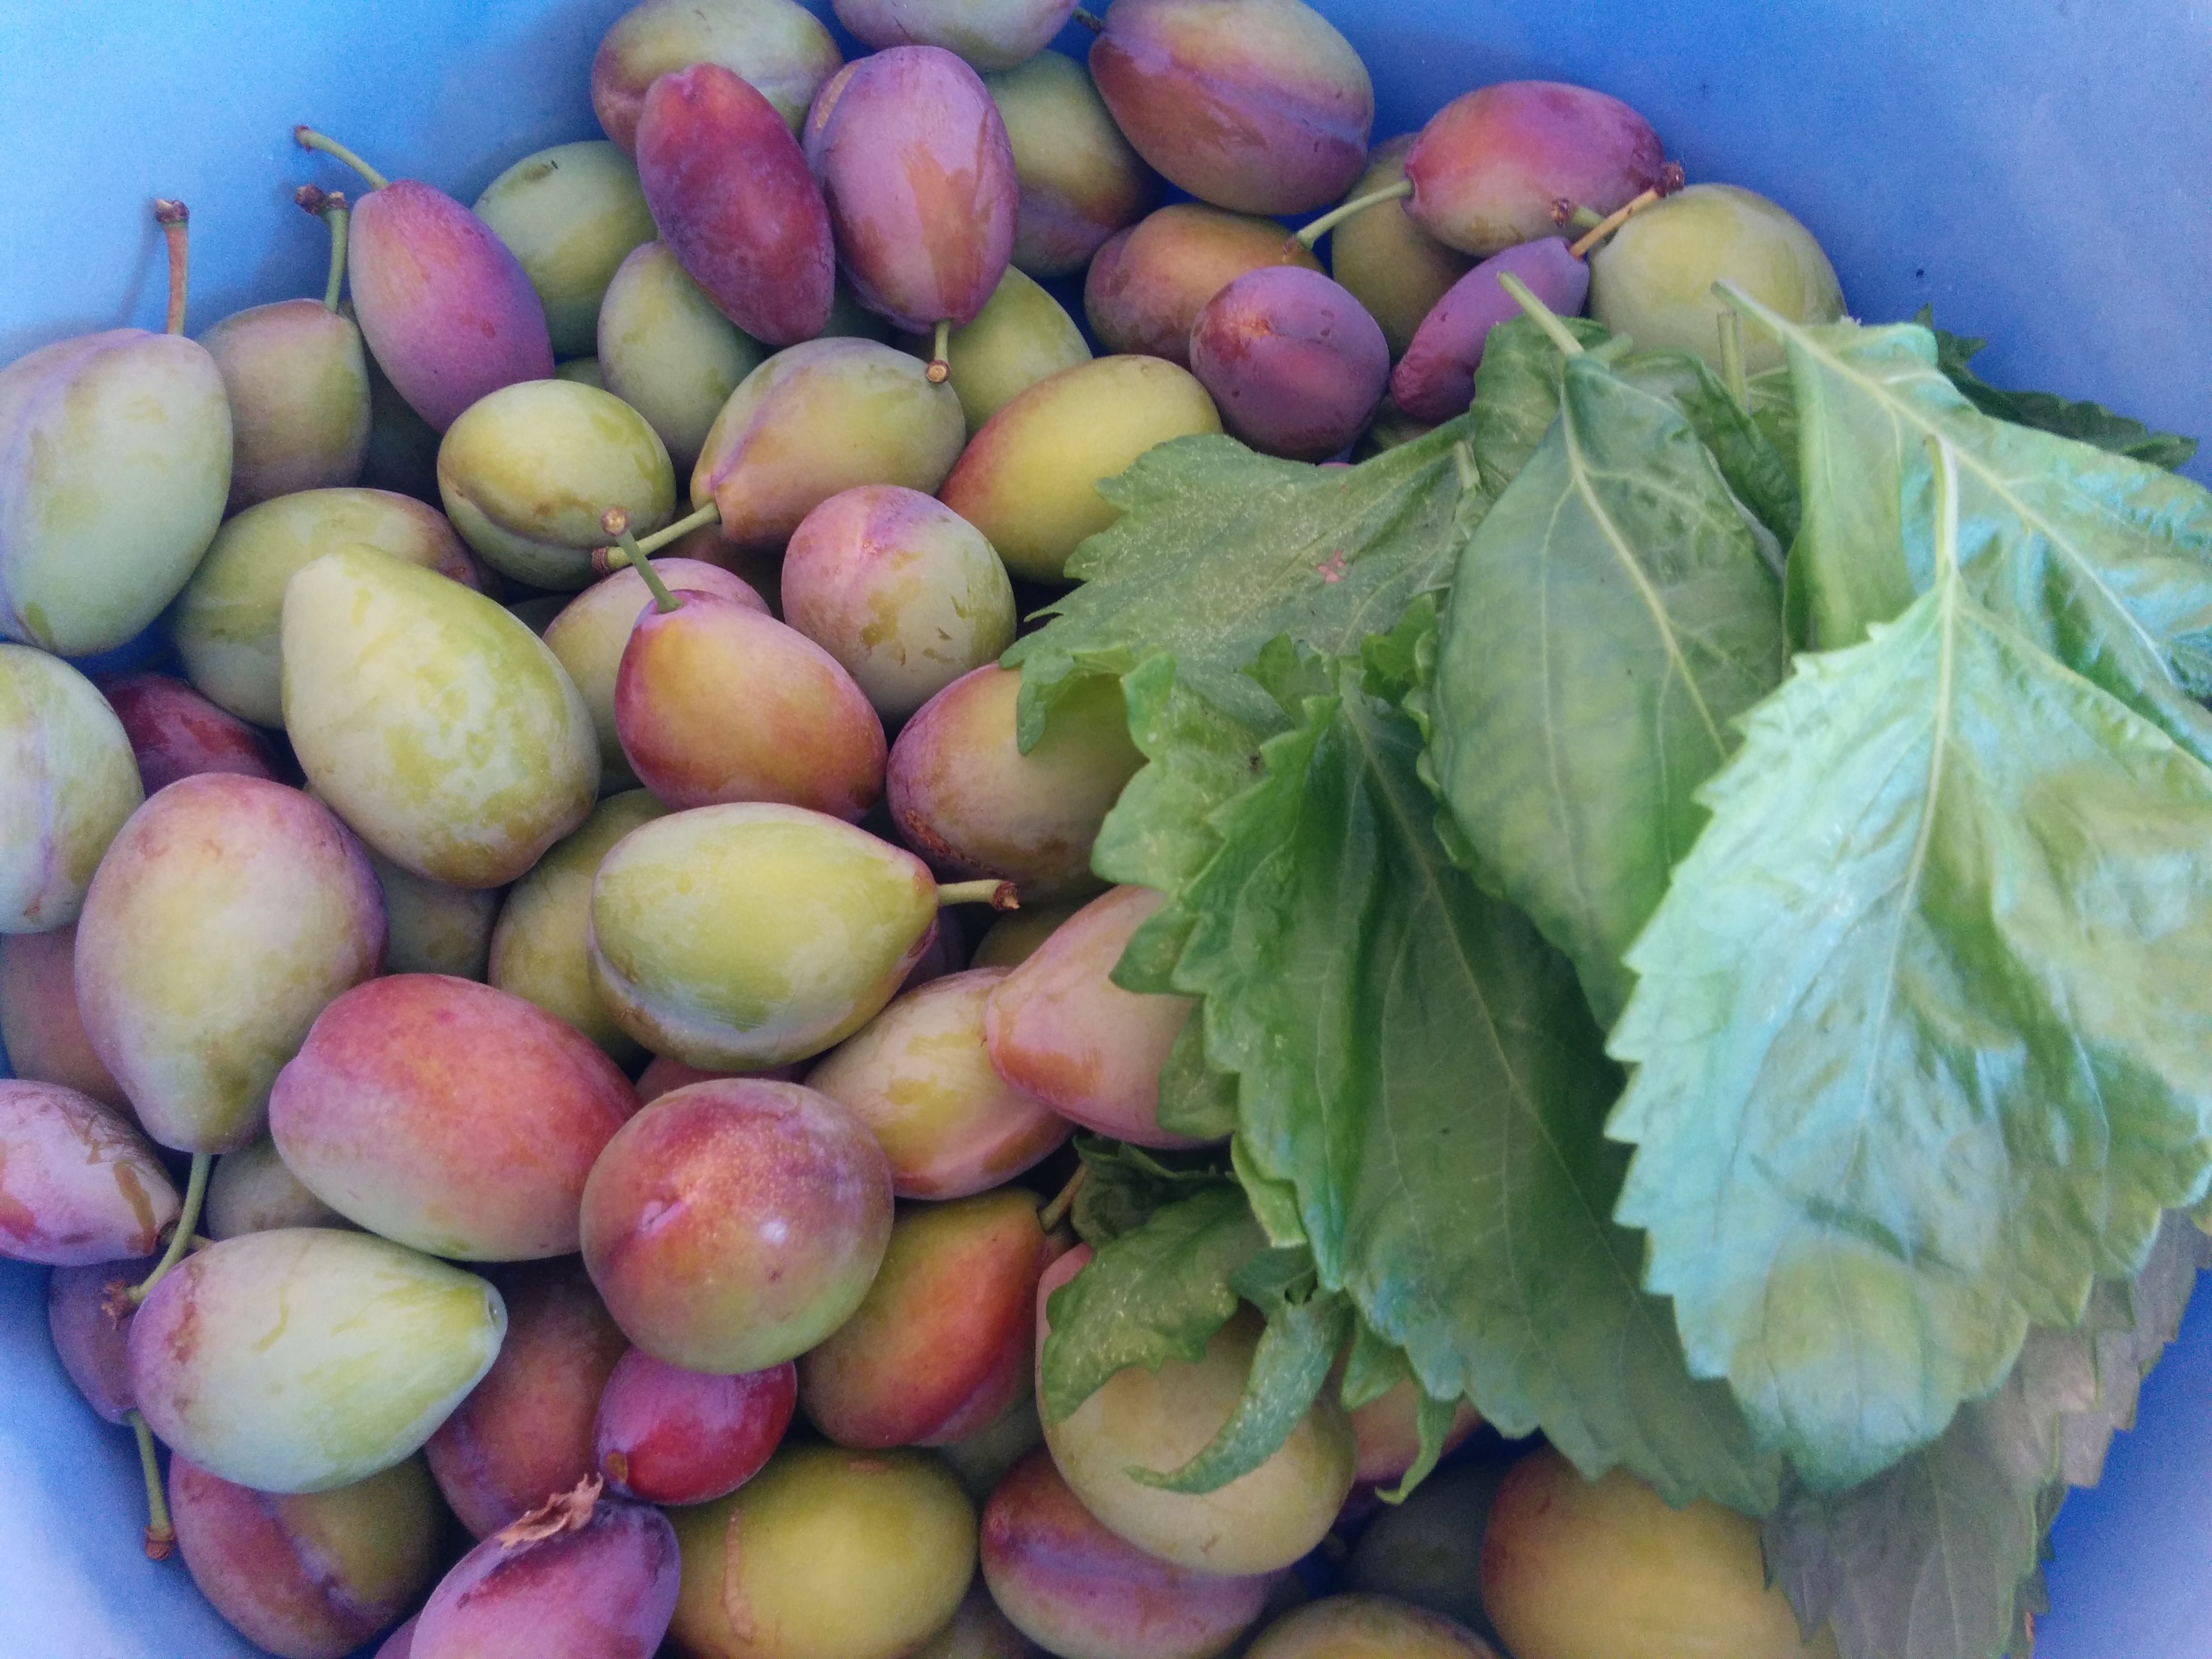
With these lovely Weck jars, I filled them generously with halved fruit (pip or stone removed), topped to the brim with cold, filtered water, put the seal in place on the glass lid, covered and clamped down. Each 370 ml (12.5 oz) jar held six whole fruit, so in total I used 36 apricots.

I have a set of cheap stainless steel stock pots (thank you eBay!) for making things like jam, syrups or stock and I find them perfect for processing bottled fruit. The trick is to put something on the bottom of the pan to create a barrier between the heat source and the glass jars – a folded tea towel is excellent.

Put the clamped jars on the tea towel and pour in warm water, making sure the jars are fully immersed. Bring the temperature up to 85 C (185 F) over an hour and maintain this temperature for another 30 minutes.

At the end of processing, I usually wait another 10 minutes and ladle some of the water off before trying to remove the jars with bottling tongs. Dropping a glass jar with boiling fruit inside is really not a good look, so please take care with this part of the process! Put the jars on a cooling rack or board out of the way, so you don’t have to move them the rest of the day. Allow them to cool completely before trying to test for a seal, and any that haven’t sealed properly are still fine to eat. They will keep for a few days in the refrigerator and make a great quick dessert.

Once the sealed jars are cooled, label them and store on a pantry shelf, away from direct sunlight. They will last unopened for at least a year, though I doubt this little batch will make it past winter!

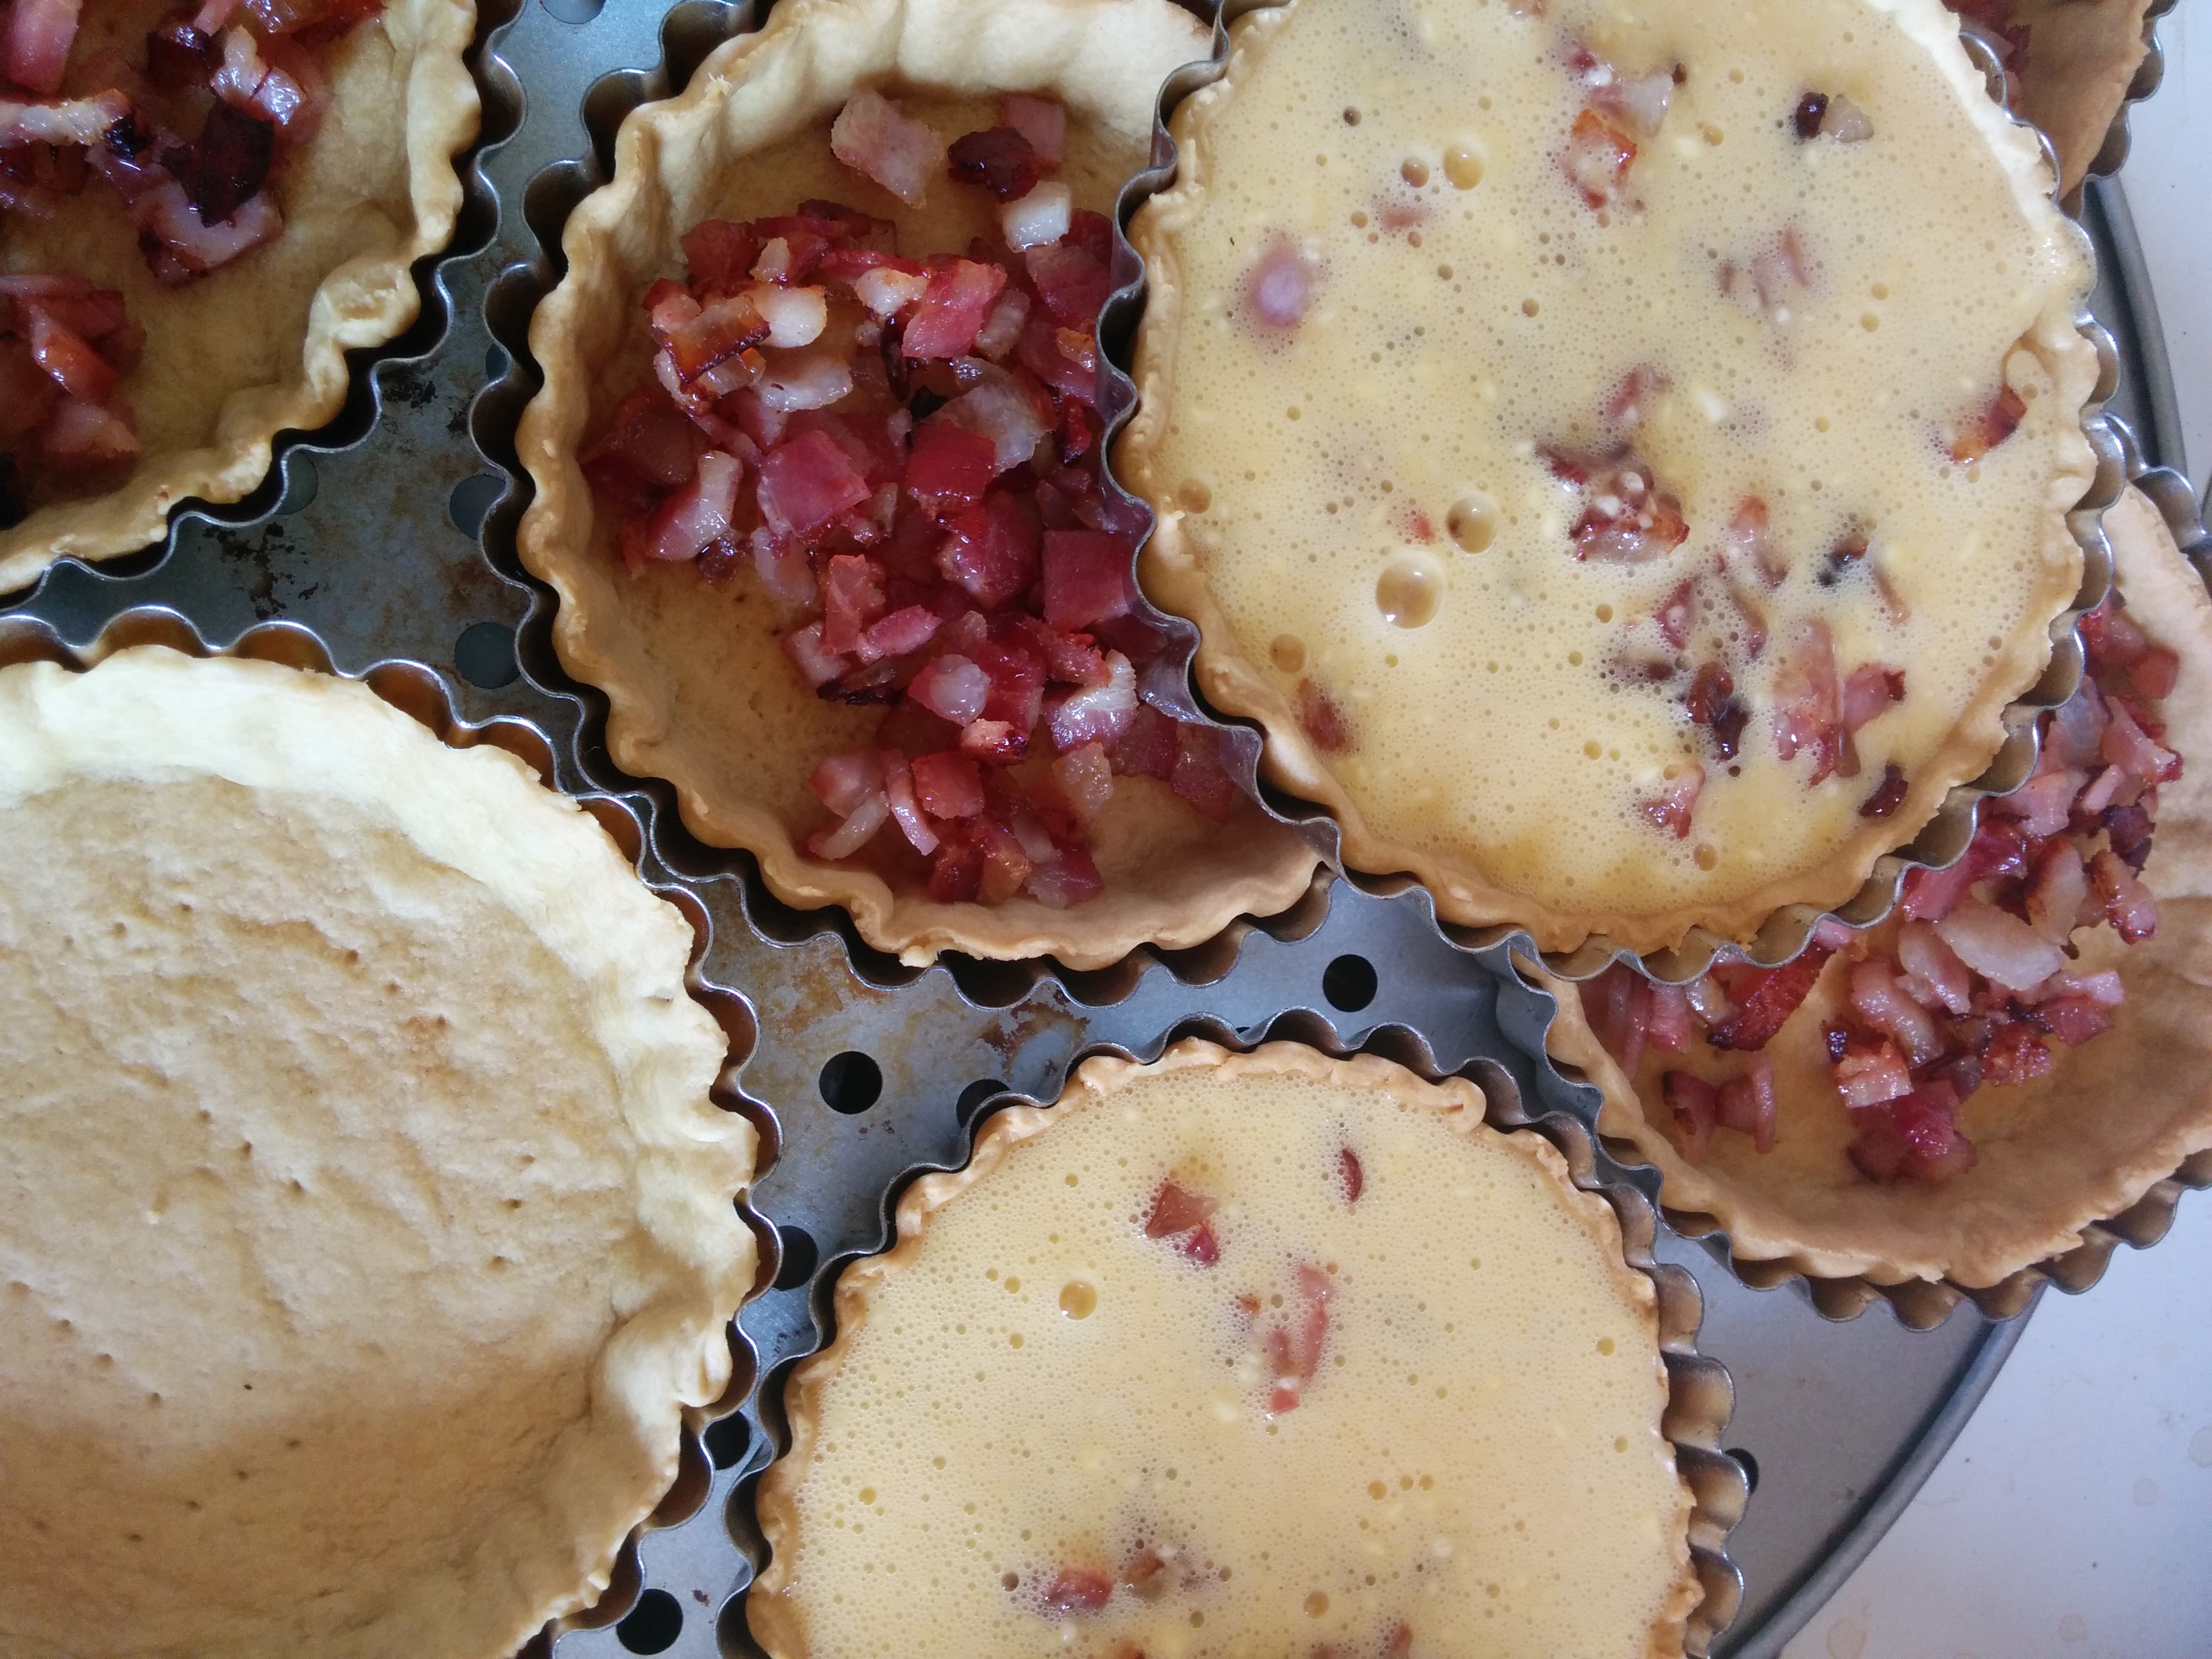
My chickens won’t stop laying this summer and I found myself again with way too many eggs for my household to deal with. I decided to make some very simple little egg-based tarts to freeze for lunches with some local bacon and a pastry that uses oil instead of butter. This is the basic recipe but it can be dressed up by adding a little minced garlic and/or onion when cooking the bacon or with a little grated parmesan and finely chopped herbs. If you want a vegetarian option, the bacon can be left out and substituted by lightly frying minced garlic, onion, finely shredded celery and mushroom. The options are as endless as your imagination – and what you’ve got on hand.

L-R: Blind baked case, bacon and bacon with ladled egg mixture

Simple Egg and Bacon Tarts (Makes 10)

Pastry:

1 cup (250g) Plain Flour

½ teas Baking Powder

Pinch of salt

¼ cup olive oil

Up to ¼ cup water

Mix dry ingredients in a large bowl, making a well in the middle. Add the oil first and mix thoroughly (it should be crumbly and soft). Then add water, a little at a time, to bring it to a ball. Cover and put in the refrigerator for at least 10 minutes.

Cut the dough in half and cover the unused portion so it doesn’t dry out. Roll out the other half of the dough on a lightly floured surface – I cheated and used my hand-cranked pasta machine and it was perfect!

Use a bowl or small plate to cut out rounds slightly bigger than your tart pans (mine are old Willow 3” tins) and press the pastry into each tin. Fork them to stop the pastry rising or use baking beads (or a handful of dry haricot beans) and blind bake for 10 minutes in a moderate oven. Allow to cool before filling.

Filling:

6 rashers of bacon, diced

12 fresh eggs

¼ cup flour

Grated nutmeg

Seasoning to taste

Parsley &/or chives, chopped finely (optional)

In a heavy pan, gently fry the diced bacon until it’s browned. Take off the heat and with a slotted spoon remove to a plate lined with kitchen paper to drain and allow to cool.

In a large mixing bowl, break the eggs and whisk them very well. Add a little grated nutmeg and season to taste and mix in chopped herbs if using. Sift the flour in and mix thoroughly, making sure there’s no lumps.

To assemble, arrange the ten pastry shells on a baking sheet and divide the bacon into each. Using a large spoon or soup ladle, divide the egg mixture into each shell, being careful not to overfill them. Bake in a moderate oven for 10-15 minutes.

Remove from the oven and cool for a few minutes before taking them from the tins, then allow them to cool completely on a rack. One per person with a green salad makes a lovely light lunch.

Enjoy and let me know how you go with these simple recipes 🙂

The finished tarts, cooling on the rack