An Ode To The Humble Plum

Well, it’s been another incredibly busy week! The weather – always a mixed blessing in Tasmania – has gone from the height of summer to feeling like an early autumn in a few short days. Mind you, I’m not complaining too much about the rain. Although I’m on the usual suburban mains system in the house, I only water the garden area from tanks and a small pump, with an extra line I put in to gravity feed down to the greenhouse. With a lot of mulch, it’s a pretty efficient system, but usually by mid-February, the levels are getting very low. This year, tanks are full again!

On the other hand, the accompanying wind has played havoc with some of the fruit trees, with lots one of my dwarf apples toppled in its tub Thursday. I’ve anchored it firmly back and staked it, so hopefully it will survive.

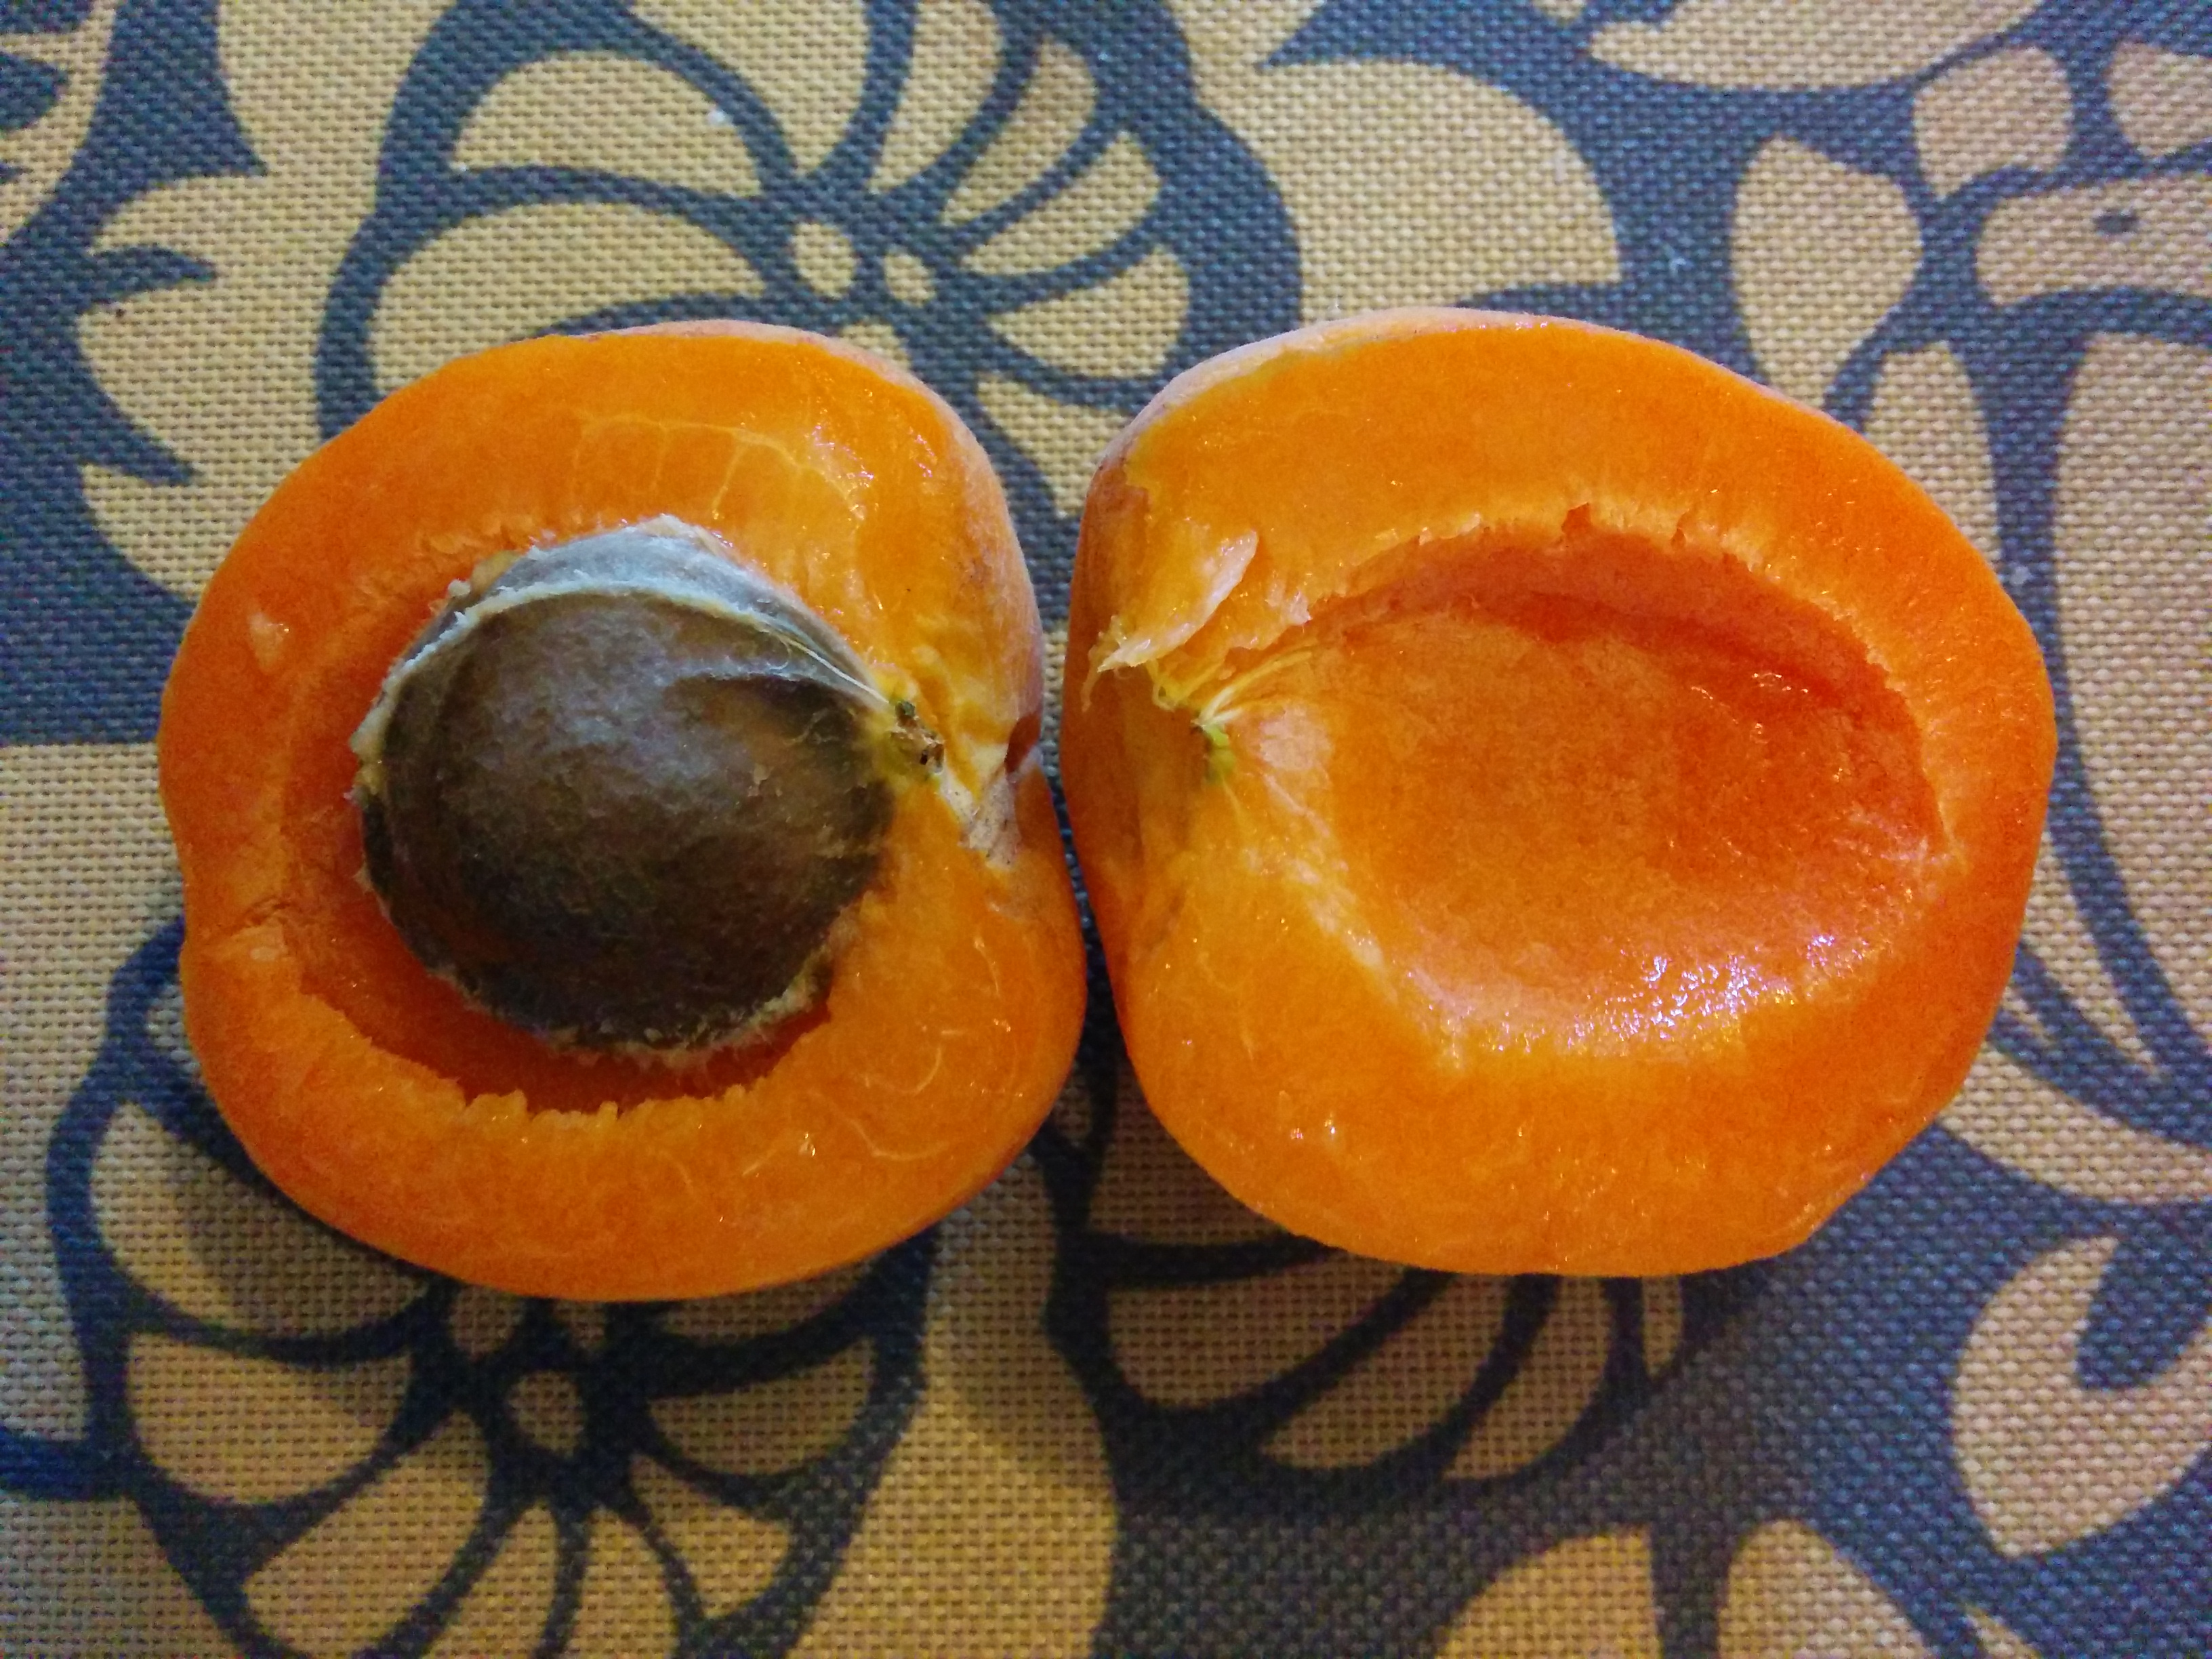
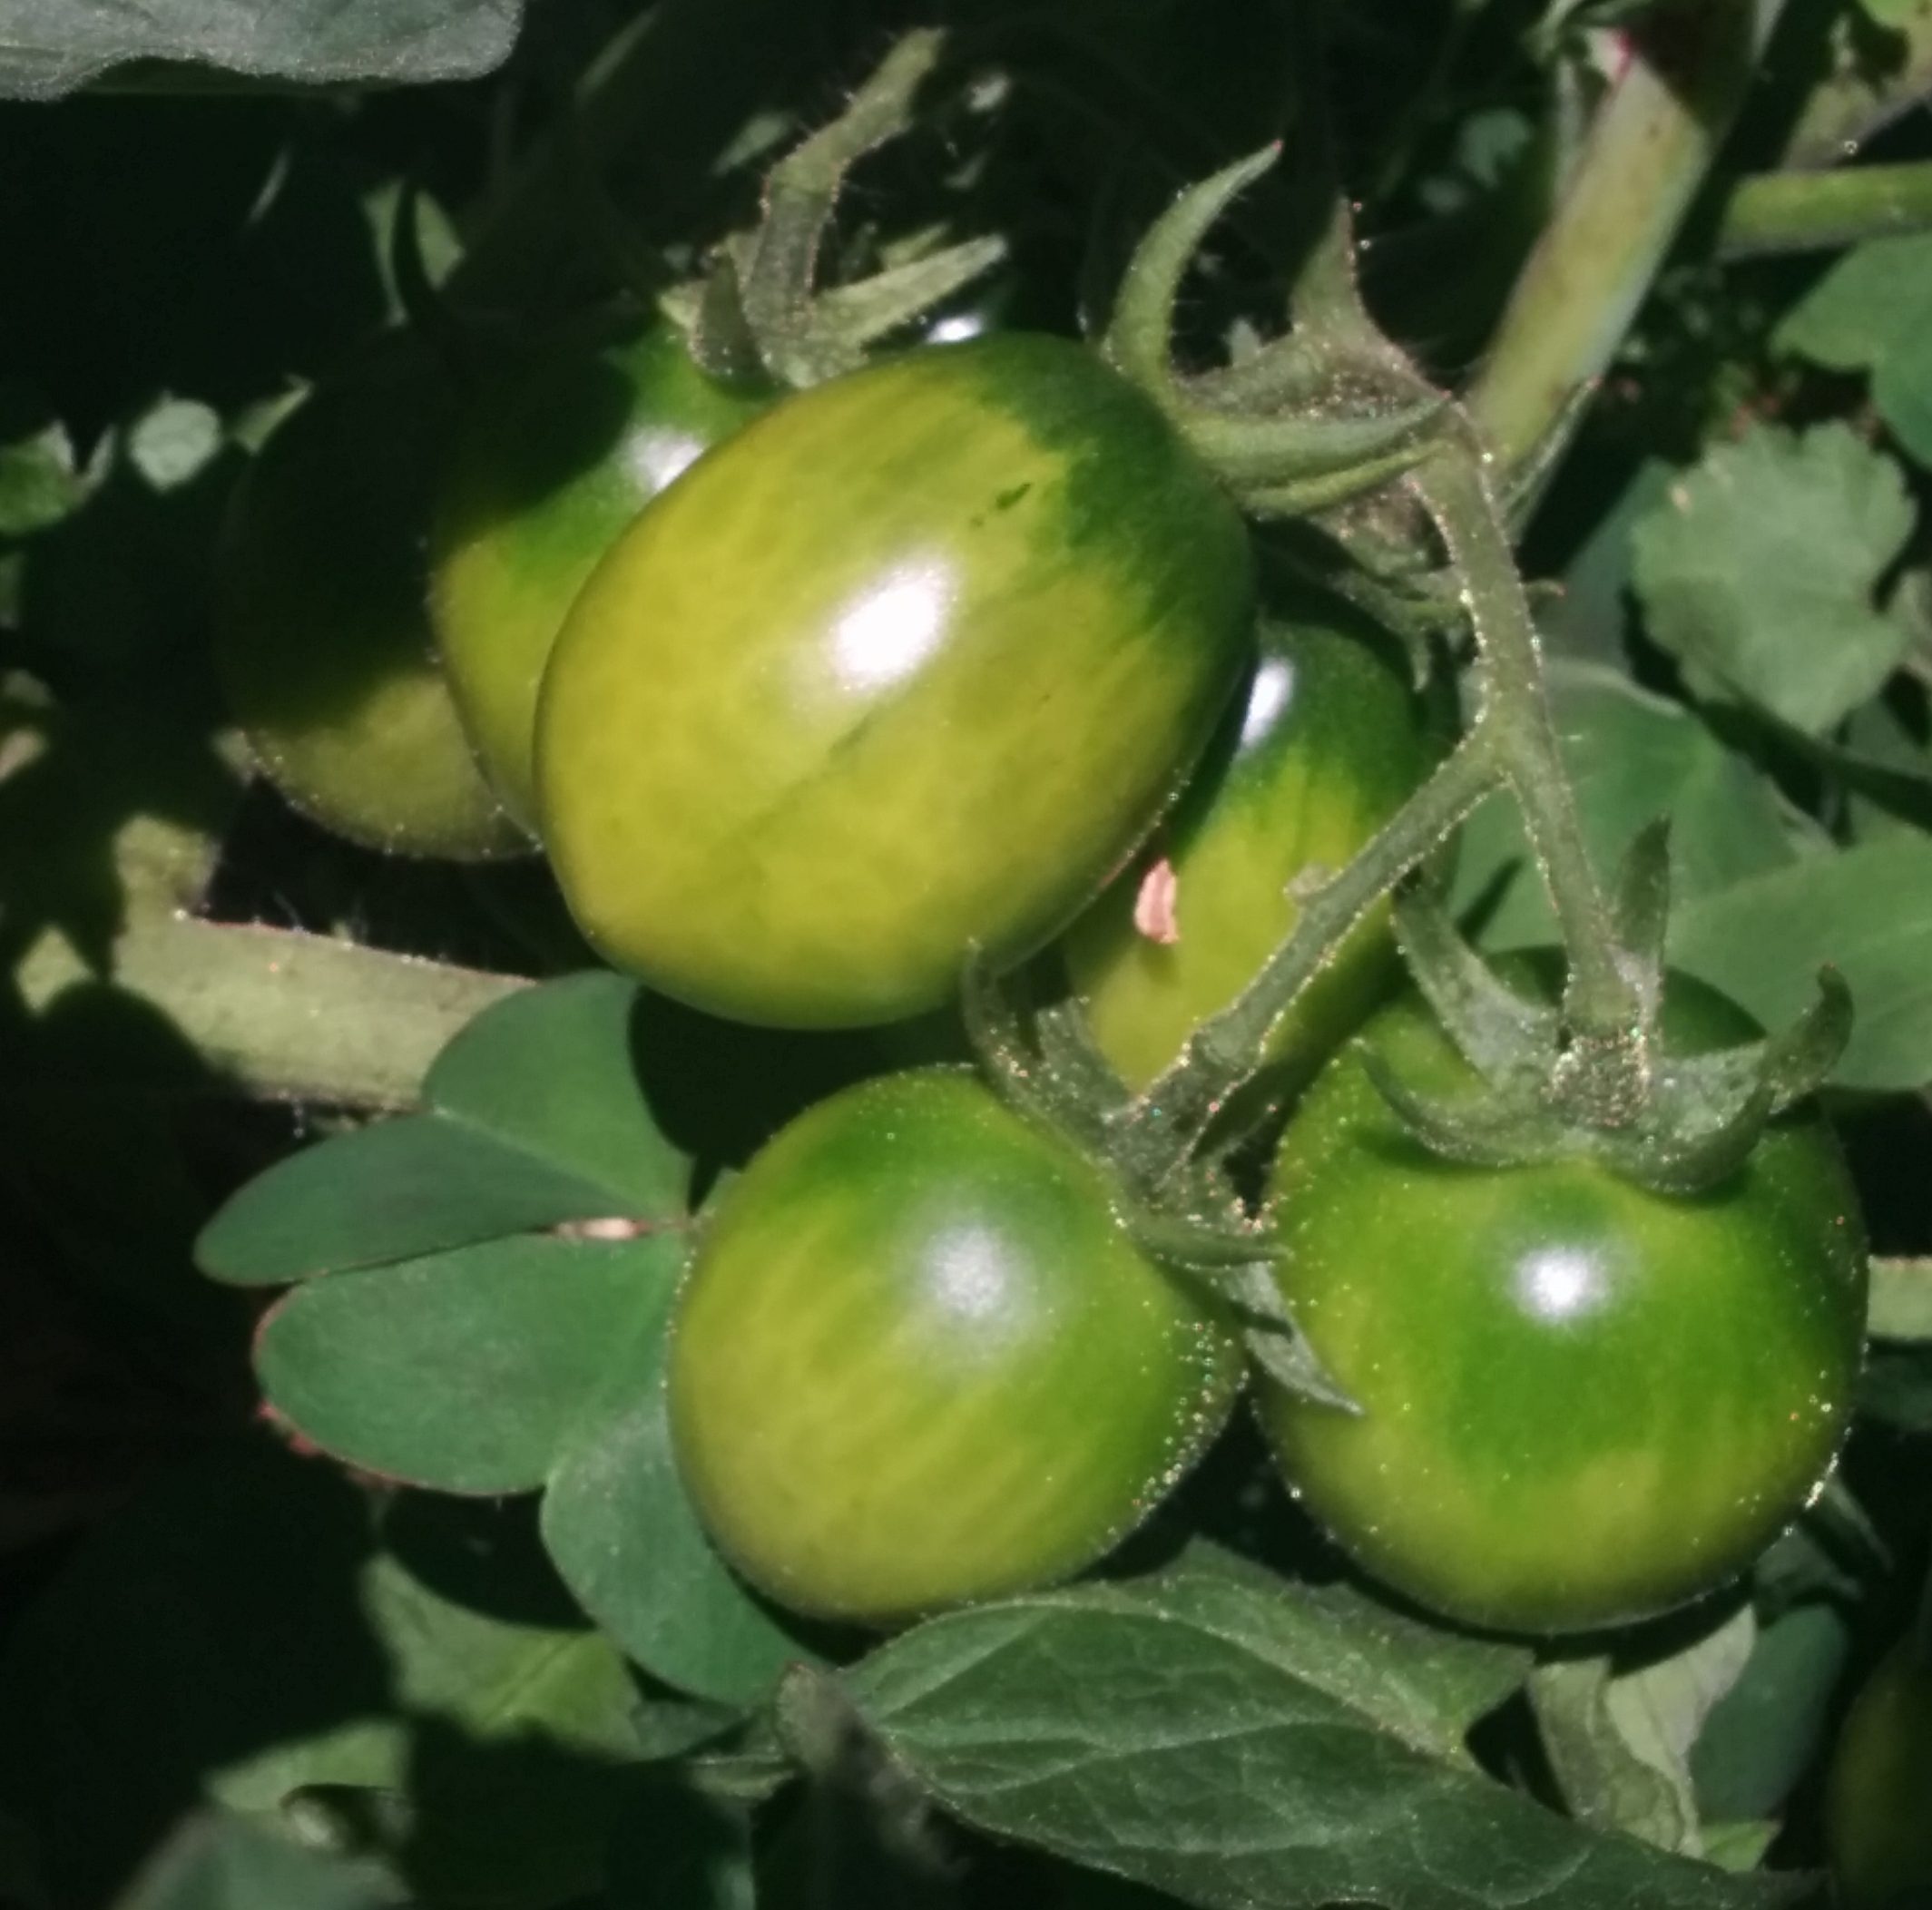
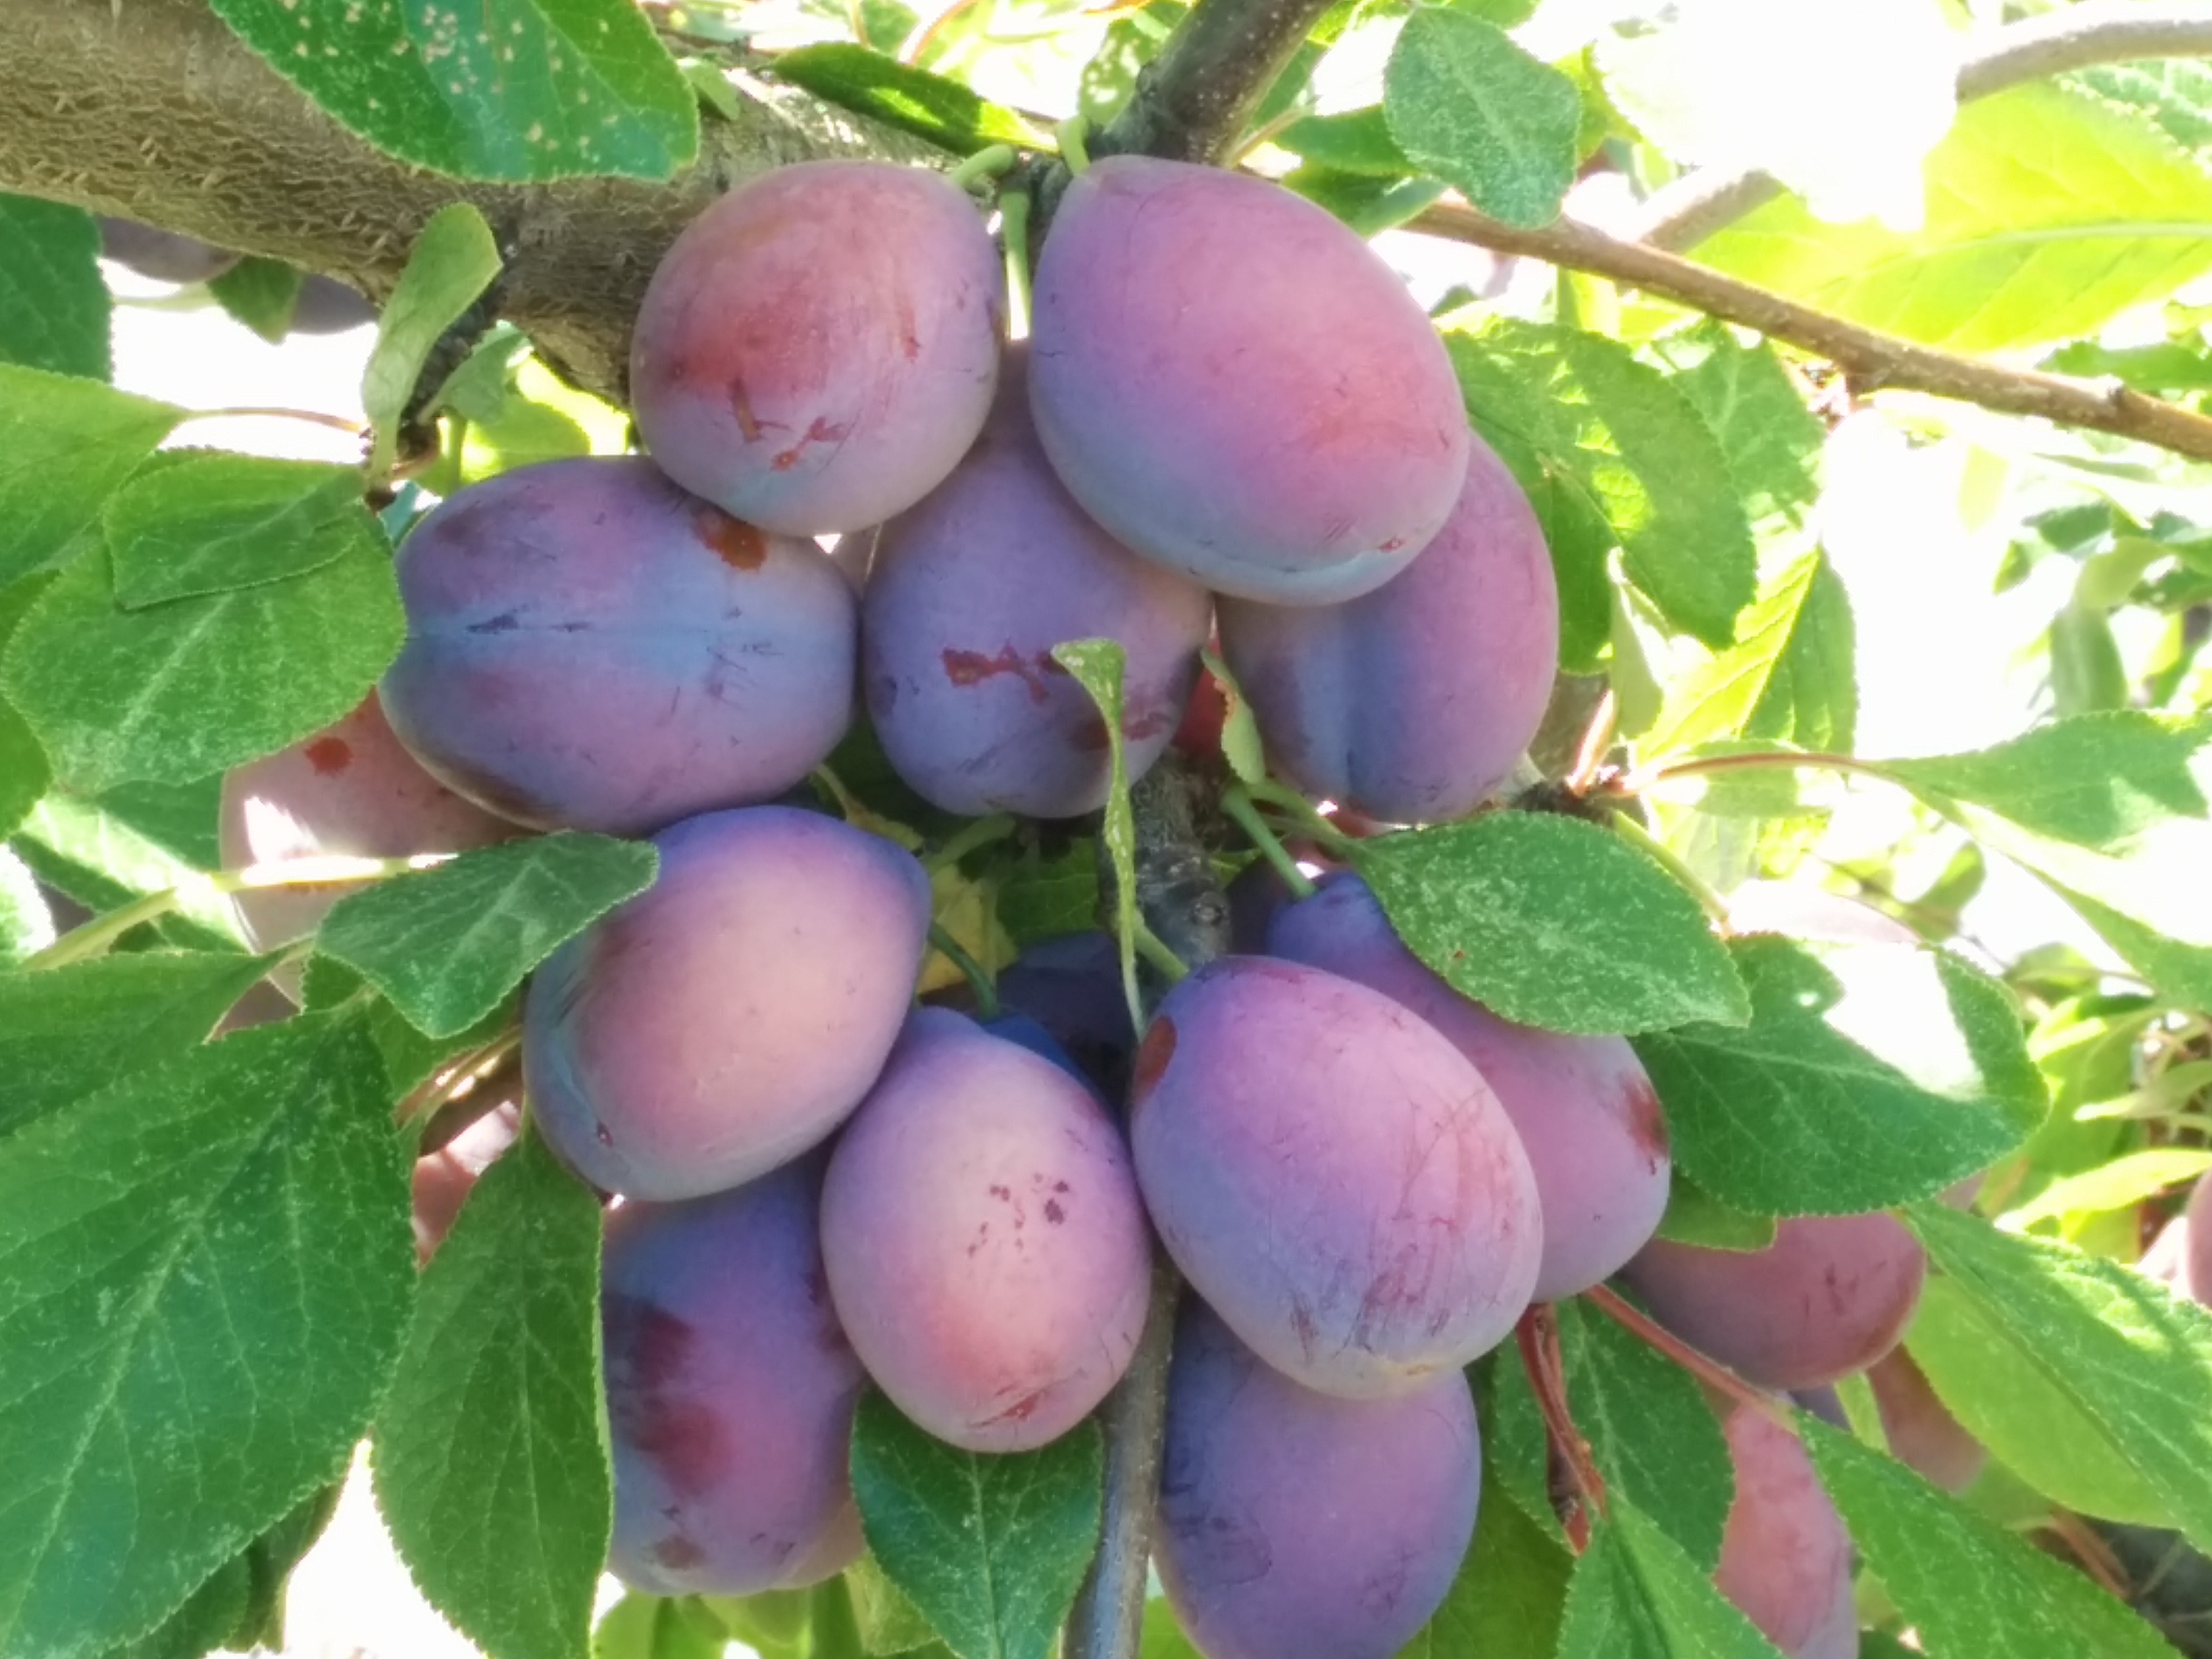
This week has also been full of plums, with most of the tree picked, dried and (for the first time) even sold and traded on. When I first came here eight years ago, there were some extremely neglected fruit trees that were mostly in a pretty woeful state. There was a lot of brush cutter damage to trunks, effectively ring barking some, brown rot in many and everything literally overrun with weeds. Some I couldn’t save but right down in the back corner, furthest from the house, was a very old plum tree, strangled by blackberries, English ivy and yet, in spite of everything, covered in small unripe fruit. The main trunk was split, it had been very poorly pruned, allowing some rot to set in but I realised it was a very old European prune plum and therefore, most definitely worth saving!

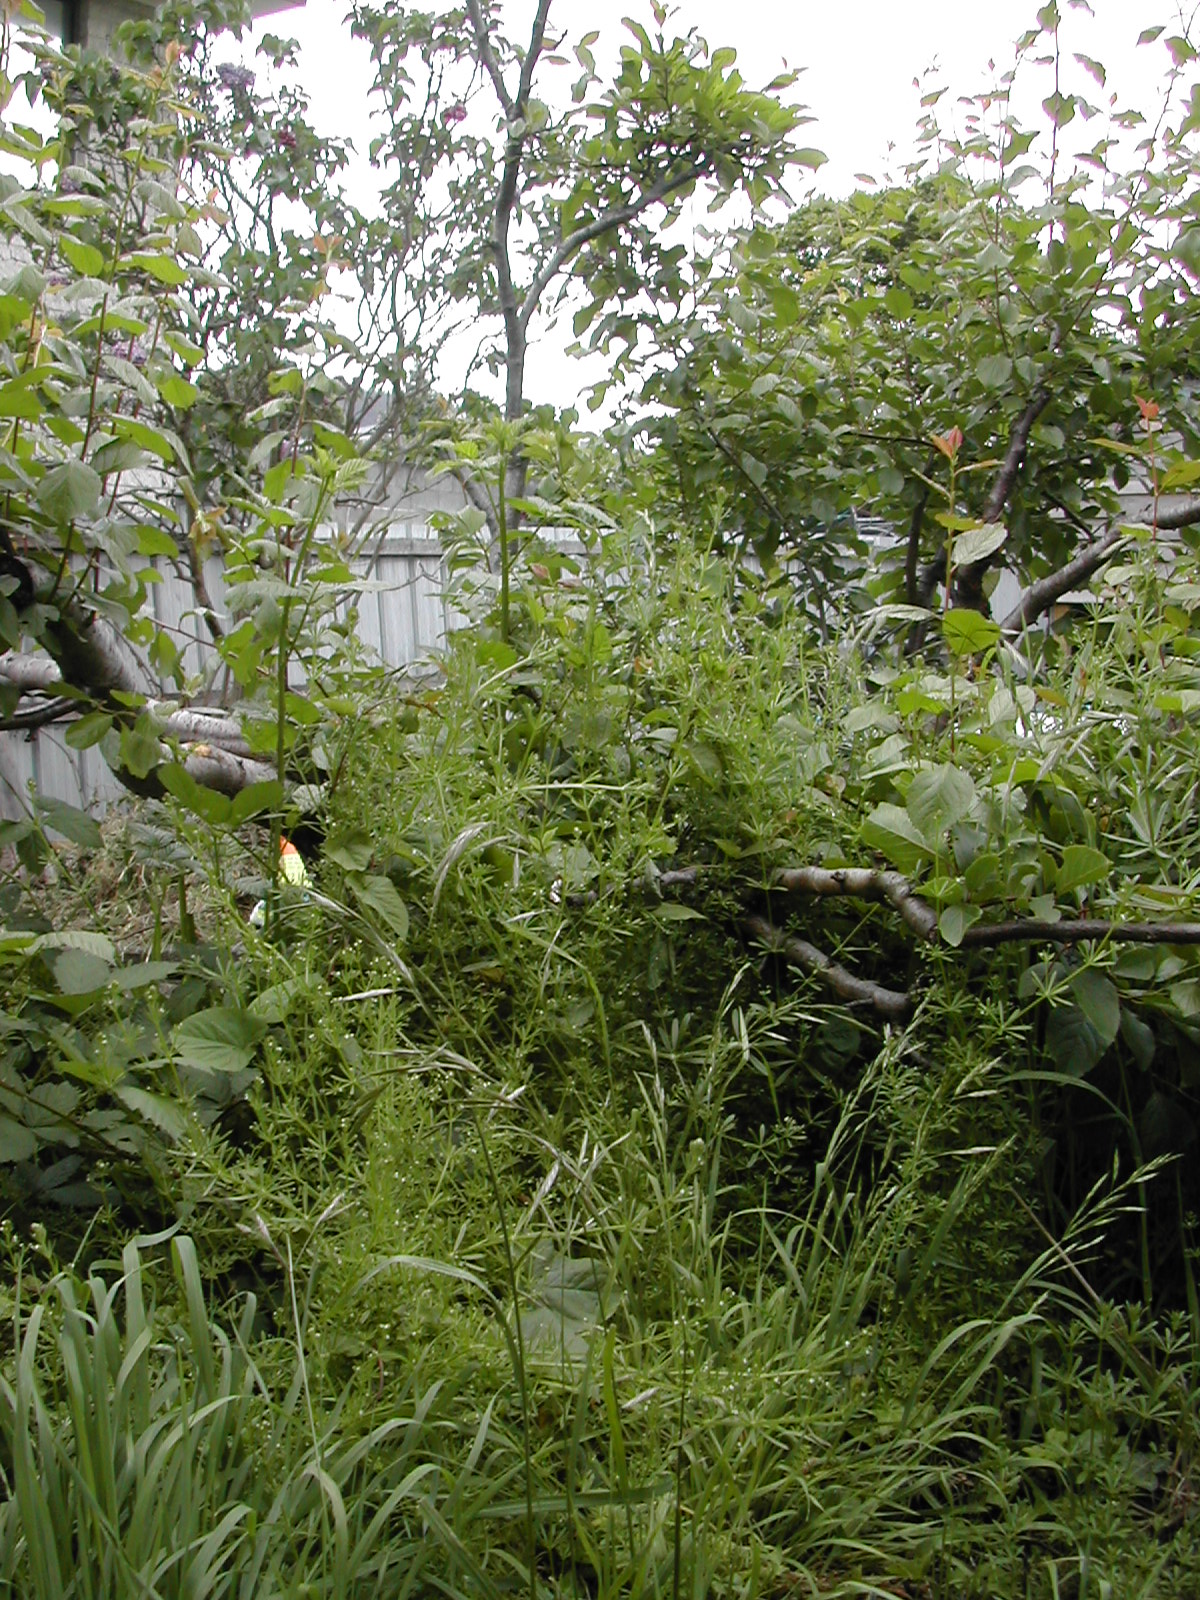
What it was – the jungle plum!

After several years of regular weeding, careful hand removal of blackberry suckers and some judicious pruning (initially with a chain saw) this tree has come back into its own. A couple of years ago we laid lots of cardboard, sand and finally pine bark to suppress weeds and it’s been a very successful makeover.

What it became – well cared for!

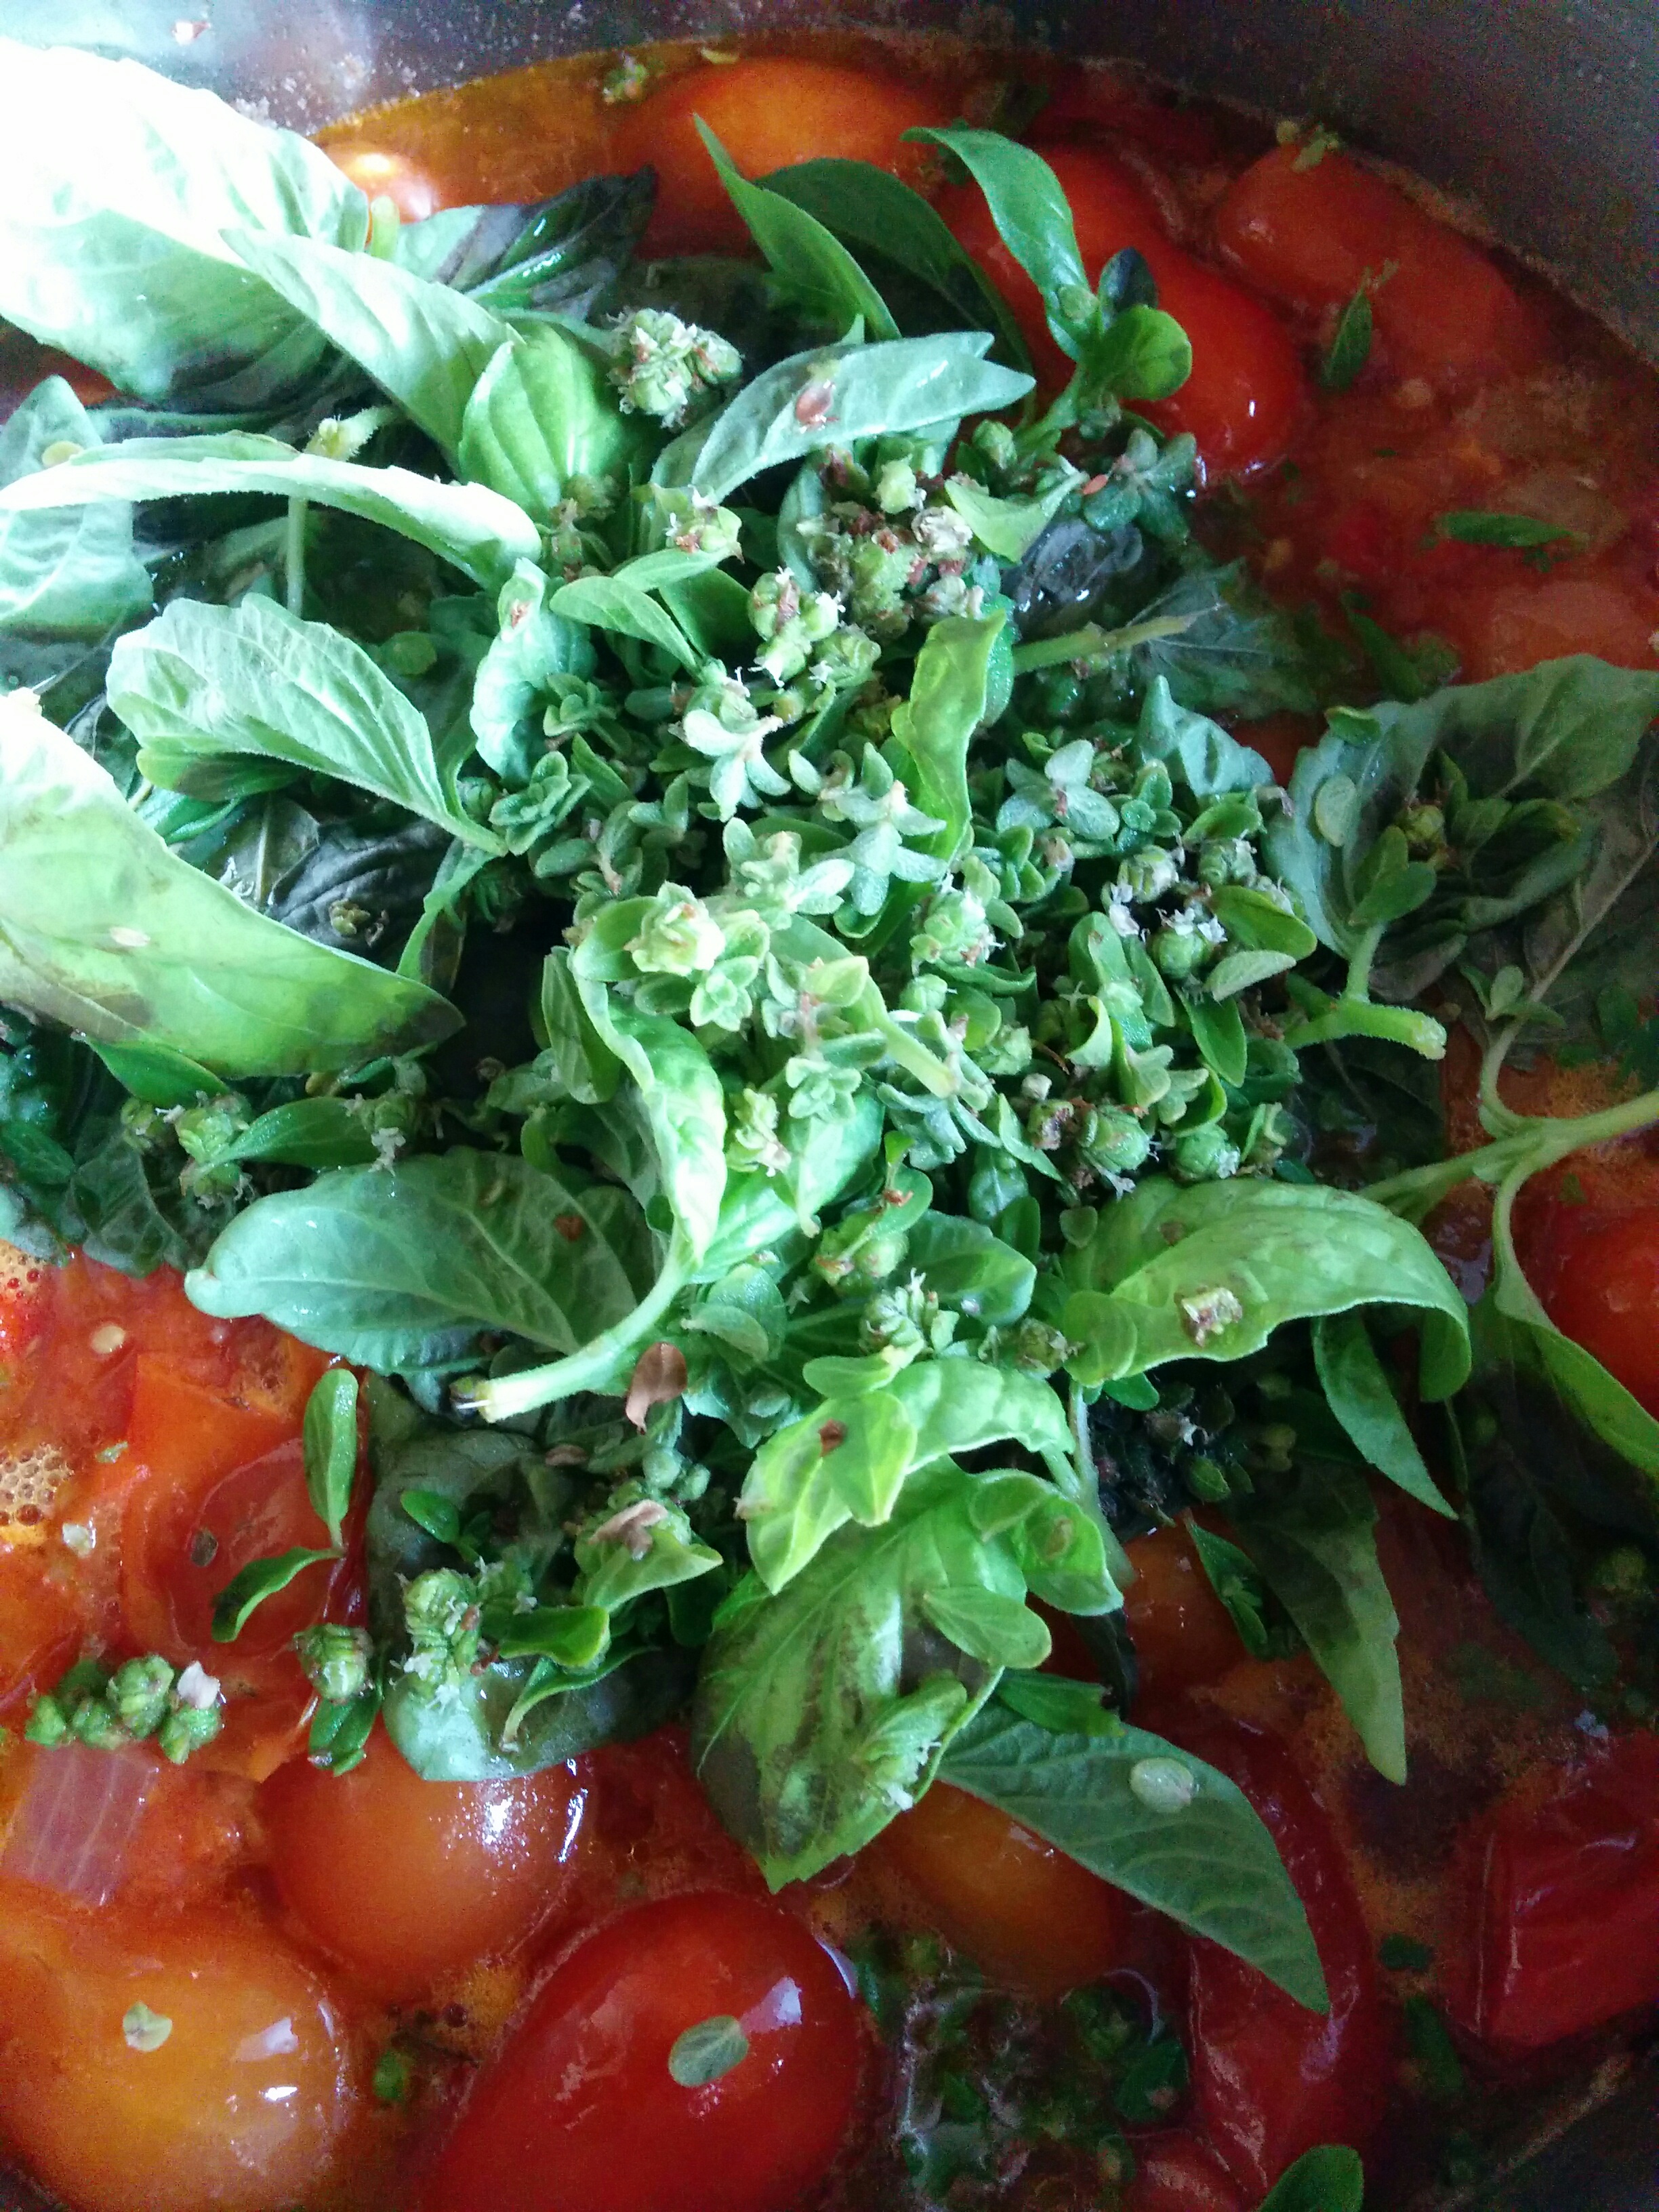
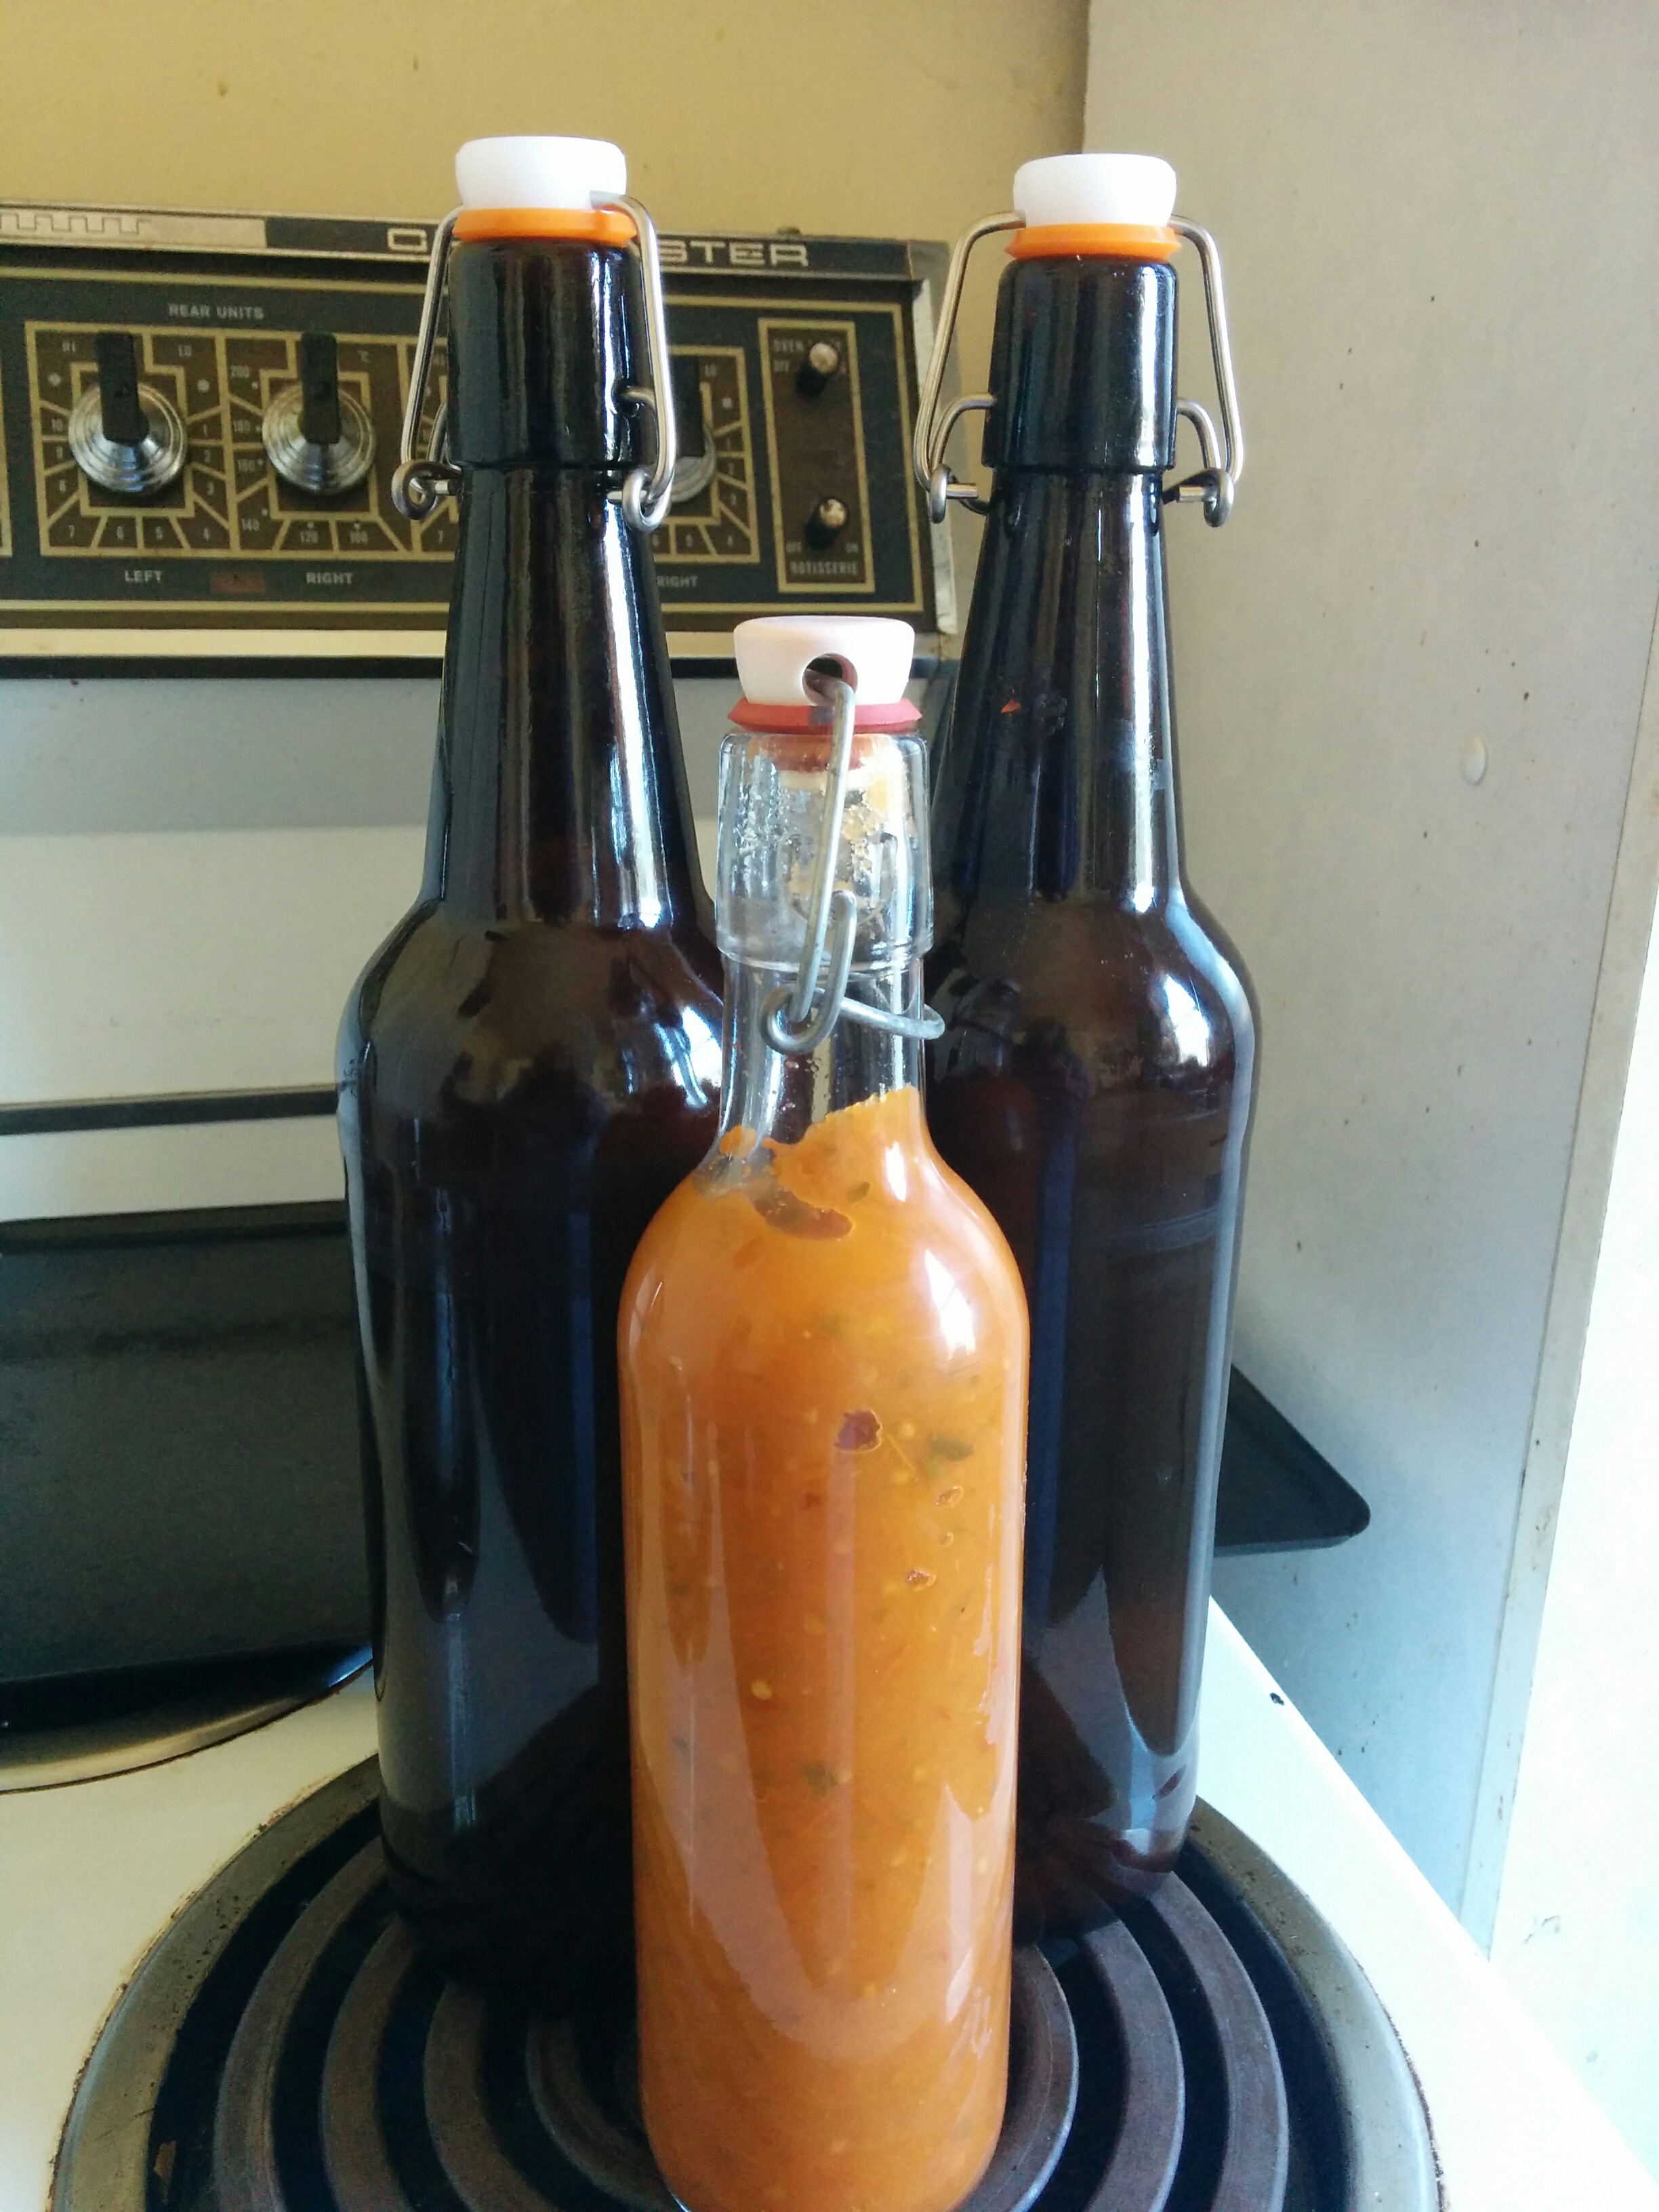
So much so, that I always have way too many plums for my household. They’re not the most wonderful plum to eat fresh, but I love making things with them. Some years I make a few jars of jam or sauce and one year I made a quite delicious perry from the yellow fleshed fruit – but always there’s lots of dried fruit – prunes to chop up for muesli, add to apple cobbler or even savoury dishes like Moroccan lamb stews. Best of all, as I walk past my pantry shelf on the way to the laundry and the back door, I pop a few in my pocket to have as a sweet snack on those cold winter mornings, a little memory of summer that was, and the promise of summer to come ❤


Venison Jerky

It’s autumn here in Hobart, though you could be forgiven for thinking it’s still summer at the moment! The sun is shining and the tomato harvest seems to be stretching on and on this year. The deer season opened in Tasmania a few weeks ago and, while I object to shooting a living creature just because you can, I have no problem with hunting if the animal is killed humanely and all the carcass is used.

I was gifted a shoulder of venison last week by family members who hunt. One deer provides a lot of meat shared throughout the clan, including mince and home-made sausages as well as the usual roasts and stewing pieces. I took my my shoulder home and wondered how I was going to use it.

As I walked in the kitchen, I spotted the dehydrator (it’s hard to miss!) still out on the bench after drying all the prunes this year, and made up my mind to try some jerky. I haven’t made jerky in a dehydrator before (only on a Weber barbecue) so this was quite an experiment for me!

Here’s the recipe:

Venison Jerky

1.2 kg (2 ½ lb) venison, sliced into thin strips

1/3 cup apple cider vinegar

1/3 cup Worcestershire Sauce and Mushroom Soy mixed together

1 ½ teaspoons salt

4 cloves garlic, minced finely

1 teaspoon dried chili flakes (optional)

2 tablespoons brown sugar

Boning out the shoulder took some time, but with a good knife, some fine music and podcasts to listen to, I was pretty happy. The trick is to cut with the grain of the meat and remove as much of the sinew as possible along the way, but the end result is worth it. Also, instead of wasting all those bits of sinew, I got a stockpot out with a head of garlic, a roughly chopped onion, a few bay leaves, my homemade Tuscan seasoning and some dried celery leaves. Once I finished boning out the shoulder, I added the bones, covered it all with cold water and wine and let it simmer for hours. The next day I skimmed off the fat and let it simmer again for a few more hours. Once it had cooled, I strained the remaining liquid and it was absolutely wonderful. I’ve potted it up and frozen it for rainy day soups, casserole and risotto bases.

In the meantime, back to the jerky. I peeled the garlic and started chopping it. Once it was reasonably small, I sprinkled the salt over it and, using the flat of the blade, really started the mash the garlic. I got out my biggest plastic lunchbox with a tight sealing lid and put the salty garlic mash in the bottom with the sugar and chili flakes. Then I added the wet ingredients and carefully mixed the whole thing. Adding the venison strips was a messy business, you really need to use your hands to massage the mix into the meat. Finally, I covered the container and put it in the fridge overnight. I did squish it around some more before I went to bed, but it isn’t really necessary.

The next day, I put thin strips of marinated venison on the dehydrator trays and lovingly placed them in the machine. The smell was gorgeous and I think this marinade would make a wonderful stir fry or slow casserole too. Using vinegar and the high salt content of both the soy and Worcestershire sauce did a great job and really drew out a lot of the moisture content from the meat as well as flavouring the strips.

To start, I put the temperature up high on the dehydrator (74 C/165 F) for the first half hour. This is recommended because I don’t use a nitrite “cure” for the jerky and it is necessary to kill off potentially nasty bacteria before drying proper. Botulism is dangerous and I take food safety seriously. Then I brought the temperature back to 63 C/145 F and processed it for just over 6 hours. This will vary with different dehydrators.

The results were excellent – chewy, delicious, dark and spicy! I’ve bagged it into little packs and for extra safety, will keep it in the freezer and pull out some as needed.  I’m going to try this with other meats (especially cheaper cuts of beef and rabbit) but the cider vinegar and salty soy combo is certainly worth repeating.

I hope you’re all well and happy wherever you are on this beautiful planet ❤

Addio Estate – Harvest Time

It’s that time of year again, the beginning of autumn when the bounty of summer comes in. And like so many of us who grow our own food, I’m feeling a bit inundated at the moment!

So far, I swapped some of my egg glut for a bag of crabapples and elderberries for jelly making; pickled and dried nectarines off our tree; dug and bagged potatoes (and I’ve still got more in the ground); eaten and dried so many beans; vainly tried to stem the attack of the killer zucchinis; dried enough prunes for the coming year but still the kitchen looks like it’s overflowing with plums now I’ve finally got the last of the fruit off.

Then there’s the tomatoes.

Some of you might recall I talked about some volunteer Roma tomatoes that survived winter in the worm farm and germinated in November. Well, quite a lot of them came up in one of the wicking barrels! I thinned the plants out and over the last month picked about 4 kg (just shy of 9 lb!) of perfectly delicious tomatoes.

Summer has been a very mixed bag here in Tasmania with much cooler temperatures and more rain than usual, and it seems we’re getting more balmy weather now that we’re officially into autumn. Everyone’s been complaining that tomatoes are slow to fruit, smaller than average and so on, but I think the flavour has been outstanding!

I don’t normally grow a lot of tomatoes but I decided to go for it this summer so I could bottle fruit as it ripens for use in winter stews and curries. This is reflected in the varieties I chose – Principe Borghese, San Marzano, Polish Giant and Debarao. These are all in various stages (the Debarao are still flowering) but I did bottle the first kilo of San Marzano this week and they are fabulous!

I didn’t factor in for the Roma crop (it was quite a surprise!) and that’s come in earlier than the rest. So I decided to make that wonderful Italian pantry staple, Passata. It’s kind of like making your own pasta sauce, totally to your taste and giving your winter meals a touch of those sun-kissed summer days.

Three things to note before we start. Firstly, I don’t blanch and peel the fruit for this as it takes a lot of time and basically I’m lazy. (In truth, I’d just blanched a couple of jars of small San Marzano tomatoes for bottling and was running out of time that night). Instead, I put the whole thing through the blender and the skins break down beautifully doing it this way. Secondly, I used a combination of Basil, Marjoram and Oregano because that’s what I had close at hand and we love those flavours. Sage, Thyme, Italian Parsley and even a little Rosemary would be just as good. And finally, this recipe uses chilies – another fruit I have in abundance here! – but it’s just as delicious without them, so don’t feel compelled to use them 😀

Deb’s Chili Passata

2 kg ripe Roma (or any plum-type) tomatoes             1 onion, chopped

1 head garlic, peeled                                                         6-12 chilies, chopped (optional)

2 tabs basil oil                                                                   ½ cup fresh basil

¼ cup oregano &/or marjoram                                     1 tab honey

¼ cup minimum Marsala or red wine                           salt to taste

Wash the tomatoes, remove any stems, bruises, etc. Put them in a large stockpot with the oil, garlic cloves, honey, onion, wine and chopped chilies. Heat slowly over a low heat until the tomatoes start to sweat and mash down. Stir occasionally but leave the lid on as much as possible.

Add the fresh herbs and continue cooking until it starts to look like a tomato soup. Season it to taste. Take off the heat, cover and leave overnight.

img_20170301_192014

The next day, put the cold tomato mix through a blender and pulse to the desired consistency. Clean and sterilise jars/bottles and lids/tops. Put the blended mixture back into the stockpot and reheat. Boil gently for at least two minutes. Take off the heat and prepare a tall stockpot for a water bath (or Fowlers Vacola or Ball canning/bottling vat).

img_20170302_172847

Ladle the hot Passata into sterilised jars, add ¼ or ½ tsp of citric acid to each jar, cover securely with sterilised lids and place in water bath. Bring the water up to the boil and hold for 20 minutes with the lid on. Turn off the heat and leave the jars to continue processing for another 15 -20 minutes.

Remove the jars carefully (they will be very hot) and put them on a board to cool. Check for a seal, label and store in a cool place. This will last unopened for up to a year but mine never lasts that long!

img_20170303_131441

This recipe made just over 2 liters and can be bottled in smaller jars as well – I just have lots of swing top bottles this year!

Enjoy, and if you try this recipe I’d love to hear what you think of it 😀

Take care and talk with you all soon, I have to go make Plum Butter now………..

Oh Beautiful Friday!

img_20170204_114402

My life is a little bit insane at the moment, hence the lack of blogging (sorry!)

I’m as always, up to my eyeballs with uni (getting a portfolio of poetry together this time) and work has started again at Oak Tasmania. This year, I’m doing my musical things with The Superstars and we have some big plans for 2017 but I’ve also started tutoring a Food Gardening group two mornings a week. It’s been hectic!

In the space of a couple of weeks, we’ve started doing experiments with growing carrots in pots rather than in traditional garden beds, resurrected the worm farm, started a vegetable and herbs seed bank, done quite a lot of weeding, cleaned out the small greenhouse that’s on site, potted up some basil and eggplants and planted some lettuce seedlings that are already up and running 🙂

img_20170214_101112

Future salad!

Eventually, we want to grow enough to pass on to the kitchen and provide the cooking courses with fresh, clean produce to turn into salads, soups and encourage better eating among the Oak staff and participants. I’m also hoping some of the seedlings will go home with the gardeners, most of whom are very keen!

This week we spotted a very old dinghy around the back of the site and we’ve decided to appropriate it. Our plan is to bed it in securely, fill it with sheep poo and some good loam and plant it out. The drainage is good – she came with lots of holes! – and we’re thinking about an experiment with some seed potatoes we discovered to begin with. Although they’re very late, in a raised bed we should get a crop and I think we should dress it up and name the old girl something like “The Good Ship Spudalicious”. (Photos are coming!)

Meanwhile, at home it’s a bit overwhelming with nectarines just finished and plums coming in and I’ll be getting the dehydrator out this weekend to turn most of the plums into prunes for the winter months. And I did get my one apricot off the new tree! A few months ago I cheered that there was one solitary fruit and it ended up perfect and utterly delicious ❤

img_20170115_201124

The maincrop bush tomatoes (San Marzano and Principe Borghese) are just starting to size up and ripen but the Debarao are still flowering and a little behind the Polish Giant Paste that are very green but already very big! Undoubtedly, the best cropper so far has been the bush Roma’s that were an unexpected bonus. I’ve been picking them just as they’ve started to colour and I’ve got a couple of kilos off them already that I plan to bottle in the next few weeks. Everyone’s tomatoes in southern Tasmania seem a little late this summer, but while the rest of the country’s been in a devastating heat wave, Tasmania has been relatively mild and surprisingly damp this year.

Principe Borghese Tomatoes

Principe Borghese Tomatoes

Last week I picked enough perfect grape vine leaves to put in brine for making Dolmades (stuffed vine leaves)

img_20170205_181926

At least I got the year right even though it’s February now!

and this week I put up two bottles of Pickled Nectarines. This is really simple and relatively quick. All I do is put halved and pitted nectarines into sterilised jars with a cinnamon quill, a star anise and piece of dried Habanero chili in each (totally optional!) and covered them with a heavily sweetened apple cider vinegar (the ratio is 1:1) while it’s still hot. Covered with sterilised lids and put the jars through a water bath for 15 minutes, these nectarines are wonderful with ice cream as a dessert or sliced with game meats. Just leave them for a few weeks for the flavours to develop.

And Wednesday, I had a great time playing a gig at Irish Murphy’s in Salamanca. Because of everything that’s going on in my life at the moment, I haven’t been playing as many solo shows and it was so good to play some songs and catch up with lots of friends 😀

Because I’m working more, I decided to make a mega Zucchini and Ham Slice to freeze and take for lunches – it’s a great way to use up some of the zucchini and egg glut! I used 8 eggs, three grated zucchini, a 1/4 cup of flour, a few left over boiled Nicola potatoes, some cubed ham (about 2 cups) a little fresh sage, thyme, marjoram, a couple of finely sliced Cayenne chilies and a grate of nutmeg. After I’d beaten all this together, I added about 1 1/2 cups of grated Colby cheese and about 1/2 cup of grated parmesan and baked it in a greased deep pan for about 45 mins in a moderate oven. I ended up with 7 generous serves that will make work lunches a lot easier!

img_20170207_171900

But now, it’s Friday night and I’m beat! All I’m good for is watching the cricket on television and drinking cups of tea. I keep looking across at the pile of clean washing and wish it would fold itself up……..


New Traditions – Day 3 NaBloPoMo 2016

I’m writing to you with the smell of new bread baking in the kitchen. It’s one of those things that spells “home” to me though my family weren’t into yeast-based cookery when I was a kid. We had bunches of dried herbs, cured meats and always pickled onions. I also remember the rows of Fowlers Vacola preserving jars (the Australian equivalent of Ball Mason canning jars) full of bottled fruit that my parents would put by every summer so we could eat apricots and peaches in the middle of winter.

I still put food by, it’s a deeply ingrained habit that I doubt I’ll ever fall out of love with. Instead of bunches of herbs hanging (and the luxury of a walk in pantry) I have new traditions – a dehydrator, a set of tall stockpots and a thermometer for water bath processing and a ragtag assortment of jars that I routinely wash, sterilise, fill, process, store and use.

My “pantry” is a bookshelf with a curtain to cut out the light and here I keep my preserved cordials, bottled and dried fruit, basil and lemon oils, homemade apple cider vinegar, bread flour and spare egg cartons. At the moment it’s mostly empty jars. There’s no bottled fruit left, one lonely roll of fruit leather from last summer, some pickled and dried chilies from the autumn harvest and a few bottles of sauce, fruit cordial, basil oil and flavoured vinegar.

img_20161103_113911

To this day, I’m not sure why we never made bread when I was a child. I suspect with six of us in the house when I was young, it would’ve been much easier and less time consuming to buy bread than make it! My mother was a wonderful baker and I learned many delicious cake and biscuit recipes from her. Every Saturday was baking day and after lunch, the kitchen table would be cleared to make enough biscuits and small cakes for the coming week. In winter there would also be a few dozen Cornish pasties that would end up reheated as lunches, a savoury Pasty Pie and at least one large cake for the weekend and any visitors that might call in.

For those of you who’ve followed my blog for a while, I have a “pet” sourdough plant I named Wee Beastie. She lives on a shelf in the kitchen, where she watches everything that goes on and demands feeding daily. I started her off on new year’s day 2015 so she’s approaching her 2nd birthday.

Wee Beastie - watching and waiting!

Wee Beastie – note the air bubbles visible through the glass jar!

This living culture requires no other yeast and is a wonderfully frothy mix. My basic recipe is roughly 2 cups of Wee Beastie, 2 cups of strong bread flour, 2 teaspoons of bread improver and some olive oil to stop the dough getting too sticky. Sometimes I add half a cup of rye flour and add a couple of tablespoons of water so the dough is fairly soft. Once this is knocked together in a bowl I turn it out onto my wooden bench and knead it thoroughly for about 5 minutes. Then I make it into a loaf shape, coat my hands in olive oil (about a tablespoon) and massage the oil into the loaf, putting it in a bread pan to prove.

I’m essentially lazy, so it only gets one chance to rise. Normally, I knock the loaf together in the afternoon, leave the dough to rise overnight and bake it the following morning. The results of this slow process are pretty spectacular and incredibly delicious!

img_20161103_114202

Even when it’s a few days old, this bread makes the best toast, perfect with a poached egg  ❤ I’ve even sliced it very thin and toasted it for an alternative to bought crispbread.

Meanwhile, I have to go. There’s an essay to write and (in the name of science) fresh bread to taste test 😉


Chinese New Year – Spicy Plum Sauce

It’s been a while since I’ve posted anything, it’s been quite chaotic! As we glide into the back end of summer here in Tasmania, I’ve been busy planning beds for winter vegetables, planting for autumn harvest, cropping the summer bounty, making feta cheese, dispatching the most recent rabbits (filling the freezer again!) and making sure our second doe (the beautiful Bella) is pregnant with another litter for autumn eating. My cupboards are full of cordials, flavoured oils, vinegars, dried fruit, and even home made Furikake, thanks to a brilliant crop of green shiso in the greenhouse this year. (Leave a comment if any of you are interested in a recipe for this).

Since the corner of shame has been revived, ready for a beehive later this year, the plum tree has loved all the extra attention and yielded a decent crop. As I write there’s three huge trays of plums in the dehydrator becoming prunes for use over winter and a couple more big bowls to do things with. Chinese New Year is coming up on Monday so I’ve decided to make Spicy Plum Sauce with 2 kilos of fruit.

I only make this every couple of years as my household aren’t big sauce or chutney fans but it’s a wonderful addition to stir fries, a marinade for barbecue chicken or rabbit and is fabulous as a dipping sauce with spring rolls, dumplings or just about anything! Also, we are all chilli lovers, so if you’re not as keen on the hot notes, adjust the number of chillies, remove the seeds, try a milder variety or even omit them altogether. Some of my treasured Habanero chillies got sunburn in the greenhouse while still green a couple of days ago, and this seemed an ideal use for them. I personally feel it’s important to make any recipe your own, rather than following someone else’s to to absolute letter. So this is my take on Spicy Plum Sauce this year – go and make it yours 🙂

IMG_20160206_172112

Spicy Plum Sauce

Ingredients:

2kg plums     1/2 cup soy sauce      1/2 cup Chinese cooking sherry   2 cups cider vinegar or white wine    1/2 cup brown sugar    1 red onion, finely diced    1 tab grated ginger      3-4 cloves garlic      6 habanero chillies, finely chopped

In a small square of muslin:  1 cinnamon quill    1 star anise     2-3 allspice berries   1 tsp cardamon pods   1 tsp coriander seed

Method:

Tie the spices in the muslin and hang off the handle of a stockpot. Halve and pit the plums, add them to the stockpot with the sherry, onion, ginger, garlic and vinegar or white wine. (If you like the sauce sharp, use vinegar).

Simmer it all together, stirring occasionally. Once the plums are starting to soften add the chopped chillies. Cook until the plums are falling apart. Allow to cool (I left mine overnight) and remove the muslin bag. If you like your sauce smooth, pour into a blender jar and blend thoroughly. If you like your sauce chunkier, use a potato masher or the back of a wooden spoon.

Reheat and pot up into sterilised glass bottles (or jars if it’s chunky) and process in a water bath for extended shelf life.

IMG_20160206_155746

Meanwhile, have a wonderful Chinese New Year wherever you are 😀

Raspberry Time – Day 27 NaBloPoMo 2015

While I’m not feeling 100% today, I’ve been thinking about what to do with the soon-to-be glut of raspberries. There’s so much fruit on the bushes, I have a feeling we’re going to be inundated in the next few weeks. Growing up in South Australia, I never ate a fresh raspberry until I moved to Tasmania and they’re probably my favourite berry fruit.

IMG_20151116_173439

Usually I make ice cream or cheesecake with excess berries, which uses eggs up as well. But with Boysenberries, Youngberries and Loganberries starting to colour up too, I think it’s time to consider my options! I’m planning to make a Raspberry Upside Down cake next week for my birthday and already have enough berries for that.

All I do with this is make up a simple sponge batter with 2 cups of self raising flour, 1 cup butter, 1 1/2 cups sugar (more if you like it sweeter), a teaspoon of baking powder and 4 eggs. Instead of splitting the mixture into two tins and filling it with jam and cream, I put the fresh fruit on the bottom of a deep baking pan and pour the batter over the top, baking for 20-30 minutes in a 180 C (350 F) oven. Once the cake’s turned out and still warm, it can be lovely to pour hot lemon syrup over for added zing or (for the adults only version) poke the still warm cake with a skewer and pour over a citrus flavoured liqueur.

None of us are fans of jam so I am going to try mashing some with yogurt and drying it as fruit leather. But for large amounts of berries, I can’t go past Raspberry Vinegar Cordial. I first had this over 30 years ago on a hot summer day in Hobart and it is delicious.

The principle here is to use the vinegar to not only preserve, but also to enhance the tangy sharpness of the fruit. It’s fabulous for very ripe fruit – and it’s ridiculously easy to make!

Raspberry Vinegar Cordial 

Ingredients:

500g (1 pound) ripe raspberries     2kg (almost 4 1/2 pound) white sugar   2 litres (4 pints) white vinegar

Method:

Put the washed, drained fruit into a non-metallic bowl or pot and pour over the vinegar. Mash it to break the berries but don’t puree them. Cover the berry mash and leave it for a day or two. I have hear that some folk leave the mash for up to five days but I’ve never done more than two – patience is not my strong suit!

Strain the mash carefully through muslin or an old, clean tea towel into a cooking pot, squeezing out as much of the precious juice as possible. Heat the juice and when it’s starting to simmer, add the sugar and boil for approximately five minutes.

Decant into sterilised jars or bottles and seal immediately. If you want to keep this for winter consumption, I’d also recommend processing the bottles in a Fowlers bottling urn or water bath. Mine never lasts long enough for that!

What’s your favourite berry fruit? And how do you like to serve and preserve them?

Eggs Galore! – Day 5 NaBloPoMo 2015

You might have gathered by now that my household’s been having difficulty keeping up with the incredible egg laying ability of my beautiful girls. This morning I had 26 eggs in the fridge, the oldest ones were only laid six days ago. I date my eggs with a pencil as soon as they come up to the house, something my mother used to do to keep track, and as you can see from the photo below, some of them are quite gigantic!

A dozen free range eggs and an old pickle jar, waiting to get together!

A dozen free range eggs and an old pickle jar, waiting to get together!

So, I decided to make very old fashioned Pickled Eggs. I haven’t had these since I was a child (yes – that long ago!) when my mother used to make them occasionally when we had a glut.

I still have some dried chilies from last year’s crop, so decided to use one in the pickling brew, along with allspice berries and a couple of bay leaves I dried a few years ago from a friend’s tree. The vinegar was mostly home made thanks to a vinegar “mother” my dear friend Sara gave me last year (see yesterday’s post about Sara – she’s pretty wonderful!) and topped up with some shop-bought white vinegar. Older eggs are actually better for hard boiling, as they’re easier to peel, so a few of mine have a few “dents” in them!

IMG_20151105_112000

Old jars are something of a passion of mine and the one I used here has been home to many delicious creations. To sterilise it, I washed it thoroughly in hot soapy water, rinsed it well and put it in the oven (about 120 C) until all the water had evaporated. The lid went in a saucepan of clean water and simmered for 10 minutes. Here’s the recipe:

Pickled Eggs 

Ingredients:

12 hard boiled eggs, peeled          a clean, sterilised pickle jar and lid           approximately 4 cups of vinegar

1 dried chili                 2 bay leaves                4 or 5 allspice berries       1 teaspoon sugar          a pinch of salt

Method:

Start by boiling the eggs for 8-10 minutes (you want them really hard for this). Once they’re cooked, plunge into cold water and tap each to stop them cooking any further. Put the clean, wet jar in a low oven to sterilise. In a saucepan, heat the vinegar, stir in the sugar and salt until dissolved with a wooden spoon. Add the allspice, chili and bay leaves and cover, reducing the heat. Simmer for about ten minutes. While it’s simmering, peel the eggs carefully, wash them in cold water to remove any tiny pieces of eggshell and put aside in a bowl.

Check the jar, if the water is completely evaporated it’s ready to use. Carefully remove it from the oven and put it on a board, preferably on the stove top next to the simmering pickle (this reduces the risk of spills and accidents). Take the sterilised lid out of the water with tongs and put it on the board to cool. Put the wooden spoon in the jar and roll the eggs in gently. Then, very carefully and slowly pour the hot vinegar and spices over the spoon and make sure the eggs are covered. Put the lid on firmly to create a seal and leave to cool. Label and date your jar and put them in a dark cupboard. They should be ready in 4-6 weeks – I’ll be trying mine on my birthday – and they will keep for up to a year.

The finished Pickled Eggs

The finished Pickled Eggs

What pickles do you love to make? Let me know in the comments 🙂