No Rest for Gardeners! – The Truth About Growing All That Food


IMG_20160307_092815

The uninitiated – that is, non-gardening friends – often say things to me that make me giggle. Things like, “you must be glad it’s autumn, you won’t have to be in the garden so much”. It got me thinking though that my busiest times are usually spring and autumn, preparing for the frenzy of summer and the hard graft of winter, when I’m more inclined to do heavy building work to keep warm, while trying to grow winter food. I feel there’s always things that should be done no matter the season and, dealing with a physical disability, things that I have to take a long view on completing.

One such job has been The Corner of Shame. I think every largish garden has one, that back corner, usually furthest away from the house, that gets overgrown and forgotten about because there’s so many other things that take your time and attention before you can walk that far! Well, after months (literally) of chipping away at it, my Corner of Shame is no more!

IMG_20160314_093852

The picture above shows the now Corner of Care that was started as a long term project by two of us in November last year. I had to get a second load of pine bark to finish top dressing around the plum tree and opted this time for the fresh rather than the composted, darker mulch. Also, I’ve planted an English Lavender (in the bottom right corner of the photo) and started pruning the plum tree. The netted area is half a huge bed that I left fallow for a season and built up with compost from the chicken coop, spent straw from rabbit hutches and a few good handfuls of dolomite.

Last weekend I planted leeks, silverbeet (chard), celery and some bunching broccoli in there and this weekend I finished it off with garlic. Next weekend, I’ll be doing a similar netting job on the other side but I’ll be waiting for a few more weeks for the next round of seedlings to be big enough to plant out.

IMG_20160308_152326

The two nursery trays above (ten punnets of winter vegetables and ten of onion varieties) were planted on March 8th, only six days ago. This morning, nine of the winter vegetables were up and big enough to handle and six punnets of the onions. Hopefully, I’ll get some time during the week to prick some of the kale, savoy cabbage and endive seedlings into toilet roll grow tubes and get them ready for planting out across five beds before the soil starts cooling off!

The other long term project I’ve brought to a close in the last few weeks has indeed been a labour of love. My all-time favourite vegetable is asparagus and at the beginning of spring, I took the plunge and planted some seed rather than wait until winter and buy (in my opinion) very expensive crowns. Asparagus seed is notoriously difficult and has a very short shelf life but either I chose well or got lucky – probably a little of both!

I ended up with 51 asparagus seedlings!!!

So, a dedicated bed had to be found, dug over, built up and dressed with sea grass – and quickly! I decided to use the bed that had garlic in last year and started the preparation in November, almost as soon as I’d lifted the huge heads. Digging is something I generally avoid these days because of my spine and arthritis unless it’s absolutely necessary – and this was necessary! It took up until the end of December to dig the previous mulch in, feed with copious amounts of sheep poo and mushroom compost, throw some dolomite over it and dig it over again. Then I covered it all with some sea grass I gratefully accepted from extended family who want to be paid in asparagus – long term investors! Then I left it to settle and every time I watered the garden, I spent some time watering the sea grass to remove the excess salt and stop the bed drying out completely. This is what it looked like after the sea grass mulch –

IMG_20151228_143733

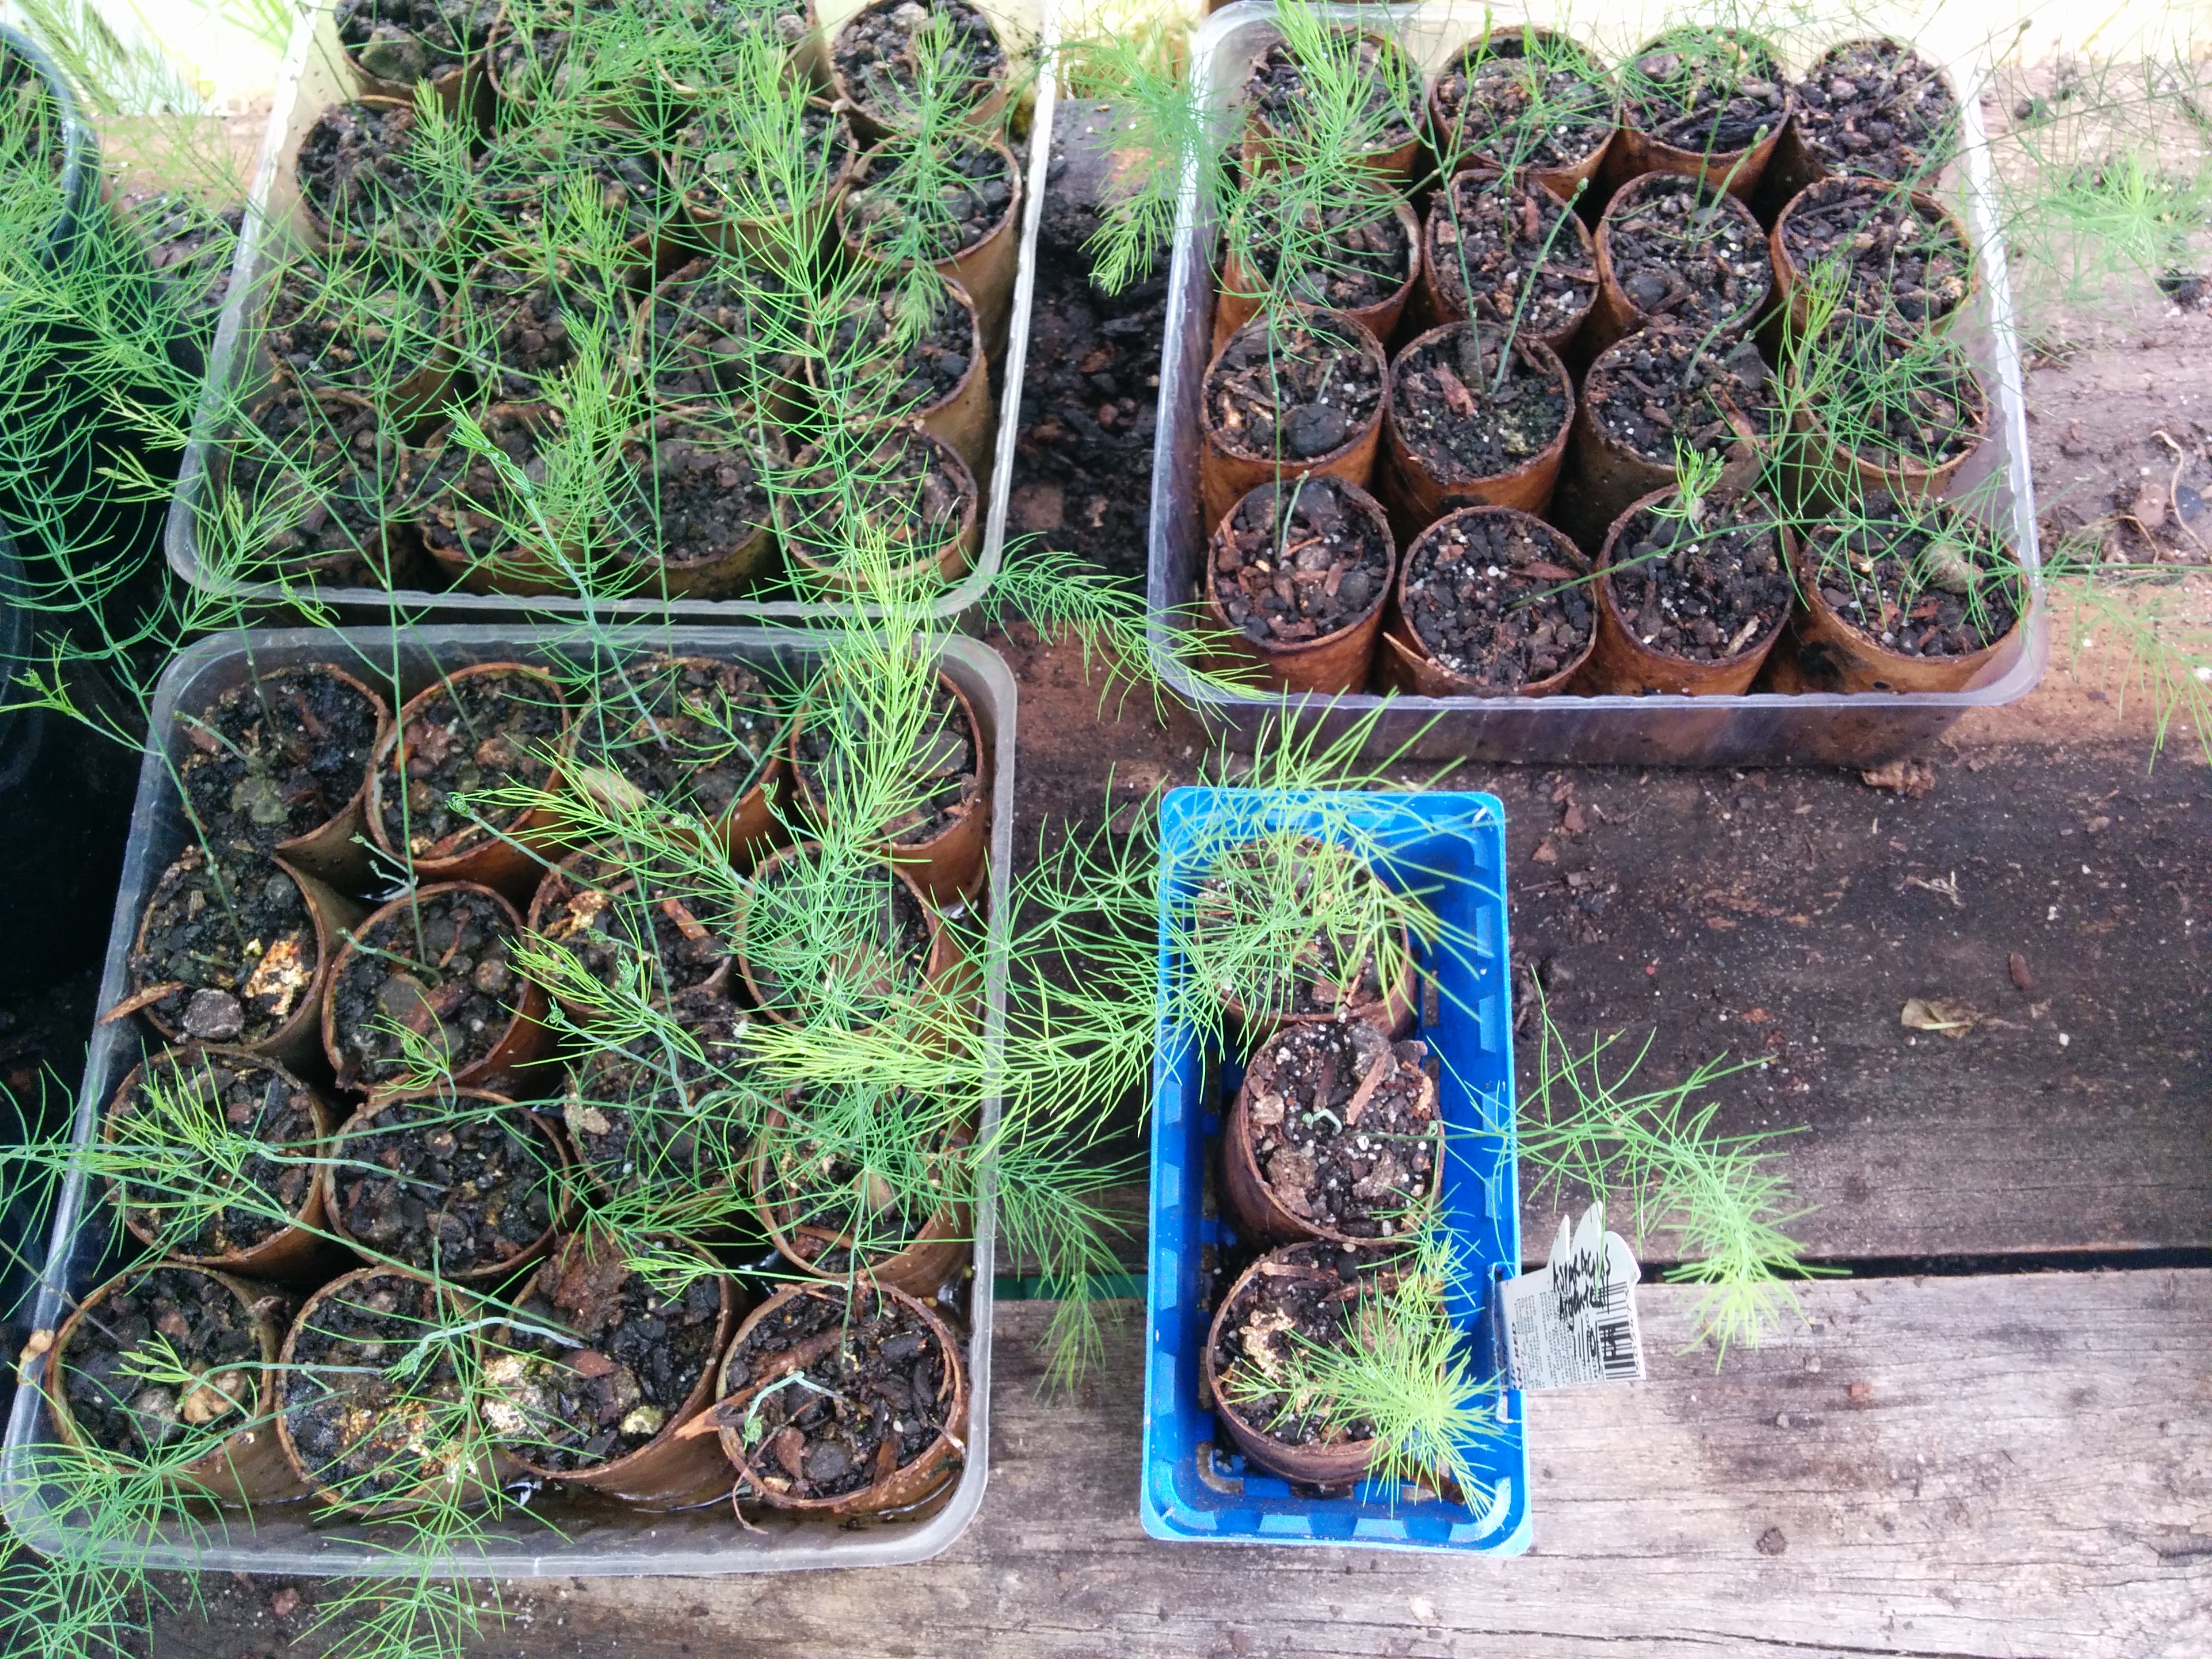
In the meantime, I spent quite a bit of time teasing out the little seedlings into individual grow tubes as you can see from the picture below.
IMG_20151206_170528

Finally, a seriously diseased cherry tree had to be taken out from behind the bed before I could plant my babies out. Thanks to my wonderful son and other family members, I had some help with this and didn’t do anything my doctor wouldn’t approve of!

And then, at last I started planting these precious little seedlings out. It took me a few weeks to get it all done but they’re doing well – all 51 of them!!! At the moment they’re very tightly planted but as the crowns grow I’ll take over the rest of the bed and give them more space to grow. Asparagus is dioecious – it has male and female plants – and I’ll be removing most of the female plants as I work out who’s who. Male plants don’t have to expend resources to produce fruit, so can crop up to three times more than a female plant.

IMG_20160314_094111

Now all I have to do is top dress with more sea grass, manure and spent rabbit straw at the end of this winter and the next. If I’m lucky and careful, I should be able to take one spear from each that spring and by 2018 have my first crop. Asparagus will produce good crops for around 20 years. It will be worth it 😀

What’s your favourite vegetable and how do you like to eat it? Please leave a comment – I love to hear your stories! 


Autumn Love

IMG_20160228_145654

So, it’s March and I keep wondering where summer went. But it also heralds the beginning of autumn, undoubtedly my favourite season in Tasmania.

After the recent sadness of my friend passing away, I channeled my “inner Jeff” and got busy. One of his maxims was “activity with a capital A”, so last weekend I went and visited a dear friend who’s also a fabulous gardener. Her style is inventive and eclectic, mixing old fashioned cottage garden standards with some quite unusual ornamental plants as well as vegetables, fruit and a healthy frog pond in a smallish suburban backyard. Added to that, she’s divided her space into distinctly differently garden “rooms”, perfect for entertaining, reading or just lounging around. It was lovely to hang out with her and enjoy the garden.

Before I left, we picked a shopping bag of elderberries, which I must say, hardly made a dent in her magnificent tree! In Tasmania, the European elderberry (Sambucus nigra) has become something of a weed as it suckers readily and birds spread the seeds very readily. Nevertheless, the elder is prized for wine making and medicinal purposes, both for the delicately scented flowers in spring and the rich, purple/black berries in late summer and early autumn.

I wanted to make a medicinal (and delicious) cordial for winter, and once I got my bag of berries home, I had a great time stripping the fruit and making a mess. The shopping bag yielded over 2 kg of ripe berries! And finally, I recommend wearing old clothes when doing this – elderberries stain everything!

Elderberry and Cinnamon Cordial

Elderberries             Water                 Sugar             Cinnamon quills           Lemons

Use a fork to ease the ripe berries off the stalks. Remove any stems, dead flowers or insects and put the berries into a stock pot. Put enough cold water over to just cover the berries. Bring it to a gentle simmer and cook, covered for 20-30 minutes.

Use a potato masher to thoroughly break the fruit. Strain the liquid off and measure carefully into a clean jam pan or stock pot. (I used a fine mesh nylon strainer but a jelly bag or muslin would do just as well. Don’t be afraid to squeeze the pulp to get all the juice out.)

For every cup of juice add a cup of sugar and ¼ cup of lemon juice (preferably fresh) and for every three cups, add a whole cinnamon quill.

Cover and leave this mixture to steep, preferably overnight.

Next day heat the syrup gently and stir to dissolve the sugar. Pot up into sterilised bottles and process in a water bath to prolong storage.

To use, mix approximately a tablespoon of syrup with cold water and ice or soda water. It’s also great as a hot drink – just boil the kettle and use a tablespoon or so in a cup – incredibly warming and delicious on a cold day and one of my “go to” drinks when I feel a head cold coming on.

IMG_20160229_165037

8 jars of Elderberry Jam and 9 bottles of Elderberry & Cinnamon Syrup from 2.2 kg fruit

My household aren’t huge jam eaters but there was so much pulp, I couldn’t bring myself to waste it! So, extended family and jam-loving friends have all done well from this 🙂 Also, to my delight I discovered that a tablespoon of the jam in a serve of plain homemade yogurt is absolutely delicious!

Elderberry Jam

Elderberry pulp               Sugar                   Fresh Lemon juice and grated zest

Lemon Balm (optional)       Jamsetta (optional)

Measure the pulp and for every four cups, add three cups of sugar and a small bunch of lemon balm in muslin if you have it on hand. Heat gently in a jam pan and bring up to a simmer. Elderberries are low in pectin so if setting point is not reached, use a commercial pectin. Add the zest and juice of two lemons.

Gently boil the jam to a setting point and test.

Pot up into sterilised jam jars and cover immediately.

Elderberry Jam on Sourdough = Yum!

Elderberry Jam on Sourdough = Yum!

I’ve got a busy week coming up but I’ll try and make time to document my experiments with chilli preserves and different cordials in the last few days – it’s been an interesting series of hits and misses 😛

Meanwhile, take care wherever you are on this beautiful blue marble ❤


Remembering Jeff

It’s been a strange week. I finished assignments for the end of another university unit, happily getting back into the swing of music teaching for the year, was generally feeling pretty wired and as a result, hadn’t been sleeping well.

Wednesday morning I woke in the pre-dawn glow, thinking of a friend who has been very ill. I was probably dreaming about Jeff, he’s been popping up a lot lately. Anyway, I found out a couple of hours later that he passed away peacefully in his sleep around the time I was waking.

Jeff Weston was bigger than life itself and the world is a much duller and quieter place for his passing.

He was, like all of us, a mass of contradictions. Cantankerous, incredibly generous, brash, opinionated, thoughtful, loud, gregarious and possessed a truly wicked sense of humour. And he influenced so many people he met in his very long and full life.

There are many stories I could tell, in fact I think it would make a great book! As a very young man he walked the rugged south west of Tasmania, was a teacher, farmer, one of the original members of the United Tasmania Group, which gave rise to the Tasmanian Greens, he travelled overseas, married and had four beautiful and talented sons, he opened his farm and home to travellers and loved (and actively supported) creative arts and especially live music.

Last year, when things started to look bad, Jeff decided to have a “living wake”, so he could see his friends and say goodbye on his own terms. We had passed messages but hadn’t seen each other for a decade and typically, picked up pretty much where we left off. It was one helluva party and it was so good to see him.

But the story I’ve been thinking about most the last few days I wasn’t there to witness, but it touched me very deeply and gives at least an idea of the kindness of the man.

My elderly mother lived in South Australia and had recently moved into a nursing home as she was no longer able to look after herself properly. Jeff was travelling from Tasmania up to a block he leased in the Kimberly, in remote north western Western Australia, where he could spend winter in a more comfortable climate. He knew I was worried about my mum and she about me but with recent personal dramas, I simply couldn’t afford to visit her at that time.

So, without my knowledge, Jeff went out of his way to my home town, tracked down the nursing home, and not only introduced himself to my mother, but found a lovely bunch of home grown autumn roses to give her. He spent most of the afternoon with her and according to my mum, told her many things that he never said to me, but which put my mother’s mind at rest in that very difficult time.

Above all things, he was my friend and was there for me at a time when my life was very hard. For that, I will never forget him.

Vale Jeffrey Dubrelle Weston 1927-2016 ❤

Jeff, at the center of the action

Jeff, at the center of the action July 2015 


Telling the Truth – Why Racism is Alive and Well in Australia

Recently, a writer friend Nikki McWatters (author of One Way or Another and other books) poured out her shock on social media about a blatantly racist attack on a Korean-born couple who run a much-loved local store in the New South Wales central coast town of Terrigal.

Paul and Isobella, after months of vandalism and racist slurs decided to sell the business. They also decided not to press charges against the teenagers who attacked them – something I’m not sure I could do if I were in their shoes.

Things got much worse sadly, with local media writing what Nikki described as “the worst piece of newsprint I have ever had the misfortune of reading”, in effect enabling the racist attack and praising the main attacker for apologising.

You can read Nikki’s full story here, and I recommend it.

It got me thinking, particularly as the attack against Paul and Isobella happened the first day of the Australia Day long weekend at the end of January.

For those of you who follow my blog from overseas, Australia Day is an incredibly divisive event – most people seem to love it or hate it. I confess, I increasingly have problems with it and the sentiments some of my fellow Australians spout each year.

Essentially, it commemorates the landing and raising of the Union Jack at Sydney Cove by Captain Arthur Phillip in 1788, on a land that (to colonial English eyes) appeared barren and unoccupied. They didn’t consider the local inhabitants, who had been living there for some 40,000 years, counted or mattered. The English even called it Terra Nullius. And the irony that Captain Phillip was leading a fleet of eleven ships, full of convicts is not lost on me or many others.

Some of my aboriginal friends are pretty ambivalent about it, while others find it incredibly difficult and call it Invasion Day . On the other hand, many of my immigrant friends see it as a celebration of their new country – and good on them. As a white Australian, the third generation of free immigrants (read boat people!), I’d like to see the date moved, perhaps to January 1st to celebrate federation.

The thing is, we all need to have a serious conversation about how we treat each other, irrespective of where we originally came from, the colour of our skin and what god we do or don’t believe in. I’ve noticed especially the last few years, really insidious racist views paraded on television, print and especially online media. And it makes me fearful.

I’ve been abused on social media for not celebrating what I see as a colonial takeover of a country. It’s my choice not to do so but I don’t want to stop anyone else from partying. There’s room for different views but it needs to be offered with respect, not absolutes – and never with violence.

Australia’s a big country – my hope is we can all be big enough to live in it peacefully together. To do that, I think we have to be like Paul and Isobella – gracious and forgiving. And like Nikki – brave enough to call out racism when we see it.


Chinese New Year – Spicy Plum Sauce

It’s been a while since I’ve posted anything, it’s been quite chaotic! As we glide into the back end of summer here in Tasmania, I’ve been busy planning beds for winter vegetables, planting for autumn harvest, cropping the summer bounty, making feta cheese, dispatching the most recent rabbits (filling the freezer again!) and making sure our second doe (the beautiful Bella) is pregnant with another litter for autumn eating. My cupboards are full of cordials, flavoured oils, vinegars, dried fruit, and even home made Furikake, thanks to a brilliant crop of green shiso in the greenhouse this year. (Leave a comment if any of you are interested in a recipe for this).

Since the corner of shame has been revived, ready for a beehive later this year, the plum tree has loved all the extra attention and yielded a decent crop. As I write there’s three huge trays of plums in the dehydrator becoming prunes for use over winter and a couple more big bowls to do things with. Chinese New Year is coming up on Monday so I’ve decided to make Spicy Plum Sauce with 2 kilos of fruit.

I only make this every couple of years as my household aren’t big sauce or chutney fans but it’s a wonderful addition to stir fries, a marinade for barbecue chicken or rabbit and is fabulous as a dipping sauce with spring rolls, dumplings or just about anything! Also, we are all chilli lovers, so if you’re not as keen on the hot notes, adjust the number of chillies, remove the seeds, try a milder variety or even omit them altogether. Some of my treasured Habanero chillies got sunburn in the greenhouse while still green a couple of days ago, and this seemed an ideal use for them. I personally feel it’s important to make any recipe your own, rather than following someone else’s to to absolute letter. So this is my take on Spicy Plum Sauce this year – go and make it yours 🙂

IMG_20160206_172112

Spicy Plum Sauce

Ingredients:

2kg plums     1/2 cup soy sauce      1/2 cup Chinese cooking sherry   2 cups cider vinegar or white wine    1/2 cup brown sugar    1 red onion, finely diced    1 tab grated ginger      3-4 cloves garlic      6 habanero chillies, finely chopped

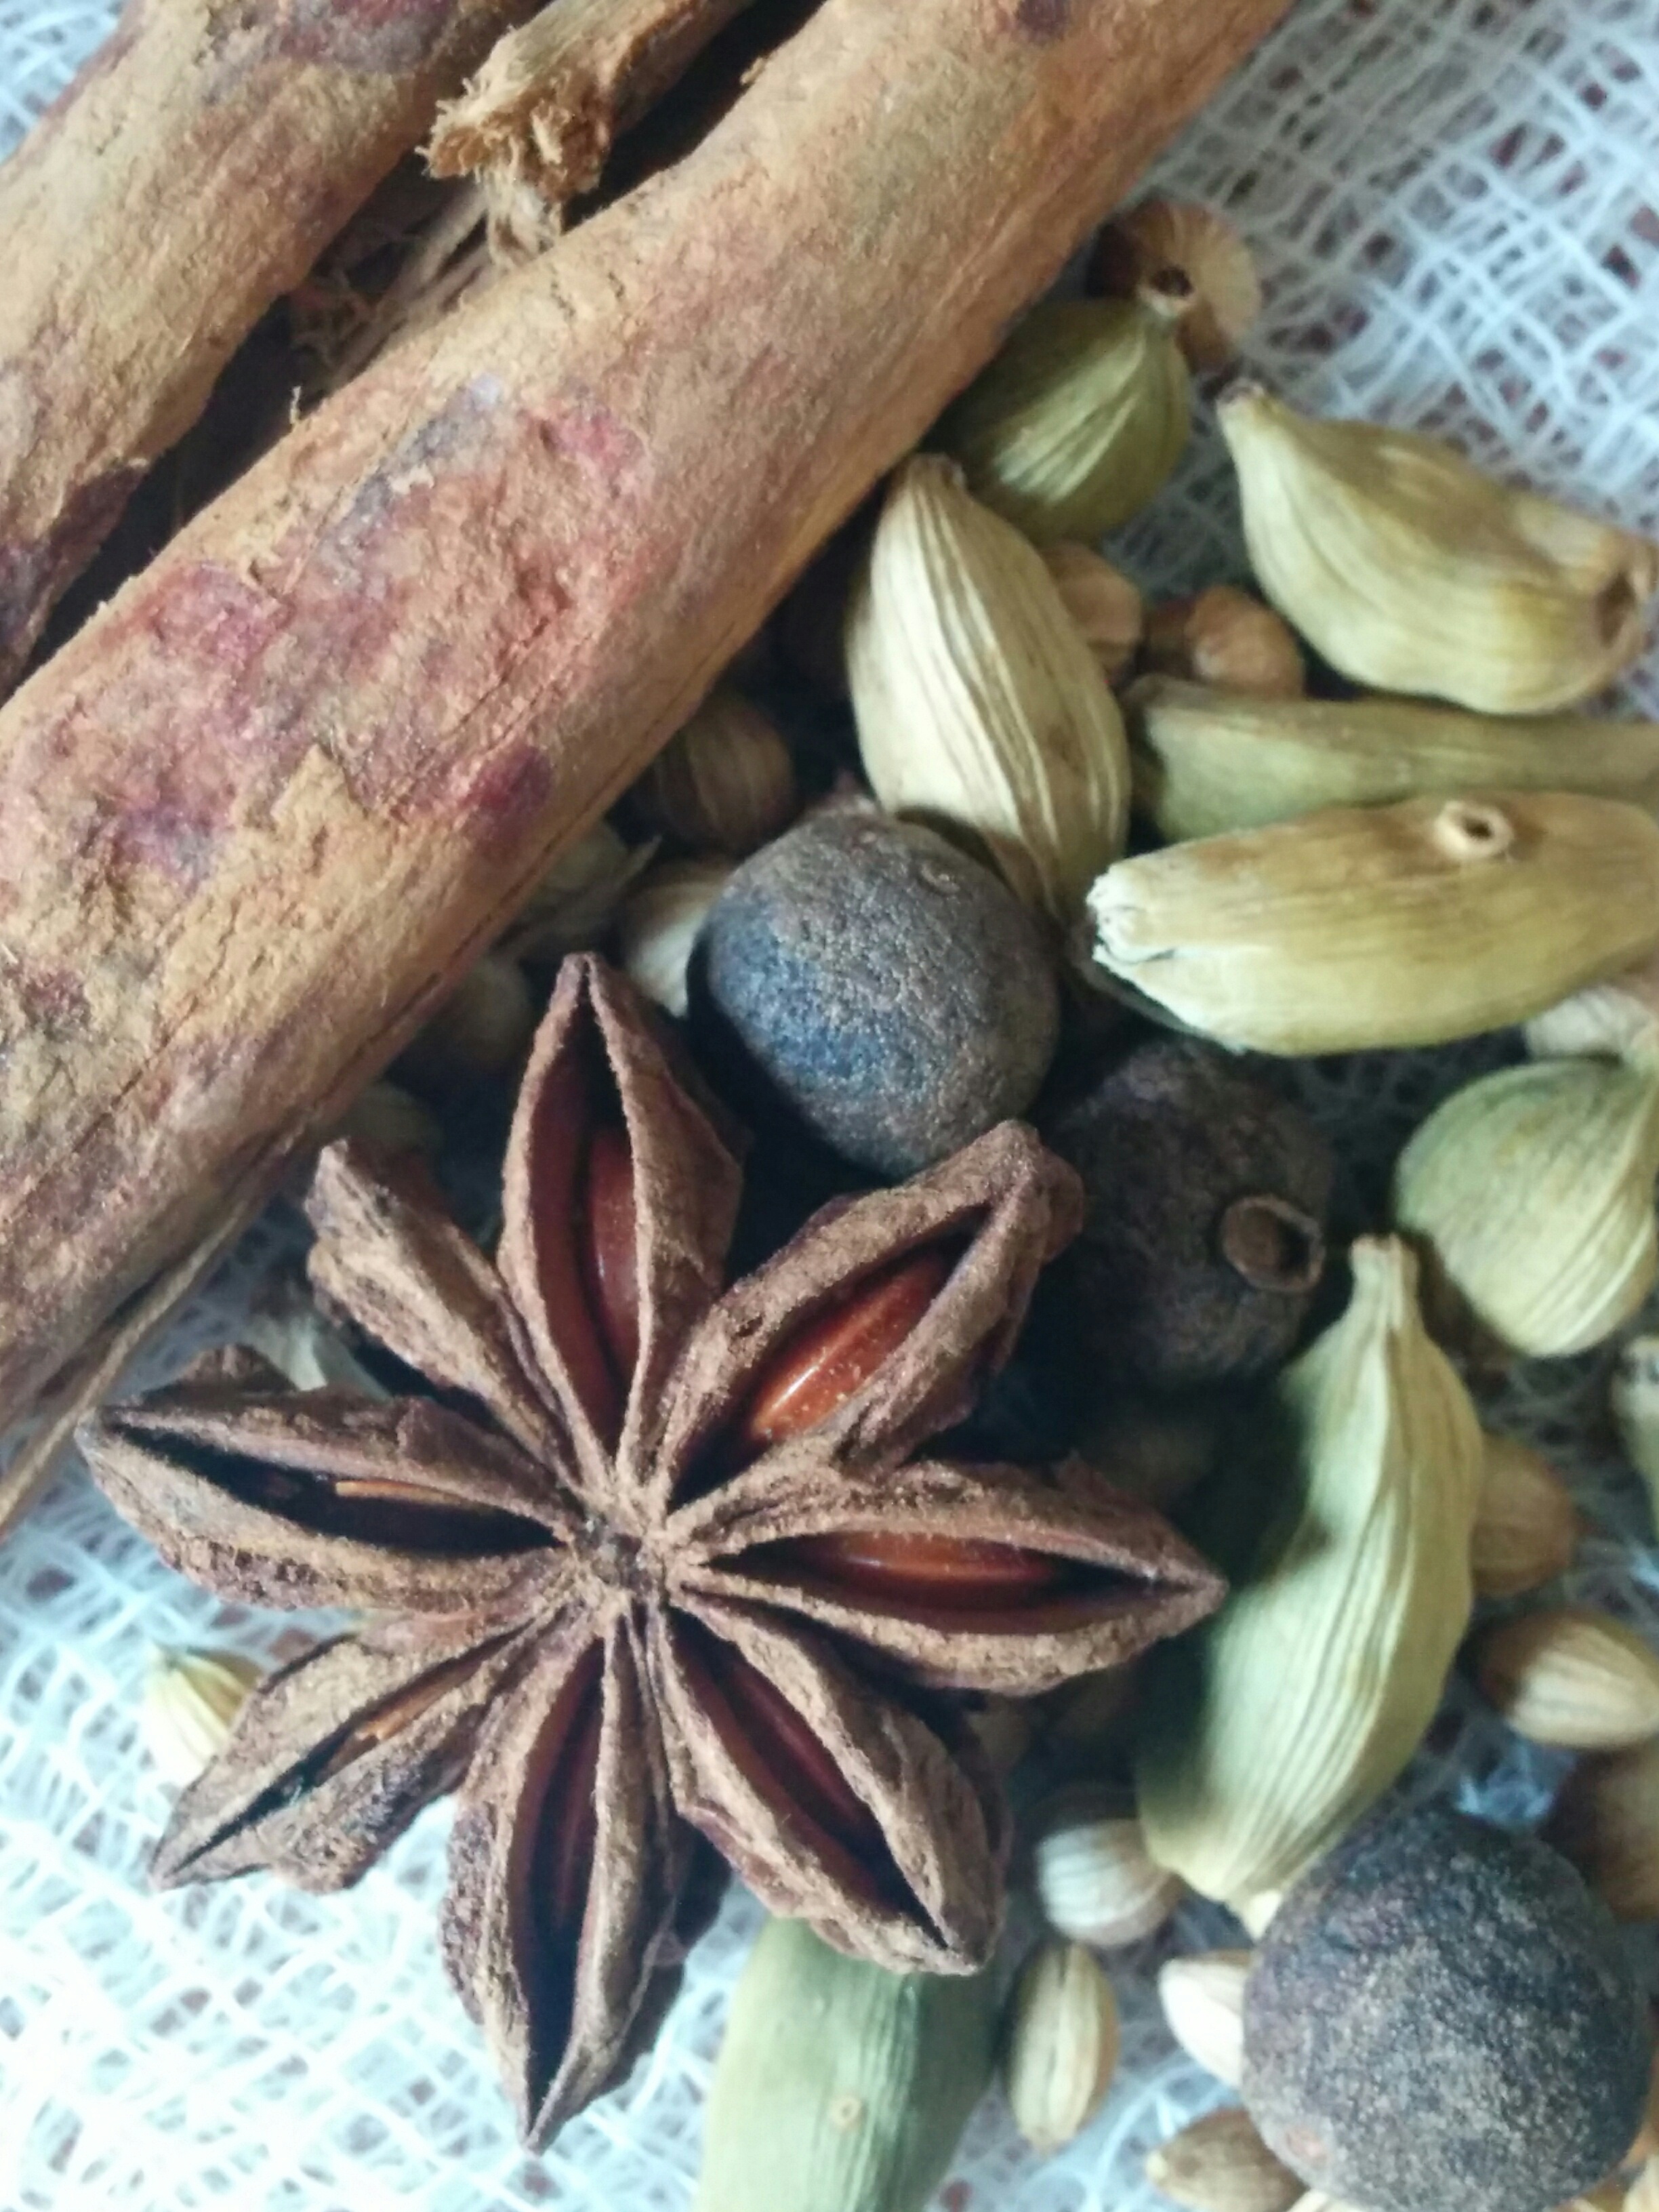
In a small square of muslin:  1 cinnamon quill    1 star anise     2-3 allspice berries   1 tsp cardamon pods   1 tsp coriander seed

Method:

Tie the spices in the muslin and hang off the handle of a stockpot. Halve and pit the plums, add them to the stockpot with the sherry, onion, ginger, garlic and vinegar or white wine. (If you like the sauce sharp, use vinegar).

Simmer it all together, stirring occasionally. Once the plums are starting to soften add the chopped chillies. Cook until the plums are falling apart. Allow to cool (I left mine overnight) and remove the muslin bag. If you like your sauce smooth, pour into a blender jar and blend thoroughly. If you like your sauce chunkier, use a potato masher or the back of a wooden spoon.

Reheat and pot up into sterilised glass bottles (or jars if it’s chunky) and process in a water bath for extended shelf life.

IMG_20160206_155746

Meanwhile, have a wonderful Chinese New Year wherever you are 😀

Boxes and Bounty

As a gardening experiment last month, I made a few wicking boxes for my front balcony. It faces east, across the River Derwent and while the view is lovely, it gets all the morning sun and can be quite windy. This time of year, we can’t walk on the concrete in bare feet before 2pm! I’ve grown salad greens in containers out there since I moved in, over six years ago but it’s a lot of work and difficult keeping water up to them with baking sun and drying winds.

IMG_20151215_102432I started out buying two food grade plastic crates from my local hardware store (I think they were 23 litre size), the kind that are often used as recycling boxes. All other materials were either recycled or things I had on hand.

Old hose was spiked with holes and laid in the bottom, with the refill end slotted into a length of larger diameter poly pipe to make it easier to pour water into. It looks pretty ugly but it works!

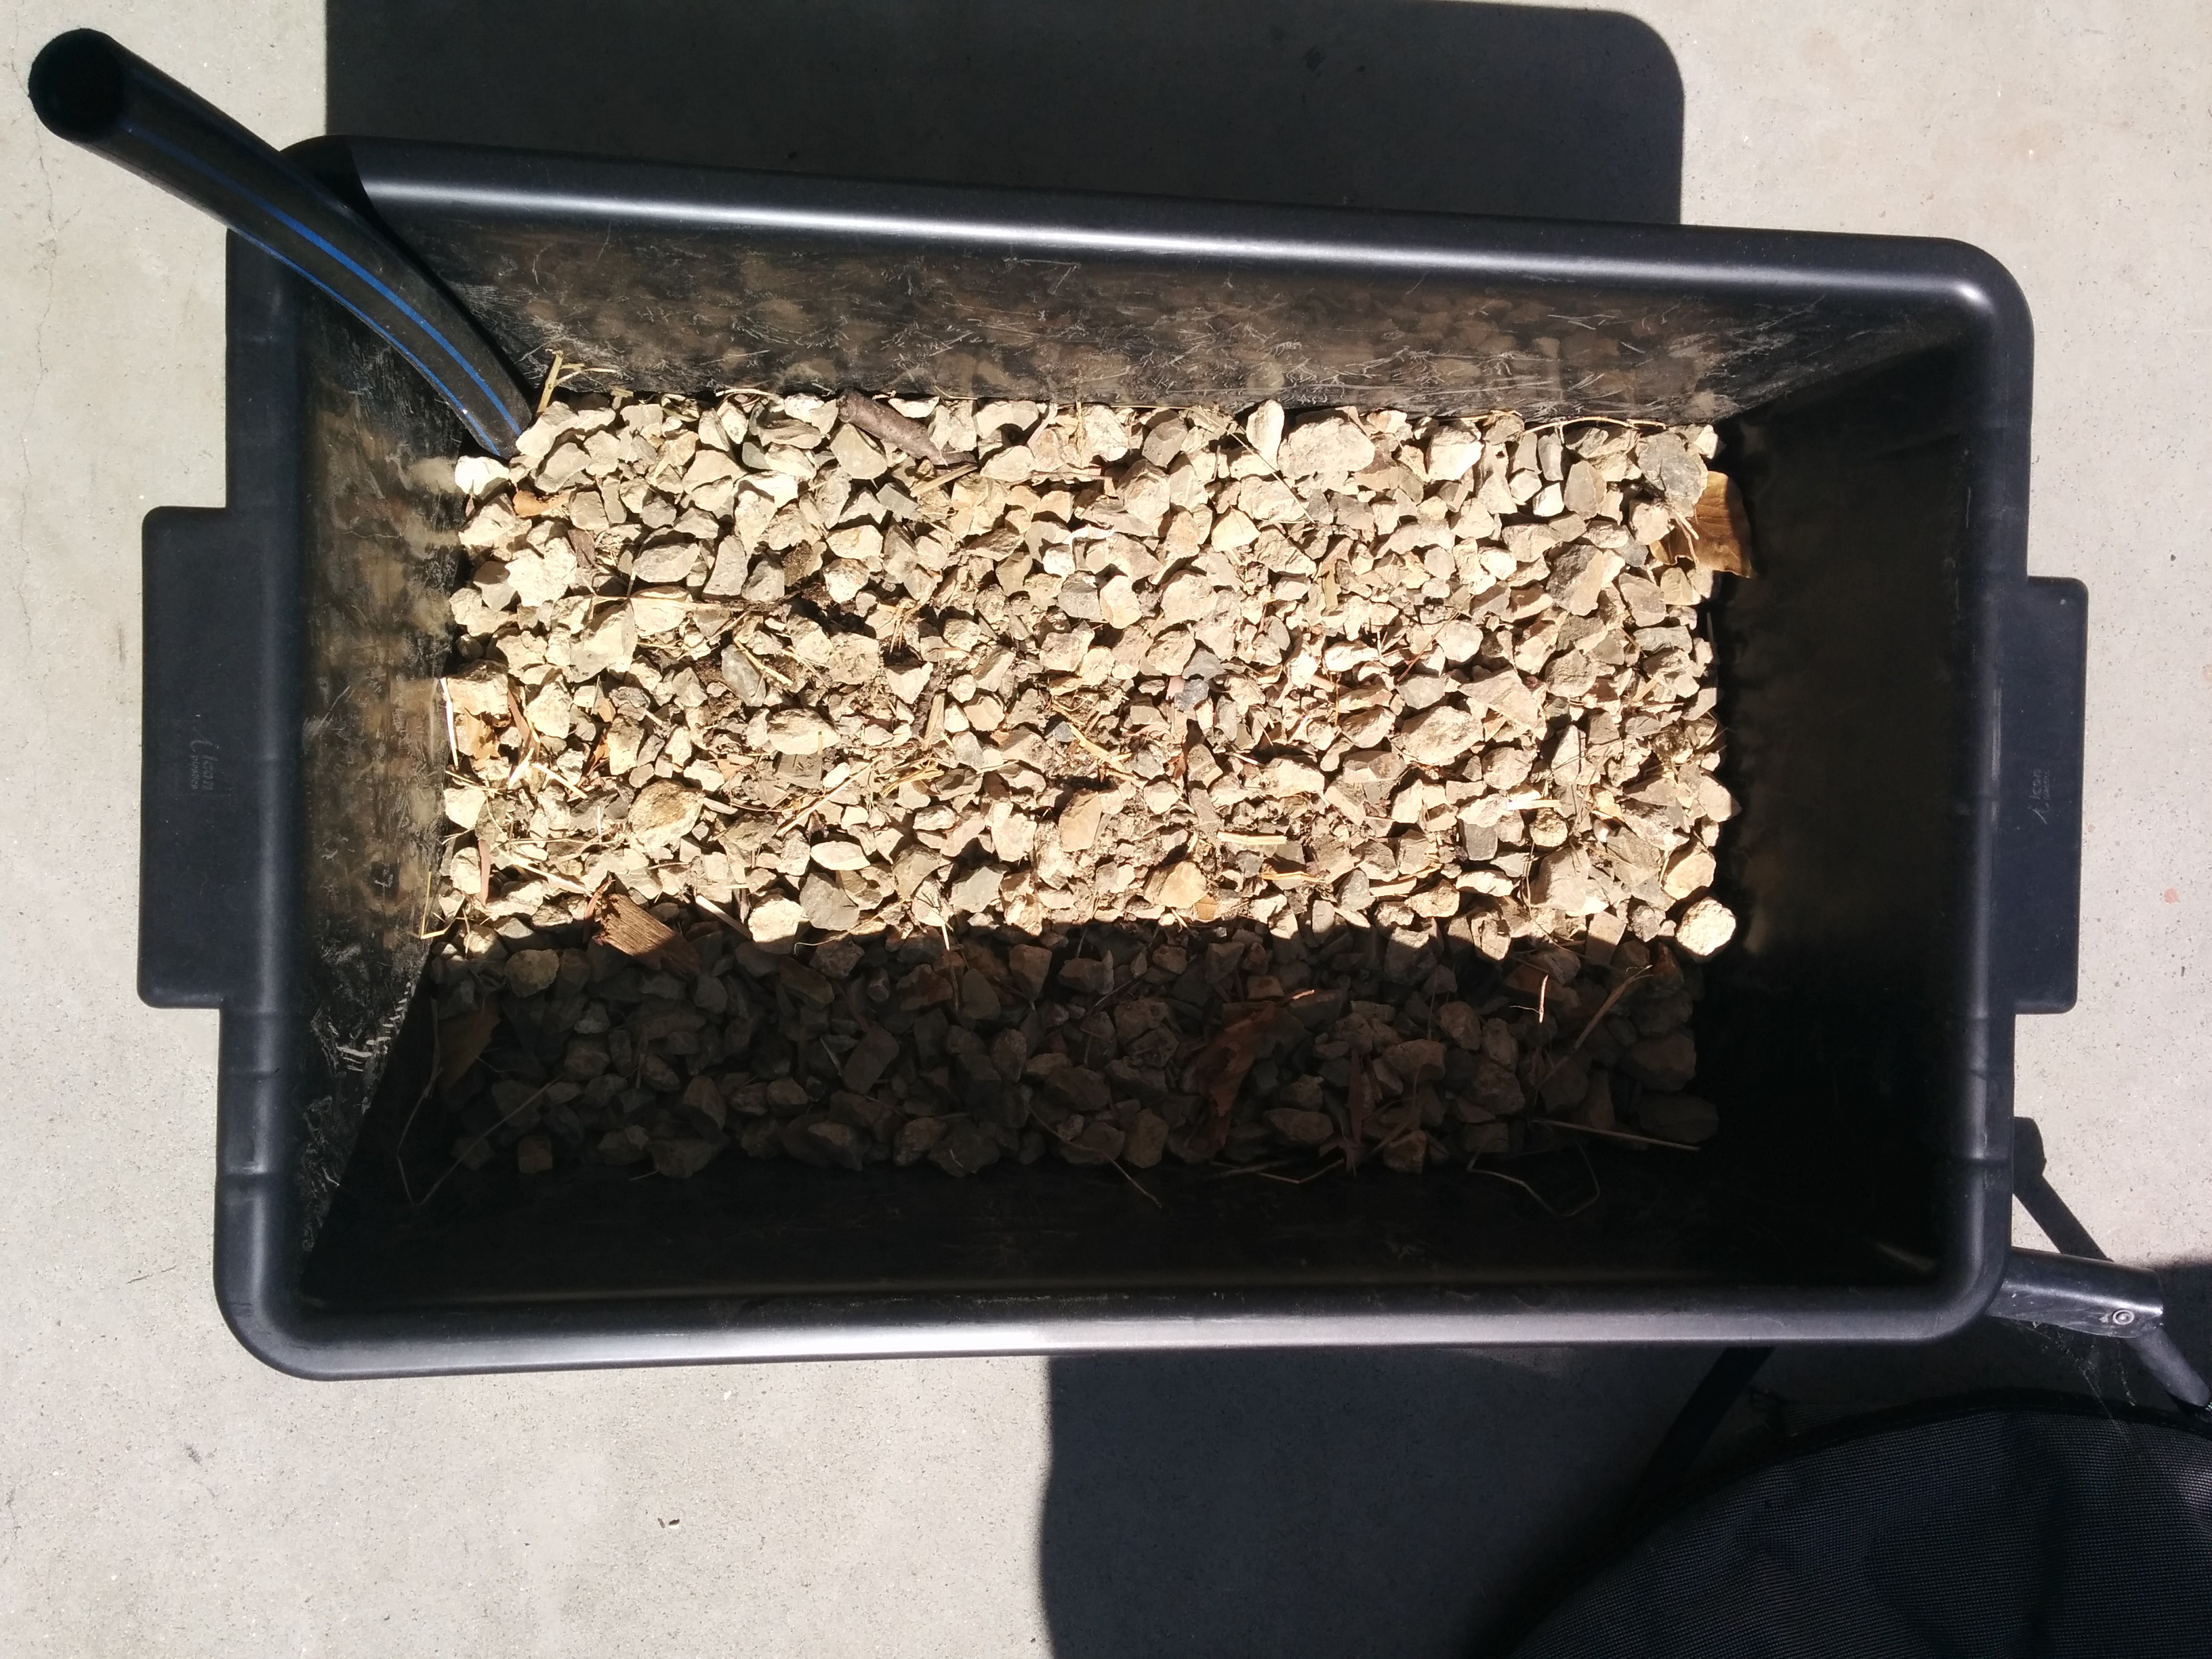
Next, I put a layer of gravel over the hose, making sure the refill end IMG_20151215_102947didn’t get buried as you can see in the photo. By the way, this gravel wouldn’t be my ideal but it was sitting in a pile begging to be used up and there was just enough to do all the boxes 🙂

At the top of the gravel, I carefully drilled a small overflow hole diagonally opposite the refill hose. This means water won’t build up and start getting smelly and the plants won’t rot in overly wet soil.

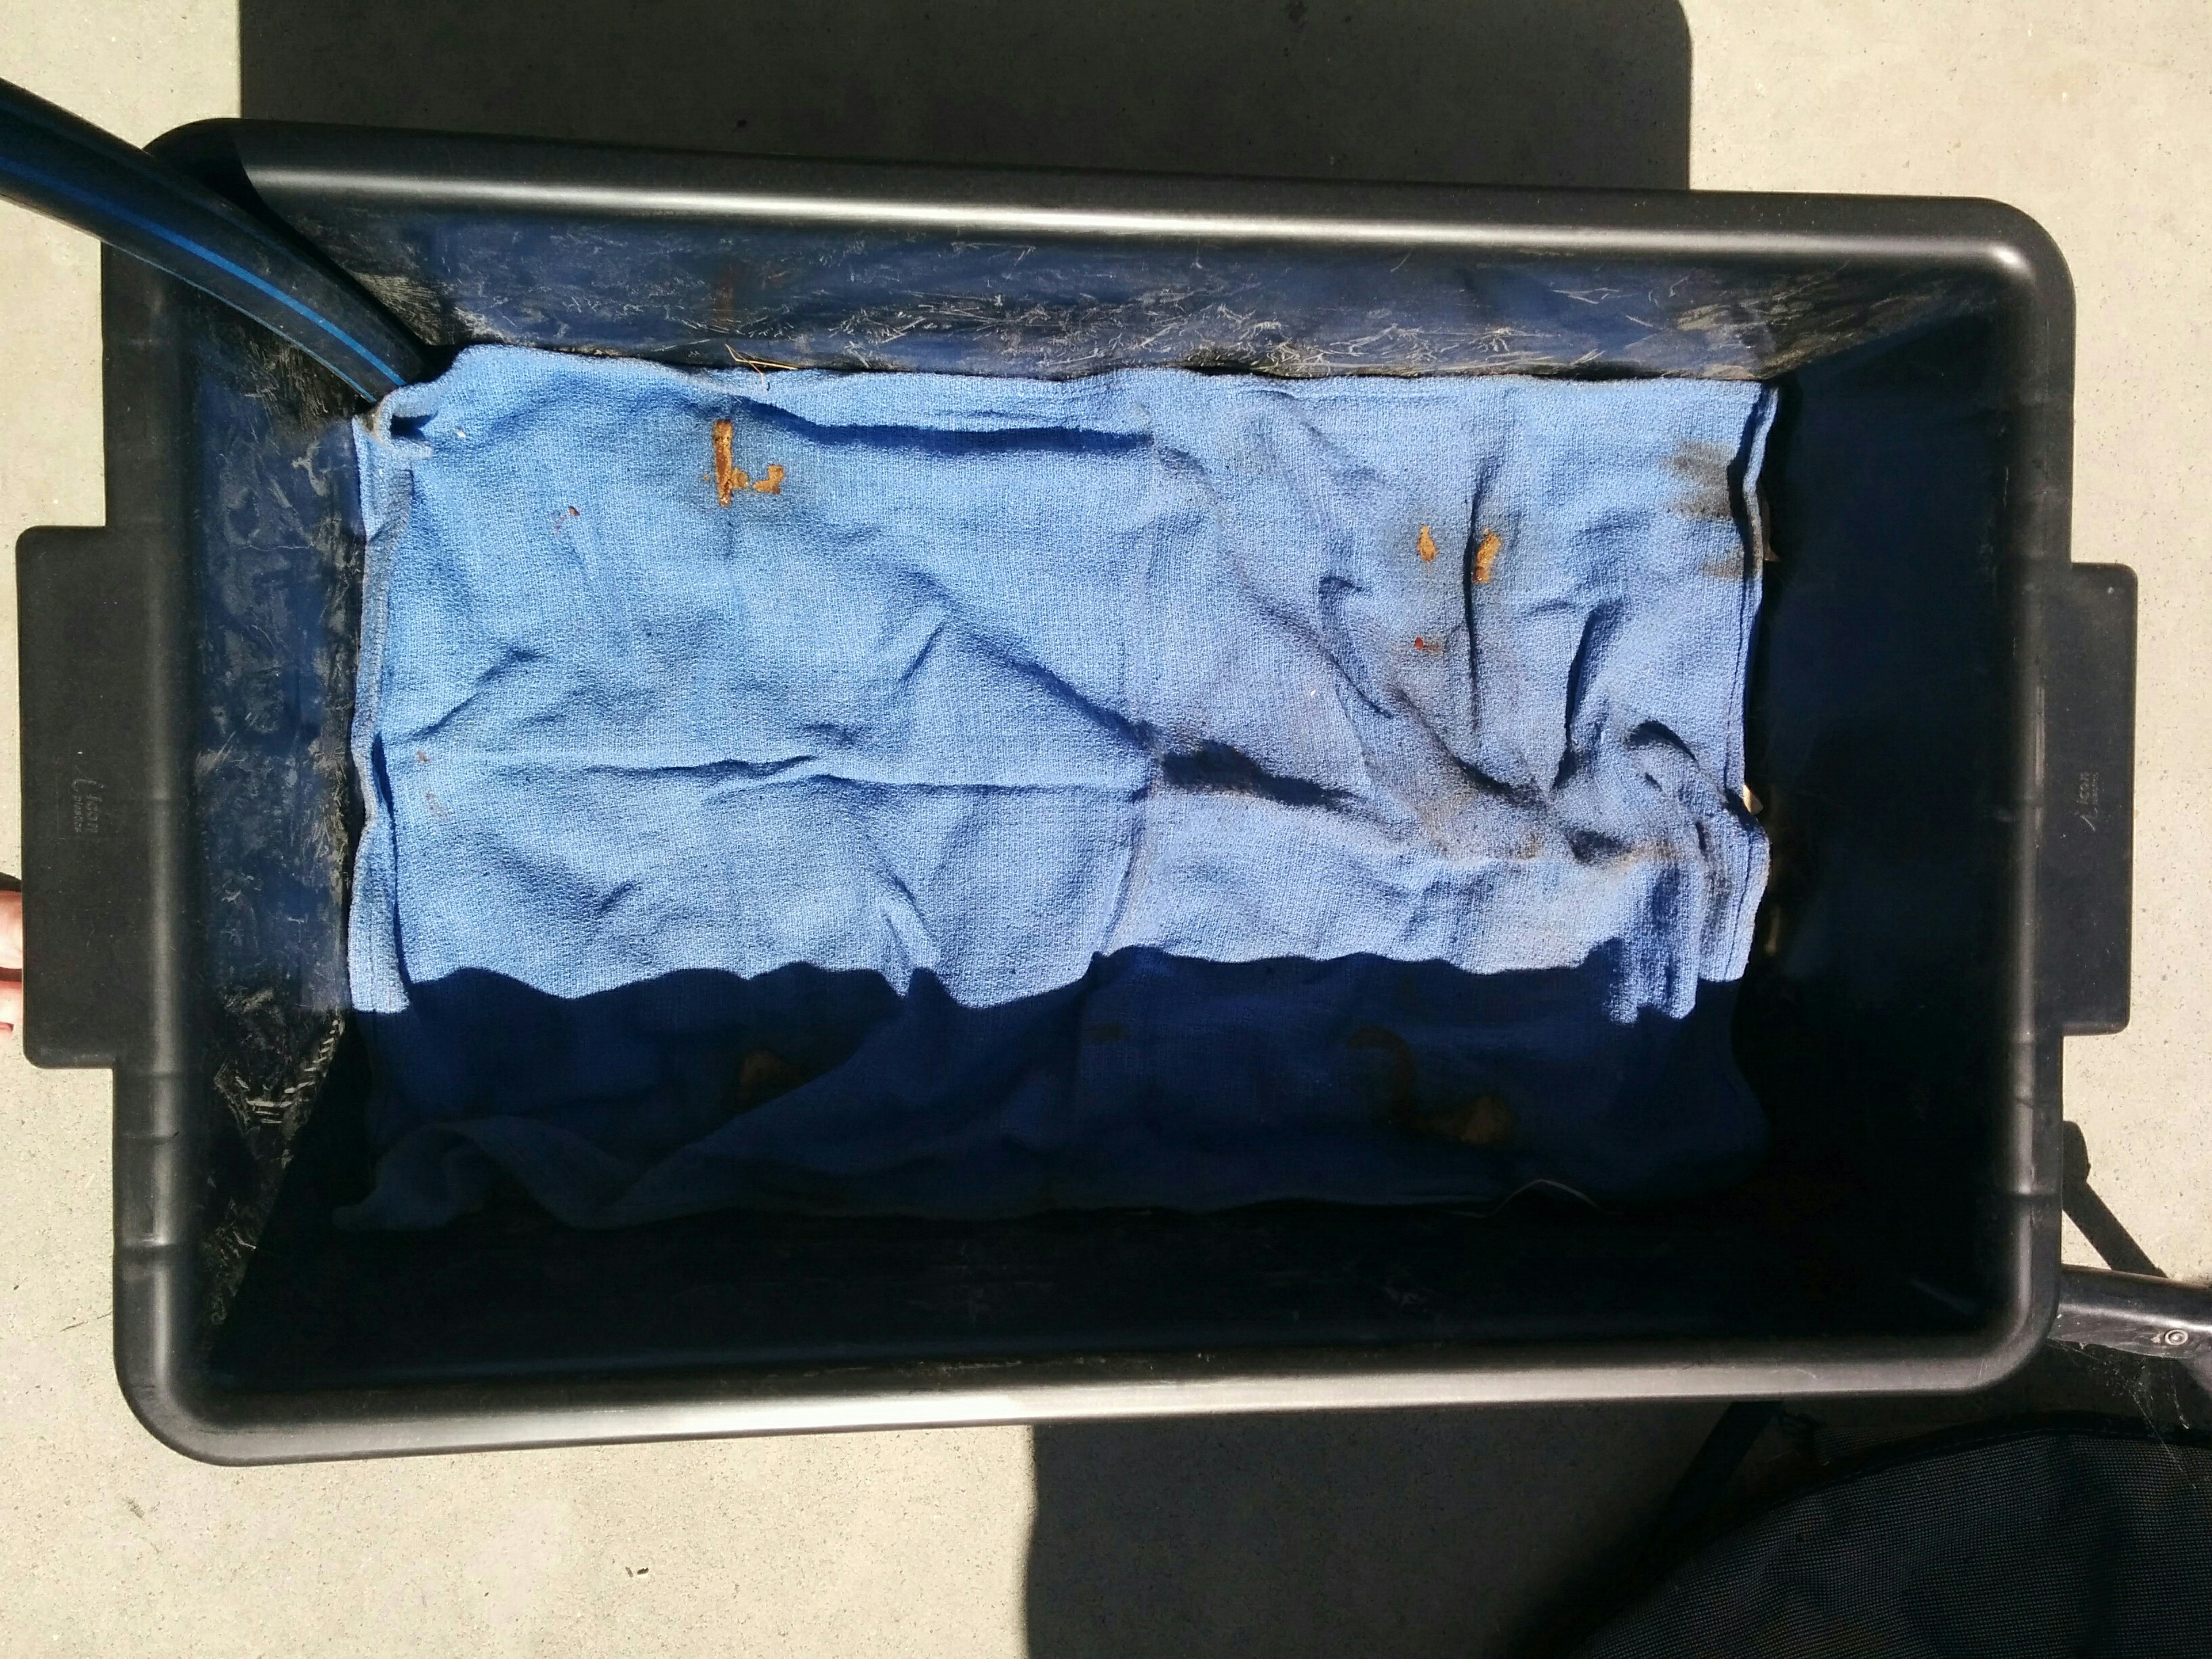
IMG_20151215_103048Next, I covered the gravel with some old tea towels that weren’t really wonderful for wiping dishes anymore. They allow the water to pass through but not the soil. Eventually, they will rot away and I’ll have to replace them but it was good to recycle them. Old shade cloth would be ideal if you have it.

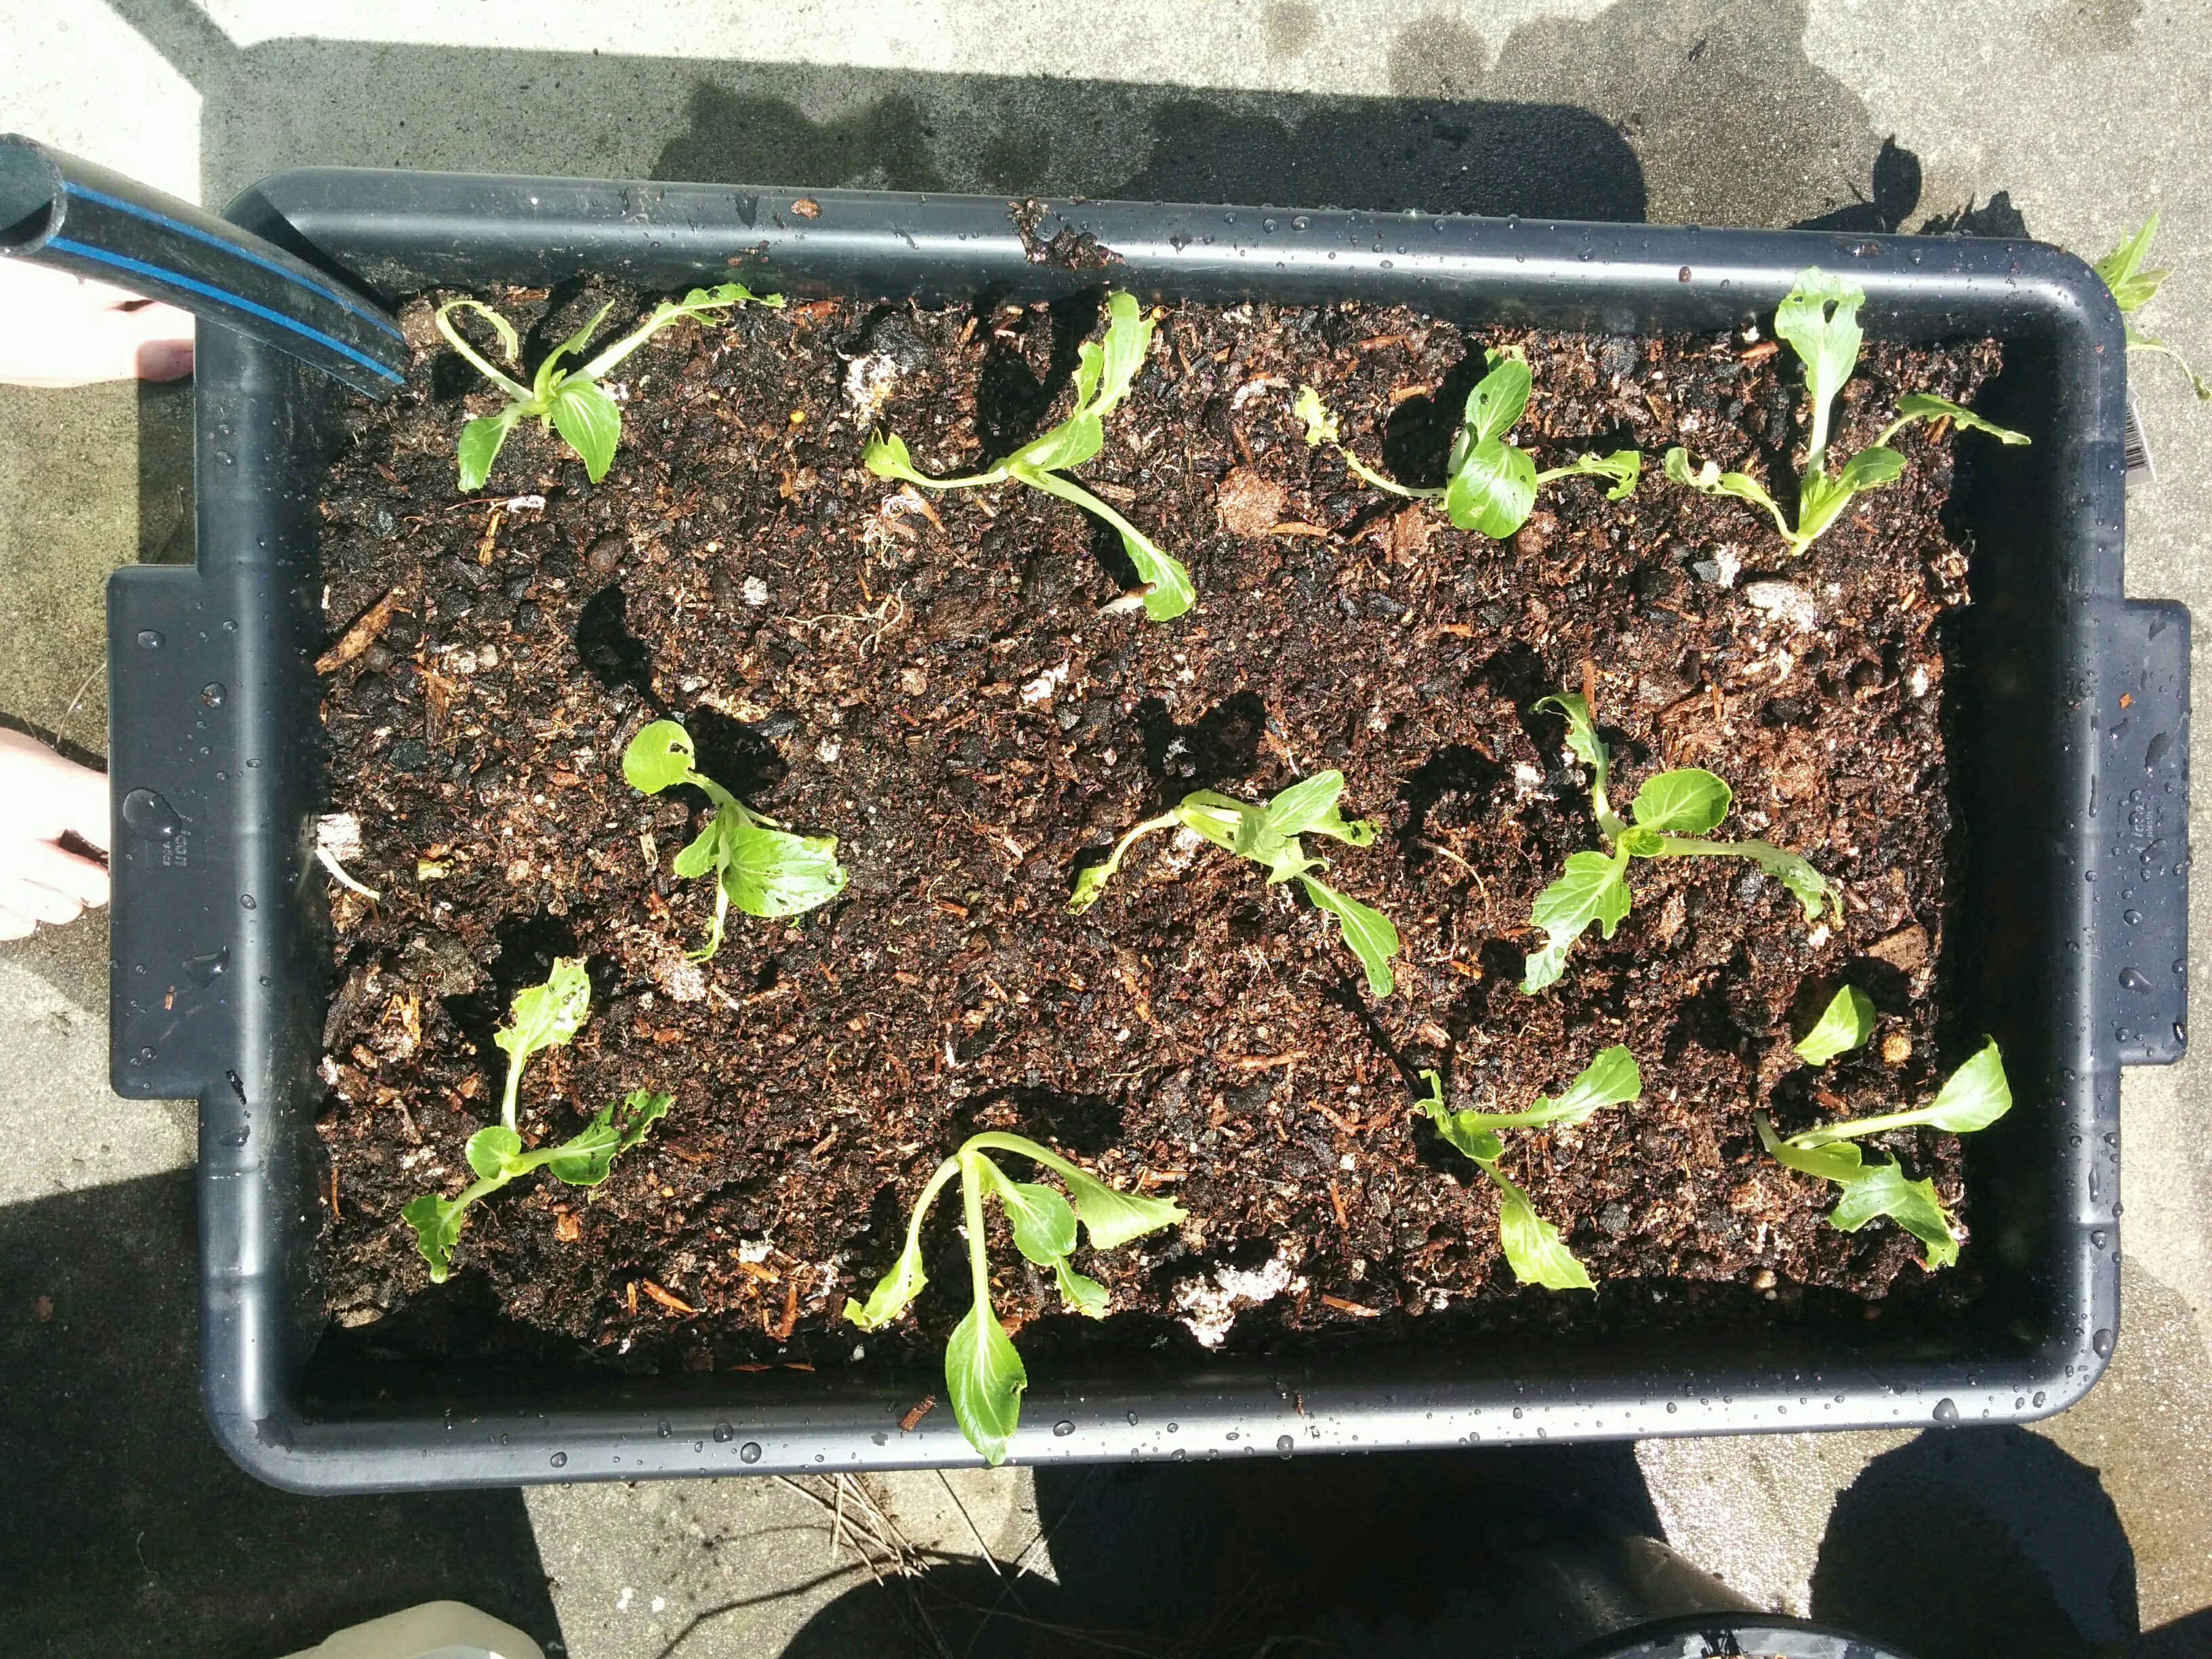
At this stage, I put a thin layer of good quality potting mix over the top, and I recommend not cutting any corners with this. The better the soil, the better the plants! I mixed well rotted sheep poo and plenty of mushroom compost in large bucket and worked this through layers of potting mix until the box was fairly full. The result was a friable, rich mix, perfect for quick growing summer salad veggies.

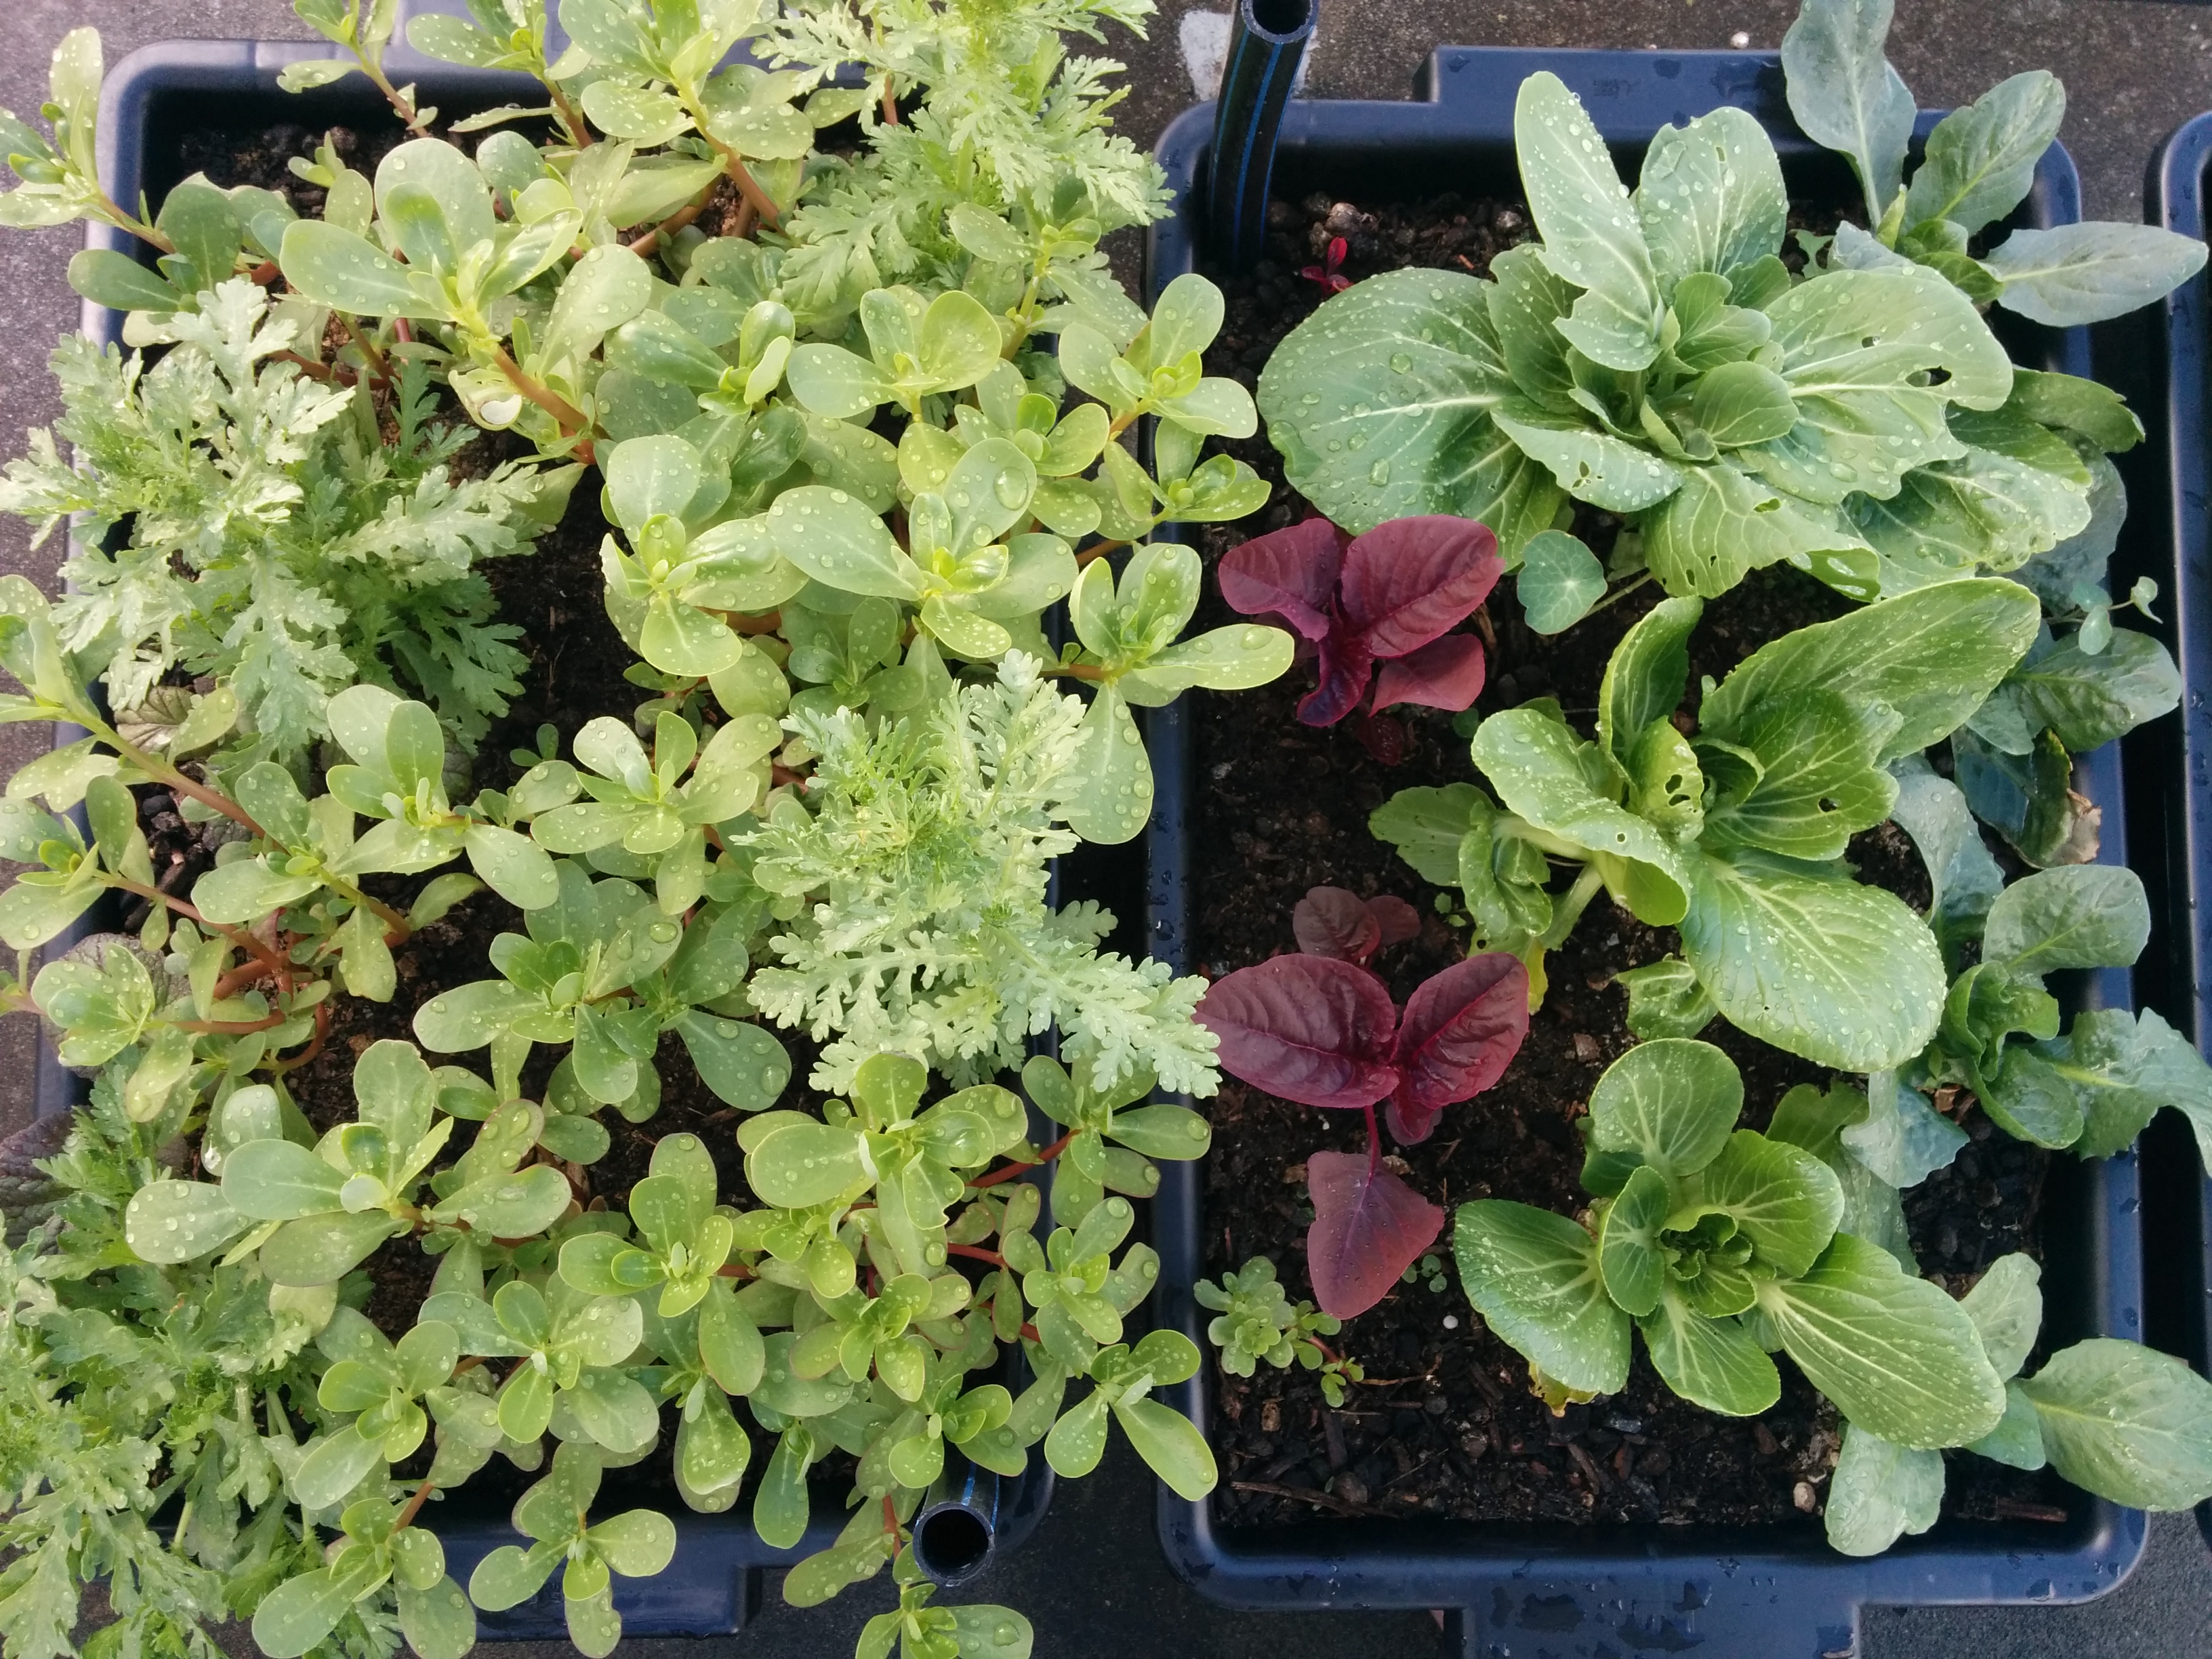
I made sure the soil was damp before planting out the first seedlings and watered them overhead for the first couple of days, until the water reservoir started to do its thing. I ended up doing eight boxes in total and crammed in fast growing Pak Choi, Portulaca, Red Amaranth, Grumolo Verde Chicory, Garland Chrysanthemum and even Silverbeet. The results have been fabulous

IMG_20151215_110116

The pic above was taken 15th December 2015 and the pic below a month later, the 14th January 2016. The results have been incredibly successful and I’m only having to refill the reservoir about once every three or four days instead of overhead watering morning and night. Despite the fact salad is my favourite meal of the day, I can barely keep up with the amount of food these boxes are producing!

IMG_20160114_173535

Do you grow vegetables in containers? What are your top tips? Please leave a comment below – I love to hear from you all! 

Smoke and Lemons

I’ve had a stomach bug since the weekend and today was the first time I felt safe to move more than a few steps away from the bathroom. I haven’t done any gardening since Saturday afternoon and had to cancel a gig on Sunday, which I hate doing. But I’m definitely on the mend, as I got into “making mode” this afternoon. Most of Tasmania has been wreathed in smoke for the last few days and that in itself makes me a little restless.

As I write, it’s hazy in Hobart and there’s a distinct smell of bush smoke through the open window. There are at present, approximately 80 fires burning across Tasmania, mostly started by lightning strikes last week on the less populated west coast. Nevertheless, this afternoon, it spread up into the north west, putting property, livestock and potentially lives at risk. My thoughts and best wishes go out, not only to friends who live in the areas affected, but also to state fire services, who are pretty much at their limit right now.

Yesterday, my lovely neighbour traded a box of lemons from her boss for a dozen of my eggs – I love bartering! After moping around the house yesterday, I decided to get creating some healthy lemon-based goodies that wouldn’t be too harsh on my tender tummy right now and pickles that will be ready in the months ahead.

First, I decided I needed the sweet, comforting tang of old fashioned Lemon Curd, something I haven’t made in years. This versatile cream doesn’t keep very long but I understand it freezes quite well so I’ve got half (about 250 ml) in a plastic container, ready to freeze. The recipe is very simple.


IMG_20160119_161333

Old Fashioned Lemon Curd (Makes approximately 500 ml)

Ingredients:

zest of 4 lemons    3/4 cup lemon juice     3/4 cup white sugar   4 fresh eggs     125g butter, cubed

Method:

In a heat proof bowl, whisk the eggs and sugar over a simmering pot of water. When the sugar is dissolved, add the lemon zest, juice and continue whisking until the mixture becomes creamy. Add the cubed butter and continue mixing until it’s thoroughly absorbed.

This tangy delight is wonderful as a base for lemon mousse, spread over a pie base for simple lemon tart, mixed with whipped cream and a little home made yogurt for Lemon Fool or just used as spread on toast. Tonight, I’m having it on pancakes as a treat.

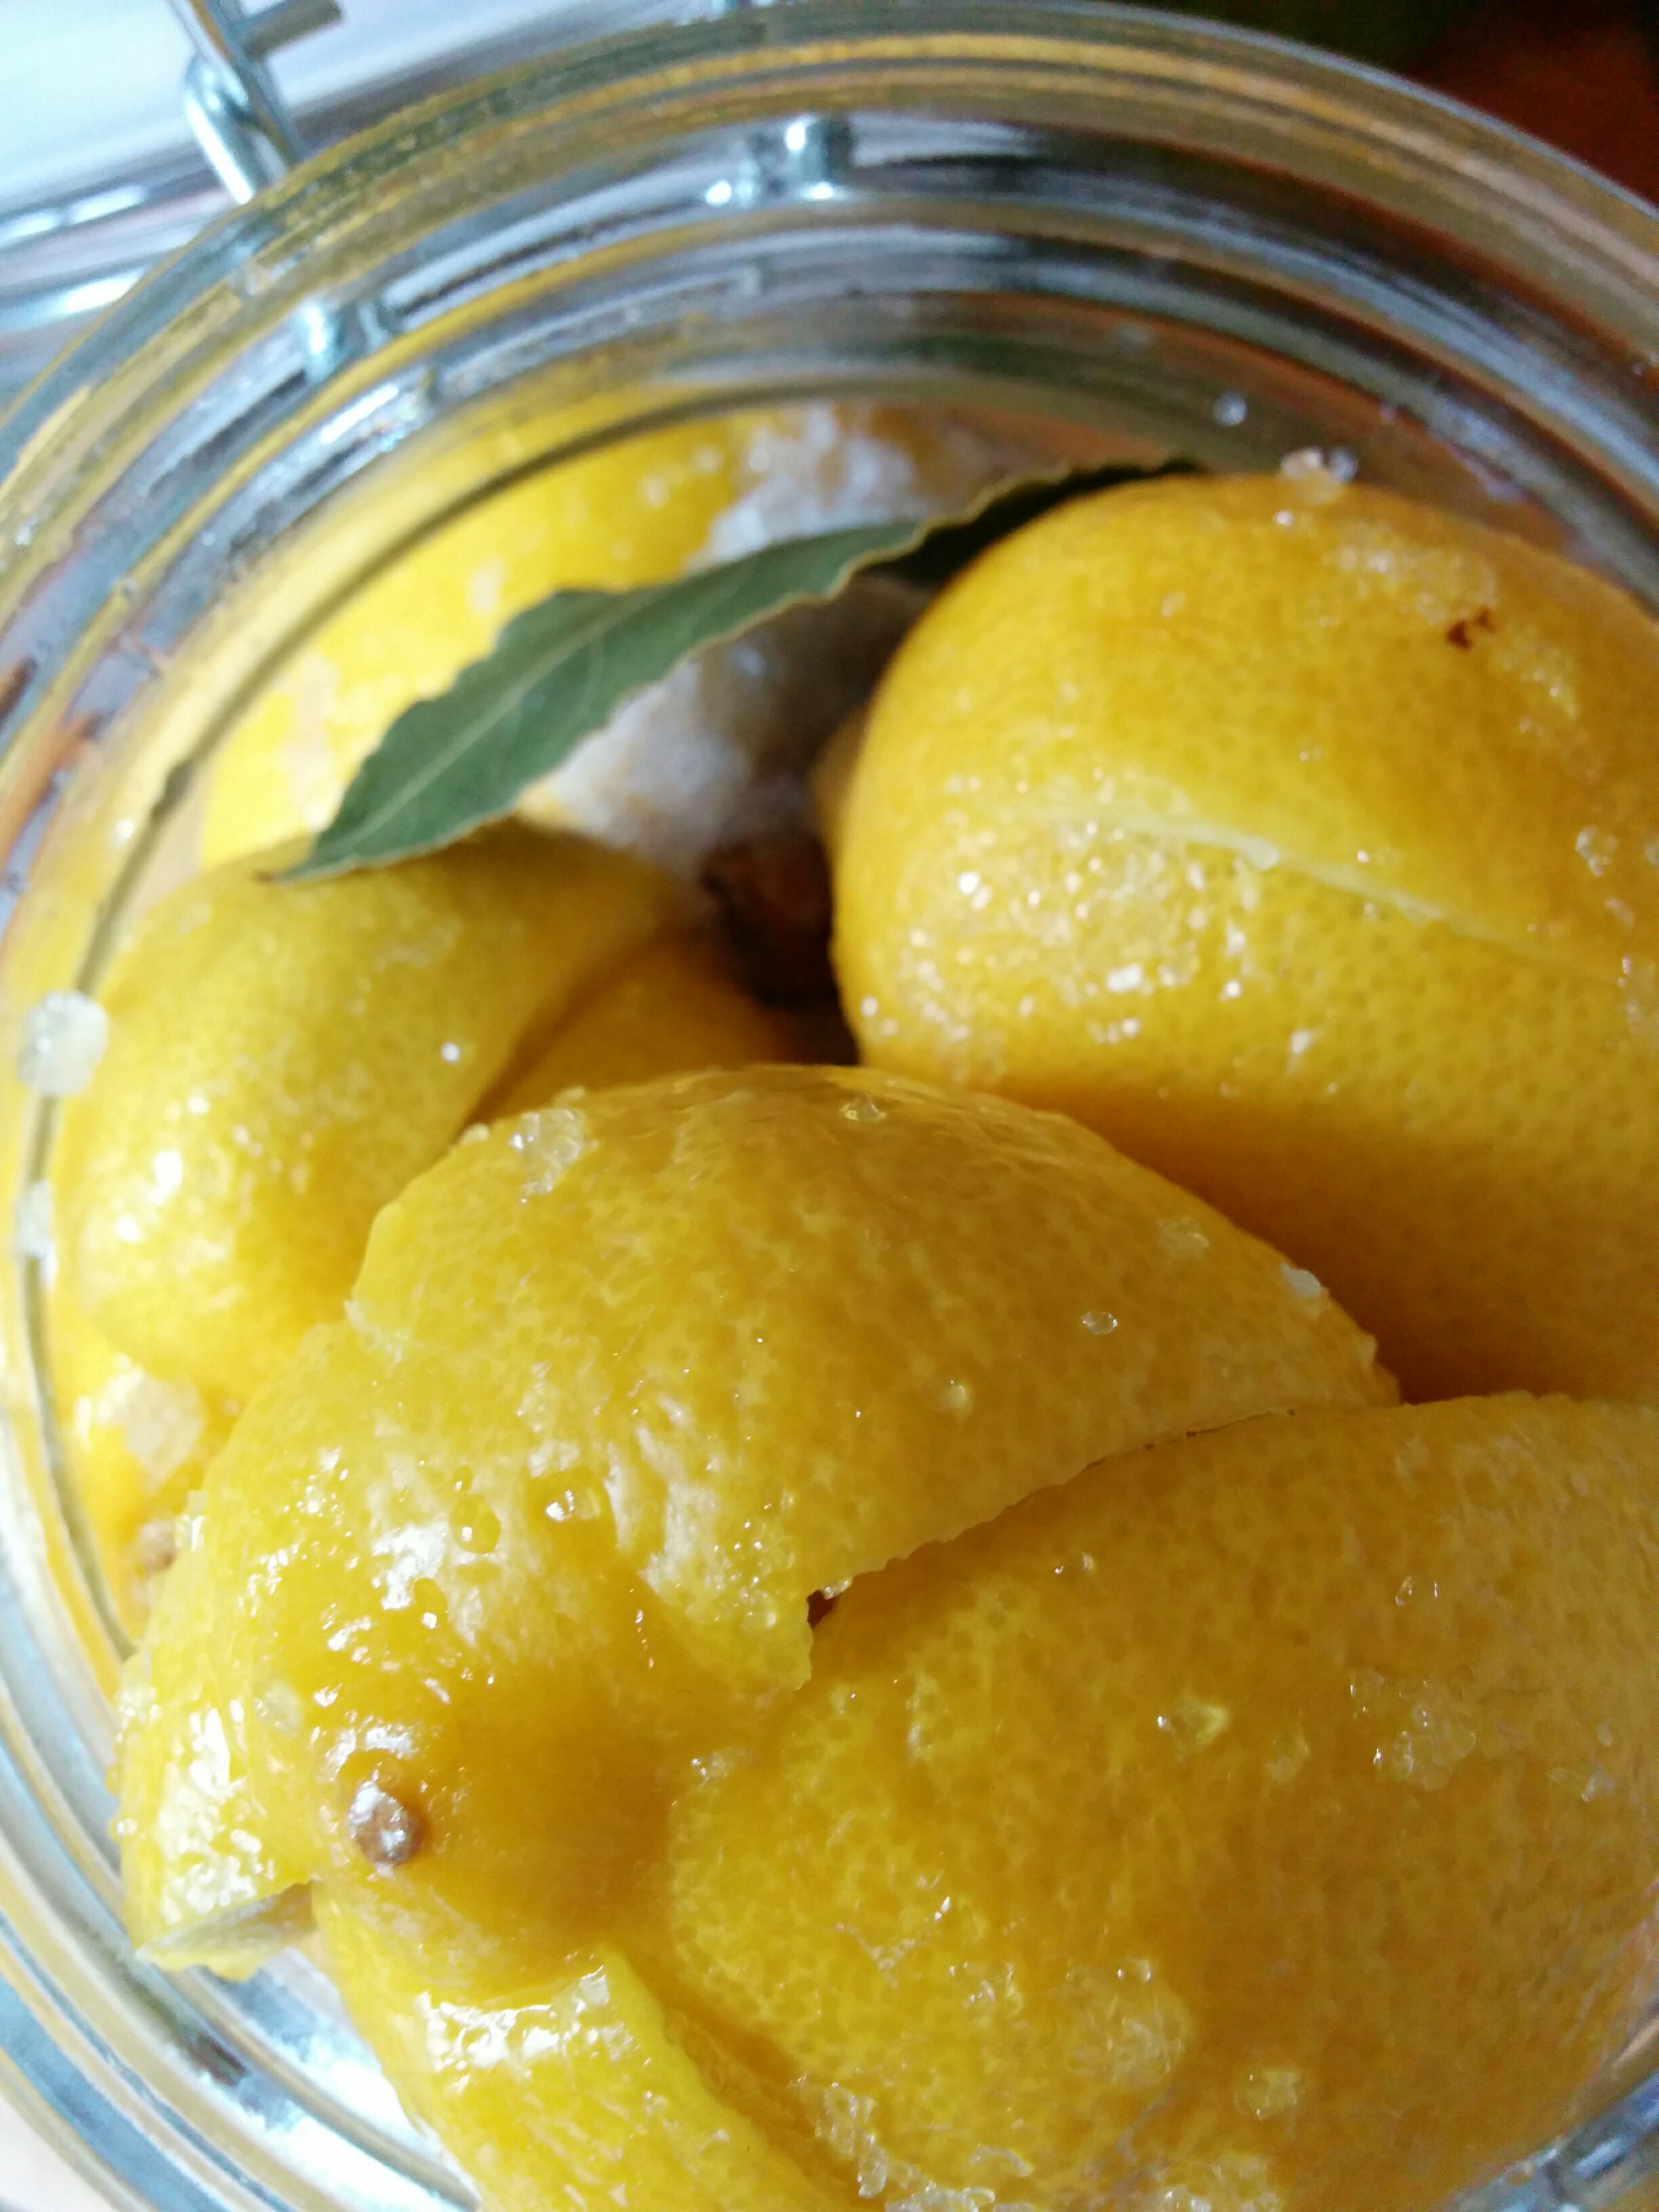
The other thing I made was another jar of Pickled Lemons. I don’t think you can ever have too many jars or variations of this most wonderful condiment. For this batch I reverted back to my old recipe I’ve been making for nearly 30 years. Measurements are fairly arbitrary – it depends on how big a jar you’ve got handy and how many lemons you want (or need) to pickle! Also, experiment with adding different spices throughout the jar. I particularly like bay leaves and chillies – something I’ve got plenty of at the moment.

IMG_20160119_163601

Deb’s Pickled Lemons 

Ingredients:

Lemons    preserving salt   Optional spices – bay leaves, chillies, cinnamon quills, mustard seed

Method:

Start with a scrupulously clean jar, preferably a sterilised preserving jar. I used one with a swing top lid and a good rubber seal. Put a tablespoon of salt in the bottom of the jar and a little of the spices and put it to one side while preparing the lemons.

Wash the lemons in plain hot water and remove any diseased fruit, stem pieces and cut out any blemishes that might spoil the finished pickles. With a sharp paring knife carefully quarter each lemon almost to the base. (See the photo above). I recommend cutting them over a bowl to catch any juice that can be poured over the finished pickle.

Put a generous spoon of salt into each cut. Again, do this over the bowl, it can get a bit messy!

Now, put the salted lemons into the jar, layering with more salt and any spices you want to use. In this jar I used a cinnamon quill broken into pieces, a few bay leaves and two fresh cayenne chillies that I poked a few holes in to let the lemon juice and salt in. Use a wooden spoon (even the handle) to really cram the lemons in and release their juice. This, combined with the salt preserves the fruit. Close the lid and leave the jar on a shelf for a month, shaking it every day.

Use a little as a condiment with curries, chopped up very fine in marinades or stuffing and in recipes such as Lemon Chicken.

IMG_20160119_165123


Saying Goodbye

Yesterday evening, while dinner was cooking on the BBQ – a wonderful Australian summer tradition – I came into the house to look at my phone, mostly to stop myself from checking the yummy things too often.

The Guardian was saying David Bowie had died. At first I thought (I hoped) it was a hoax. I walked outside and told my partner. I started to cry.

It was a surreal moment, one that I won’t forget. I’m certain there are many of you out there who will have similar memories of where you were and what you were doing when you heard that Bowie was dead.

For me and many of my generation, David Bowie was much, much more than an incredibly talented musician, a brilliant showman, a fabulous and insightful songwriter, a trend setter.

He was one of us – another misfit, a freak who didn’t fit into the mainstream, who kept kicking against what we were told was “right”. He gave us hope, and for many of us, gave us a reason to keep going on days when the world could look a very dark place.

I was in love with Bowie from the first time I heard Space Oddity in the very late 60’s when I was still in primary school in a small country town. By the time he released Ziggy Stardust and the Spiders From Mars in 1972, I was on that hideous roller coaster called puberty, and my mother was (perhaps with some cause) starting to worry about me. All my school friends were into Donny Osmond and David Cassidy. A few of us were listening to The Who, Clapton, The Plastic Ono Band and The Doors (particularly L.A. Woman) but we were a minority and considered pretty weird by our fellows.

I remember we were allowed in early high school to bring posters of our favourite pop stars to decorate the classroom. I took a poster of the cover of Hunky Dory, with Bowie doing his best Lauren Bacall impersonation and the teacher asked me who “she” was. When I told her it was David Bowie, I had to take the poster home with a concerned note for my parents. For a while I tried to fit in, but who was I kidding? And there was this amazing, skinny, obviously drug addled English guy who was telling me it was okay to be different and not be a sheep.

Throughout the years, I kept coming back to Bowie and his current works. Not just for entertainment, (though that was mostly mighty fine) but for inspiration and instruction for my personal arts practice. In particular, Bowie’s interpretations of Jacques Brel and Bertold Brecht were and remain profoundly important to me. Also, it was an ongoing reassurance that it was still okay to be different. Actively embracing change and personal reinvention is an important part of my life thanks to him.

All these years later, I still come back to Bowie’s music and continually find new lessons in my craft.

Although I never met the man and sadly, never had to opportunity to see him live on stage, I feel like I’ve lost a favourite, incredibly chic, slightly disreputable uncle. You know, the one who takes you out partying when you’re still under age with a “hush, don’t tell your parents we did this” conspiratorial wink.

And when my time comes, I hope I’ll have the strength of character to make something as beautiful and powerful as Blackstar and, in particular write a song as gloriously human as Lazarus. 

Along with the rest of the planet, my thoughts are with his family and friends in these incredibly sad days.

Vale David Bowie, and thank you from the bottom of my still fiercely independent heart ❤

Shiso and Cider Vinegar – A Heavenly Match

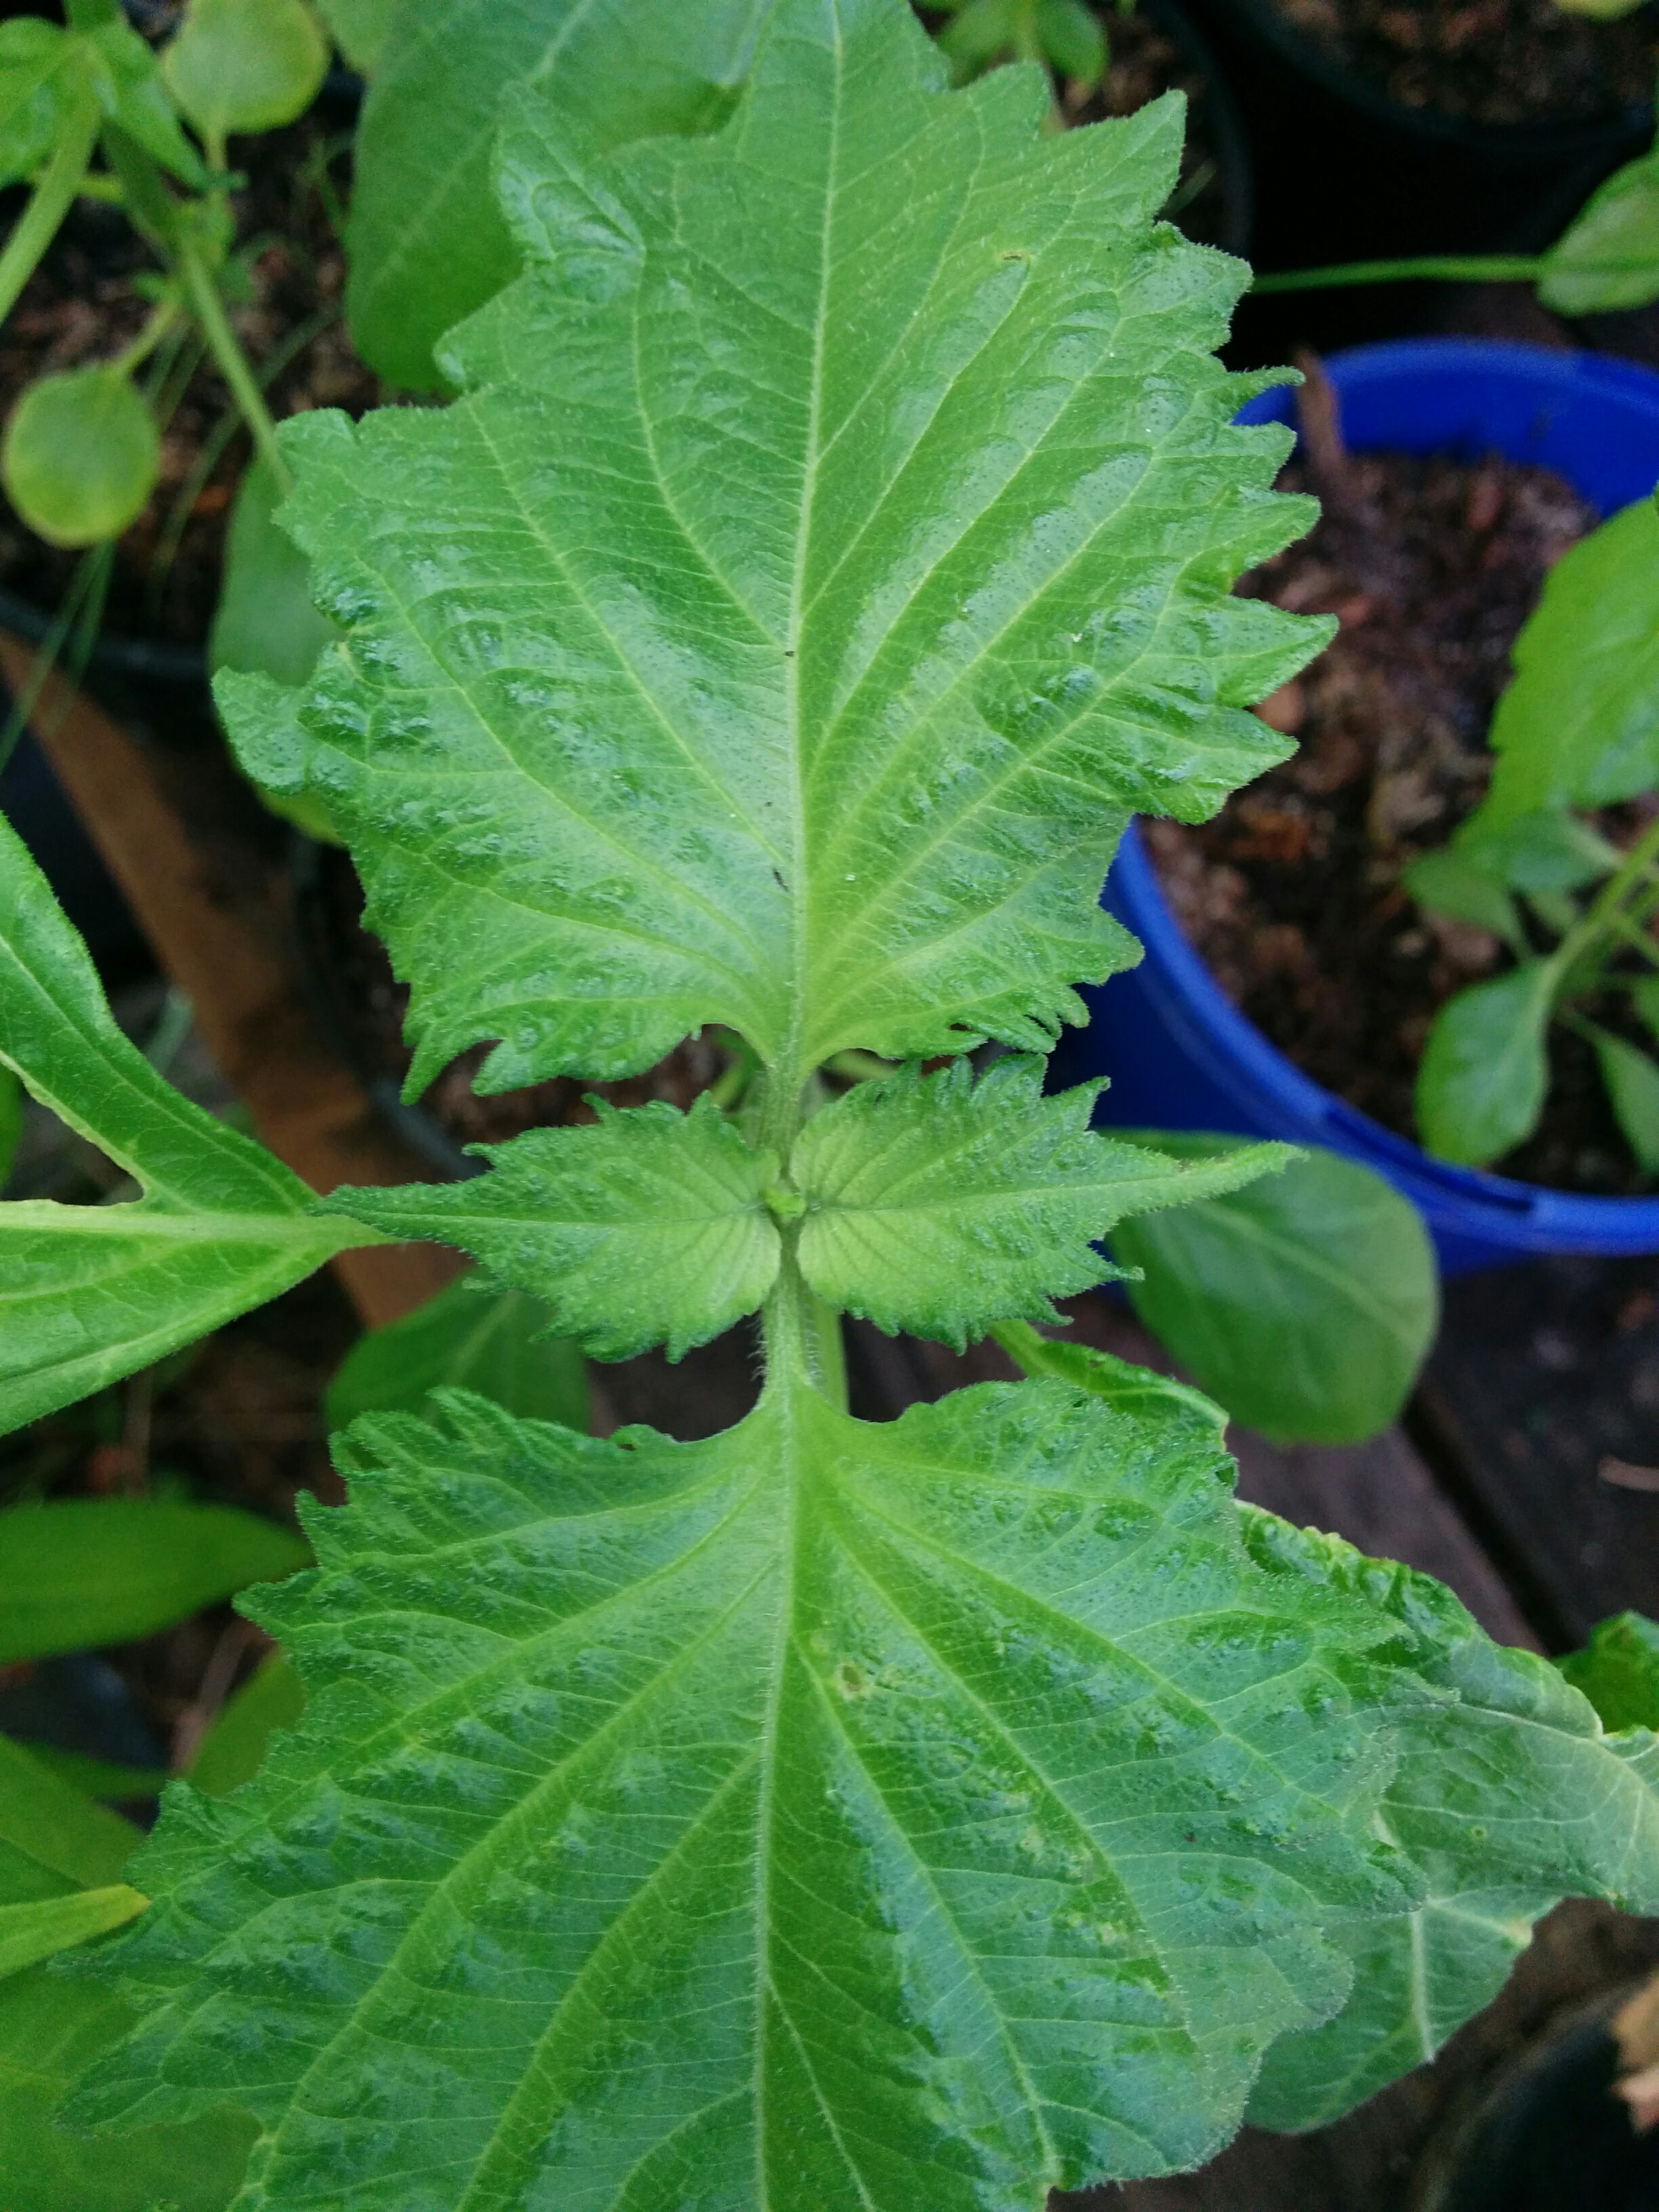
Over the years I’ve grown quite a lot of that most wonderful annual herb, Perilla, Shiso or Beefsteak Plant. Traditionally, it’s found in Korean, Japanese and Vietnamese dishes, and Shiso is its Japanese name. In particular the green variety (Perilla frutescens) which I prefer, seems to like my greenhouse very much. The unusual aroma and flavour is a welcome addition to summer salads in my household. Flavour-wise, I think it plays a similar role to Basil in Mediterranean dishes, and it is sometimes sold as Japanese Basil. I just wash the leaves thoroughly, put them through the salad spinner and chiffonade them. We also love it as a flavouring for steamed rice and stir fries and the whole leaves for tempura.

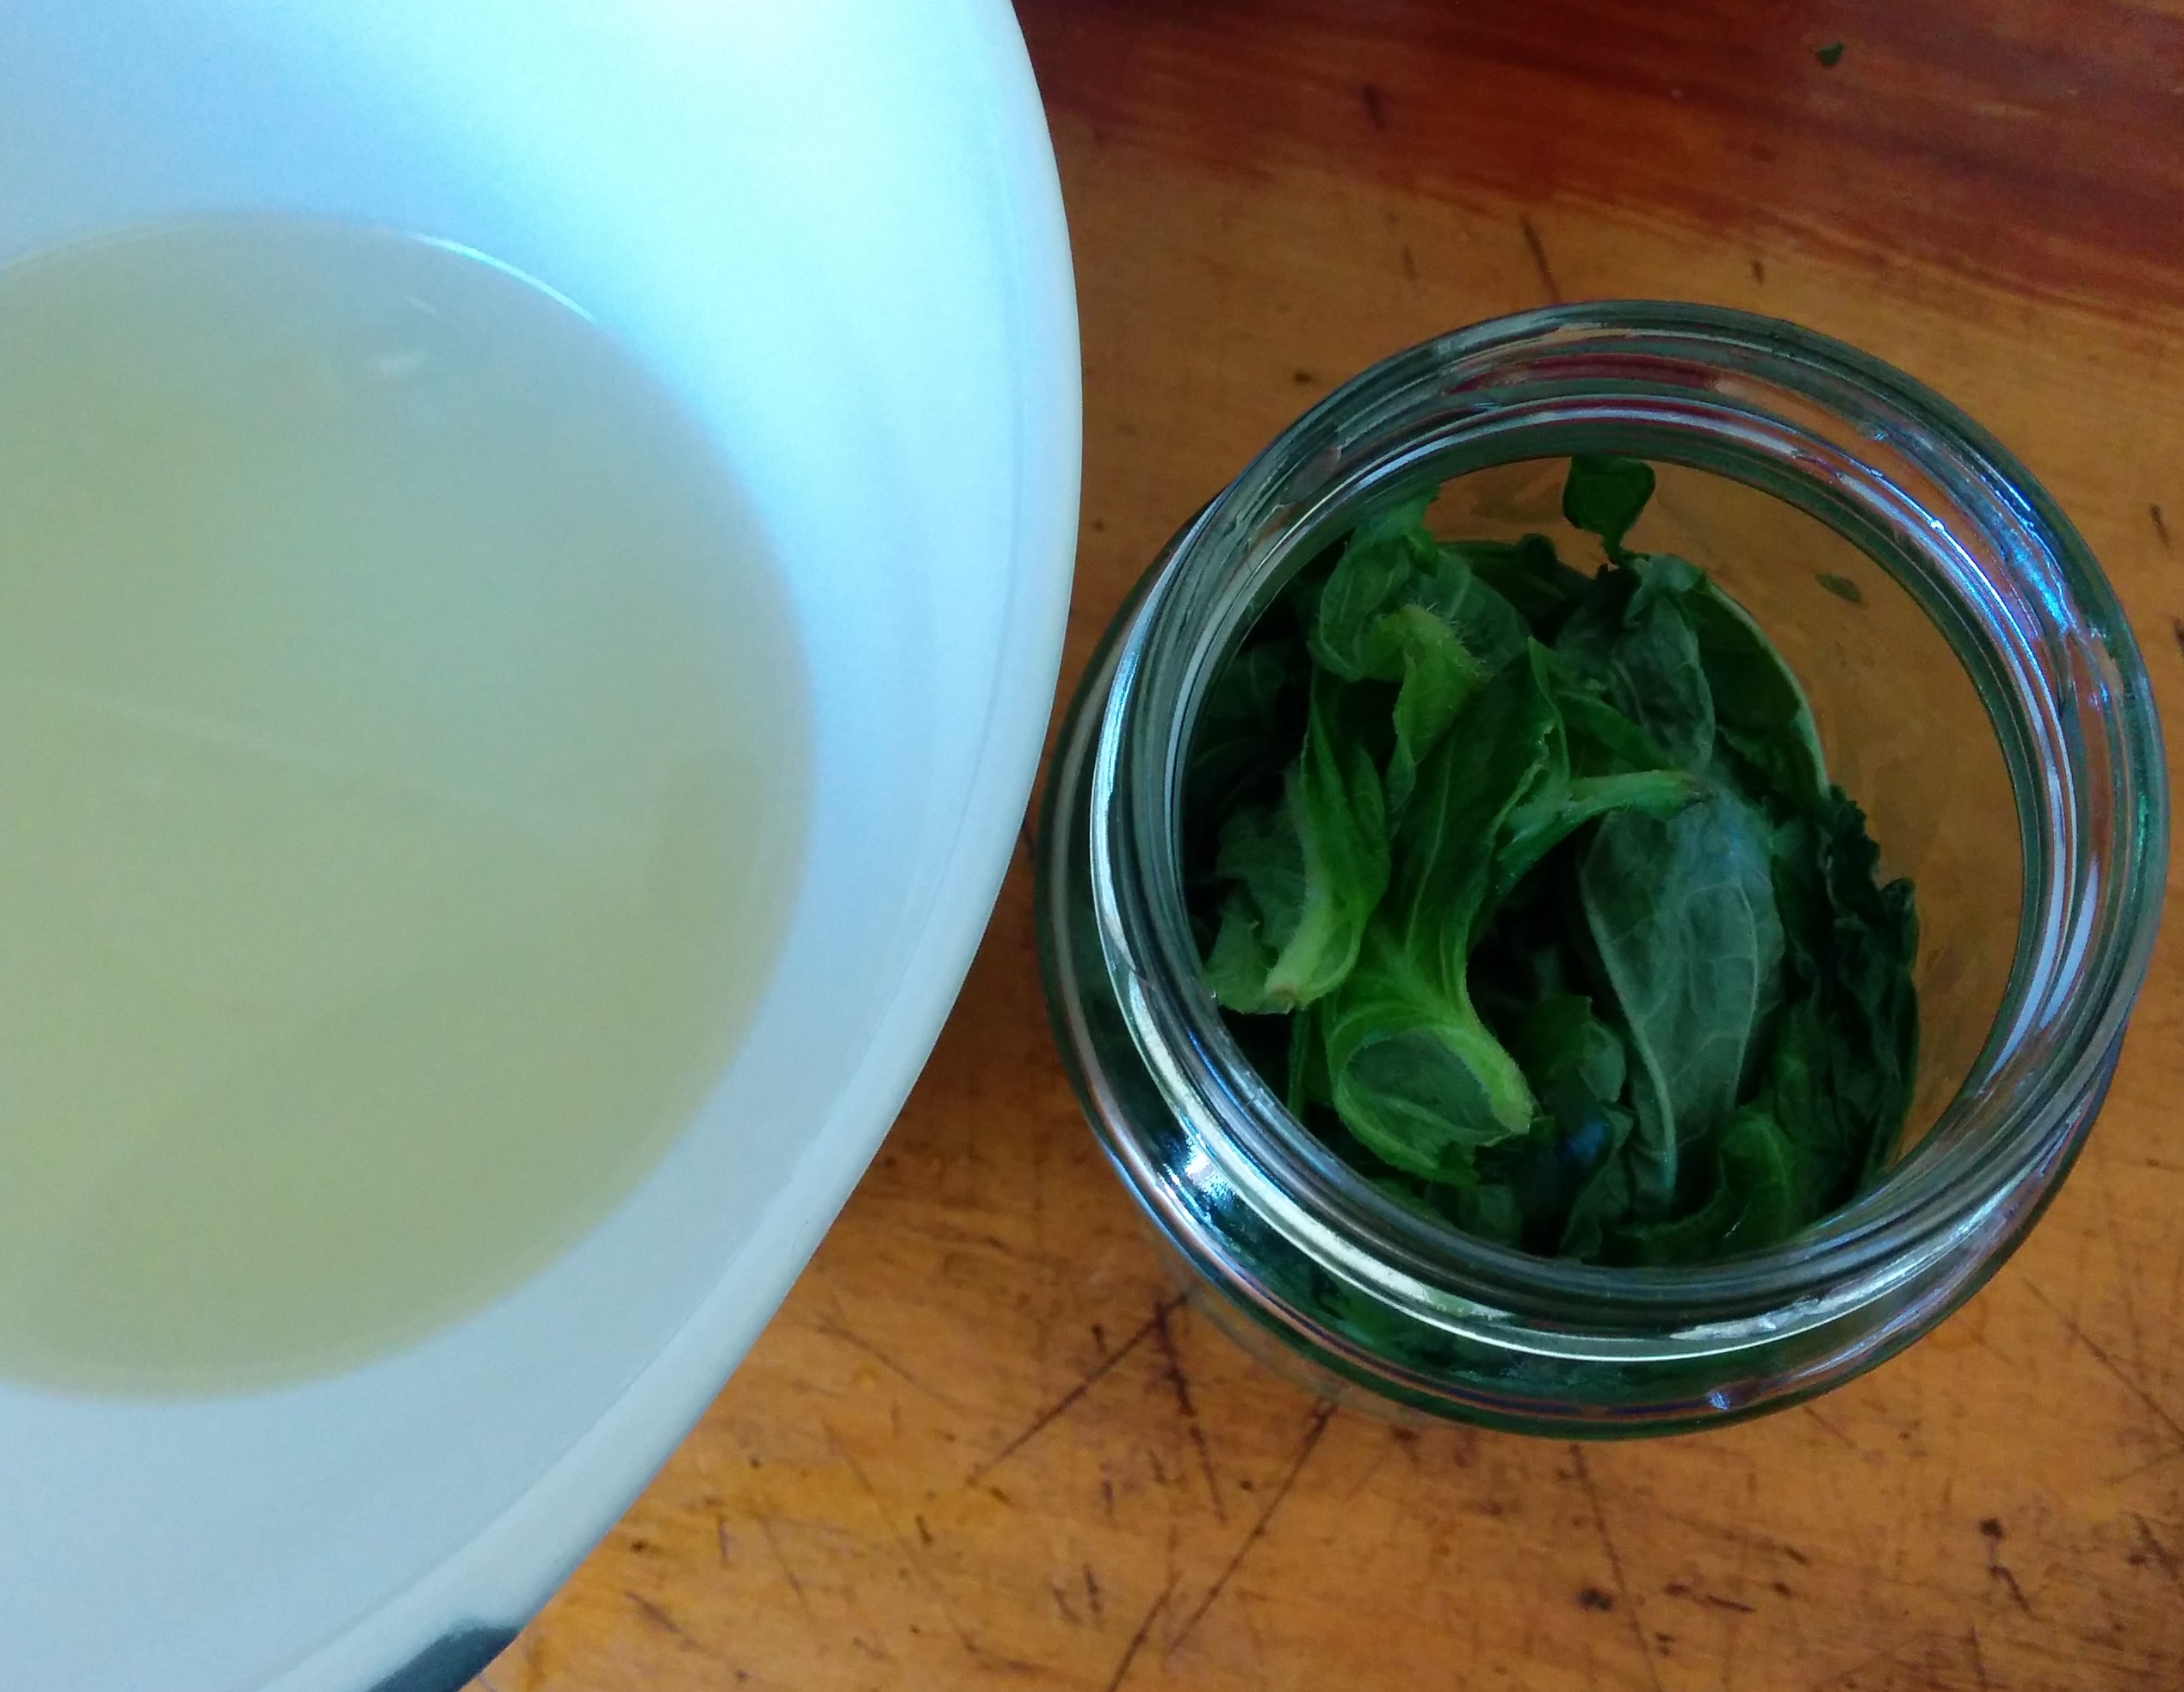
Pickling liquid and Shiso leaves in a jar

Pickling liquid and Shiso leaves in a jar


This year I’ve had a fabulous crop and I began to wonder what else I could do with it. That got me thinking about other Japanese flavours and what would happen if I started experimenting with a pickle. In Japan, Green Shiso is salted and the whole leaves are layered in jars for use during the cooler months and the Red Shiso is used to make Umeboshi but I found a wonderful cucumber recipe at Food52 that I’ve adapted for my needs. I wanted to have pickled leaves I could use whole as wrappers or shred up as required and this looks like a winner!

I made this yesterday 🙂

Refrigerator Pickled Shiso

15-20 large Shiso leaves           1/4 cup sugar                       1 tablespoon salt

3 tablespoons Mirin                1 cup Apple Cider vinegar       A clean pickle jar and lid (300-400g)

Wash the Shiso leaves carefully to remove any grit, pat dry or put through a salad spinner to remove excess moisture. Lay the leaves on top of each other and very carefully roll them, feeding the entire roll into the jar. In a non-metallic mixing bowl whisk the other ingredients thoroughly until the sugar and salt are dissolved.

Pour this over the Shiso leaves, close firmly and refrigerate. This will be ready to use in a few hours but will benefit from leaving for at least a couple of days. I have no idea how long the leaves will last in the refrigerator but as I use a few and make room, I plan to add some thin slices of the little cucumbers that are starting to fruit.

I confess I took a nibble this morning and it’s as wonderful as I hoped it would be. The big factor for me is the flavour of the pickling liquid, which is very similar to a dipping sauce. Also, I used some of the vinegar I made from a failed cider about three months ago and it’s pretty special just on its own! I will write a post about processing the vinegar with details and photos soon.

I’m also planning to dehydrate some of the crop, grind it and mix with a little shredded nori and toasted sesame seeds to make my own furikake and I’m considering getting a fermenting jar and making Korean Gaennip Kimchee. There’s also an idea brewing in my mind about making Shiso oil, similar to the Basil oil I make relentlessly through summer. I’ll keep you posted on that 🙂

Meanwhile, I’ve finished and submitted my assignment and I’m back to my wonderful people at OAK Tasmania tomorrow – summer holidays are over for me. But the days are still long and luscious for gardening and cooking.

Stay well and happy friends,

Debra ❤

Beautiful Shiso

Beautiful Shiso

More Lemons!

Things have been really busy around here!

Besides the constants of plants to water and harvest in summer, there’s animals to care for and ensure they’re protected from the heat of the day and ongoing development work in the garden. And then there’s the excess – mostly eggs, raspberries and basil at this house – and what to do with them. Lots of quiche, raspberry cheesecake, cordial, basil oil and pesto for the freezer at the moment. On top of that I’ve been writing a short story for my latest university unit (yes, Griffith Uni Online know no summer holidays!) which has been really quite demanding.

IMG_20160104_143007

Just when I thought it was safe to go back to the kitchen, I caught up with my friend Sara last week and she gave me a bag full of lemons. I was able to trade a bottle of Raspberry Vinegar Cordial, which has been threatening to take over my pantry cupboards!

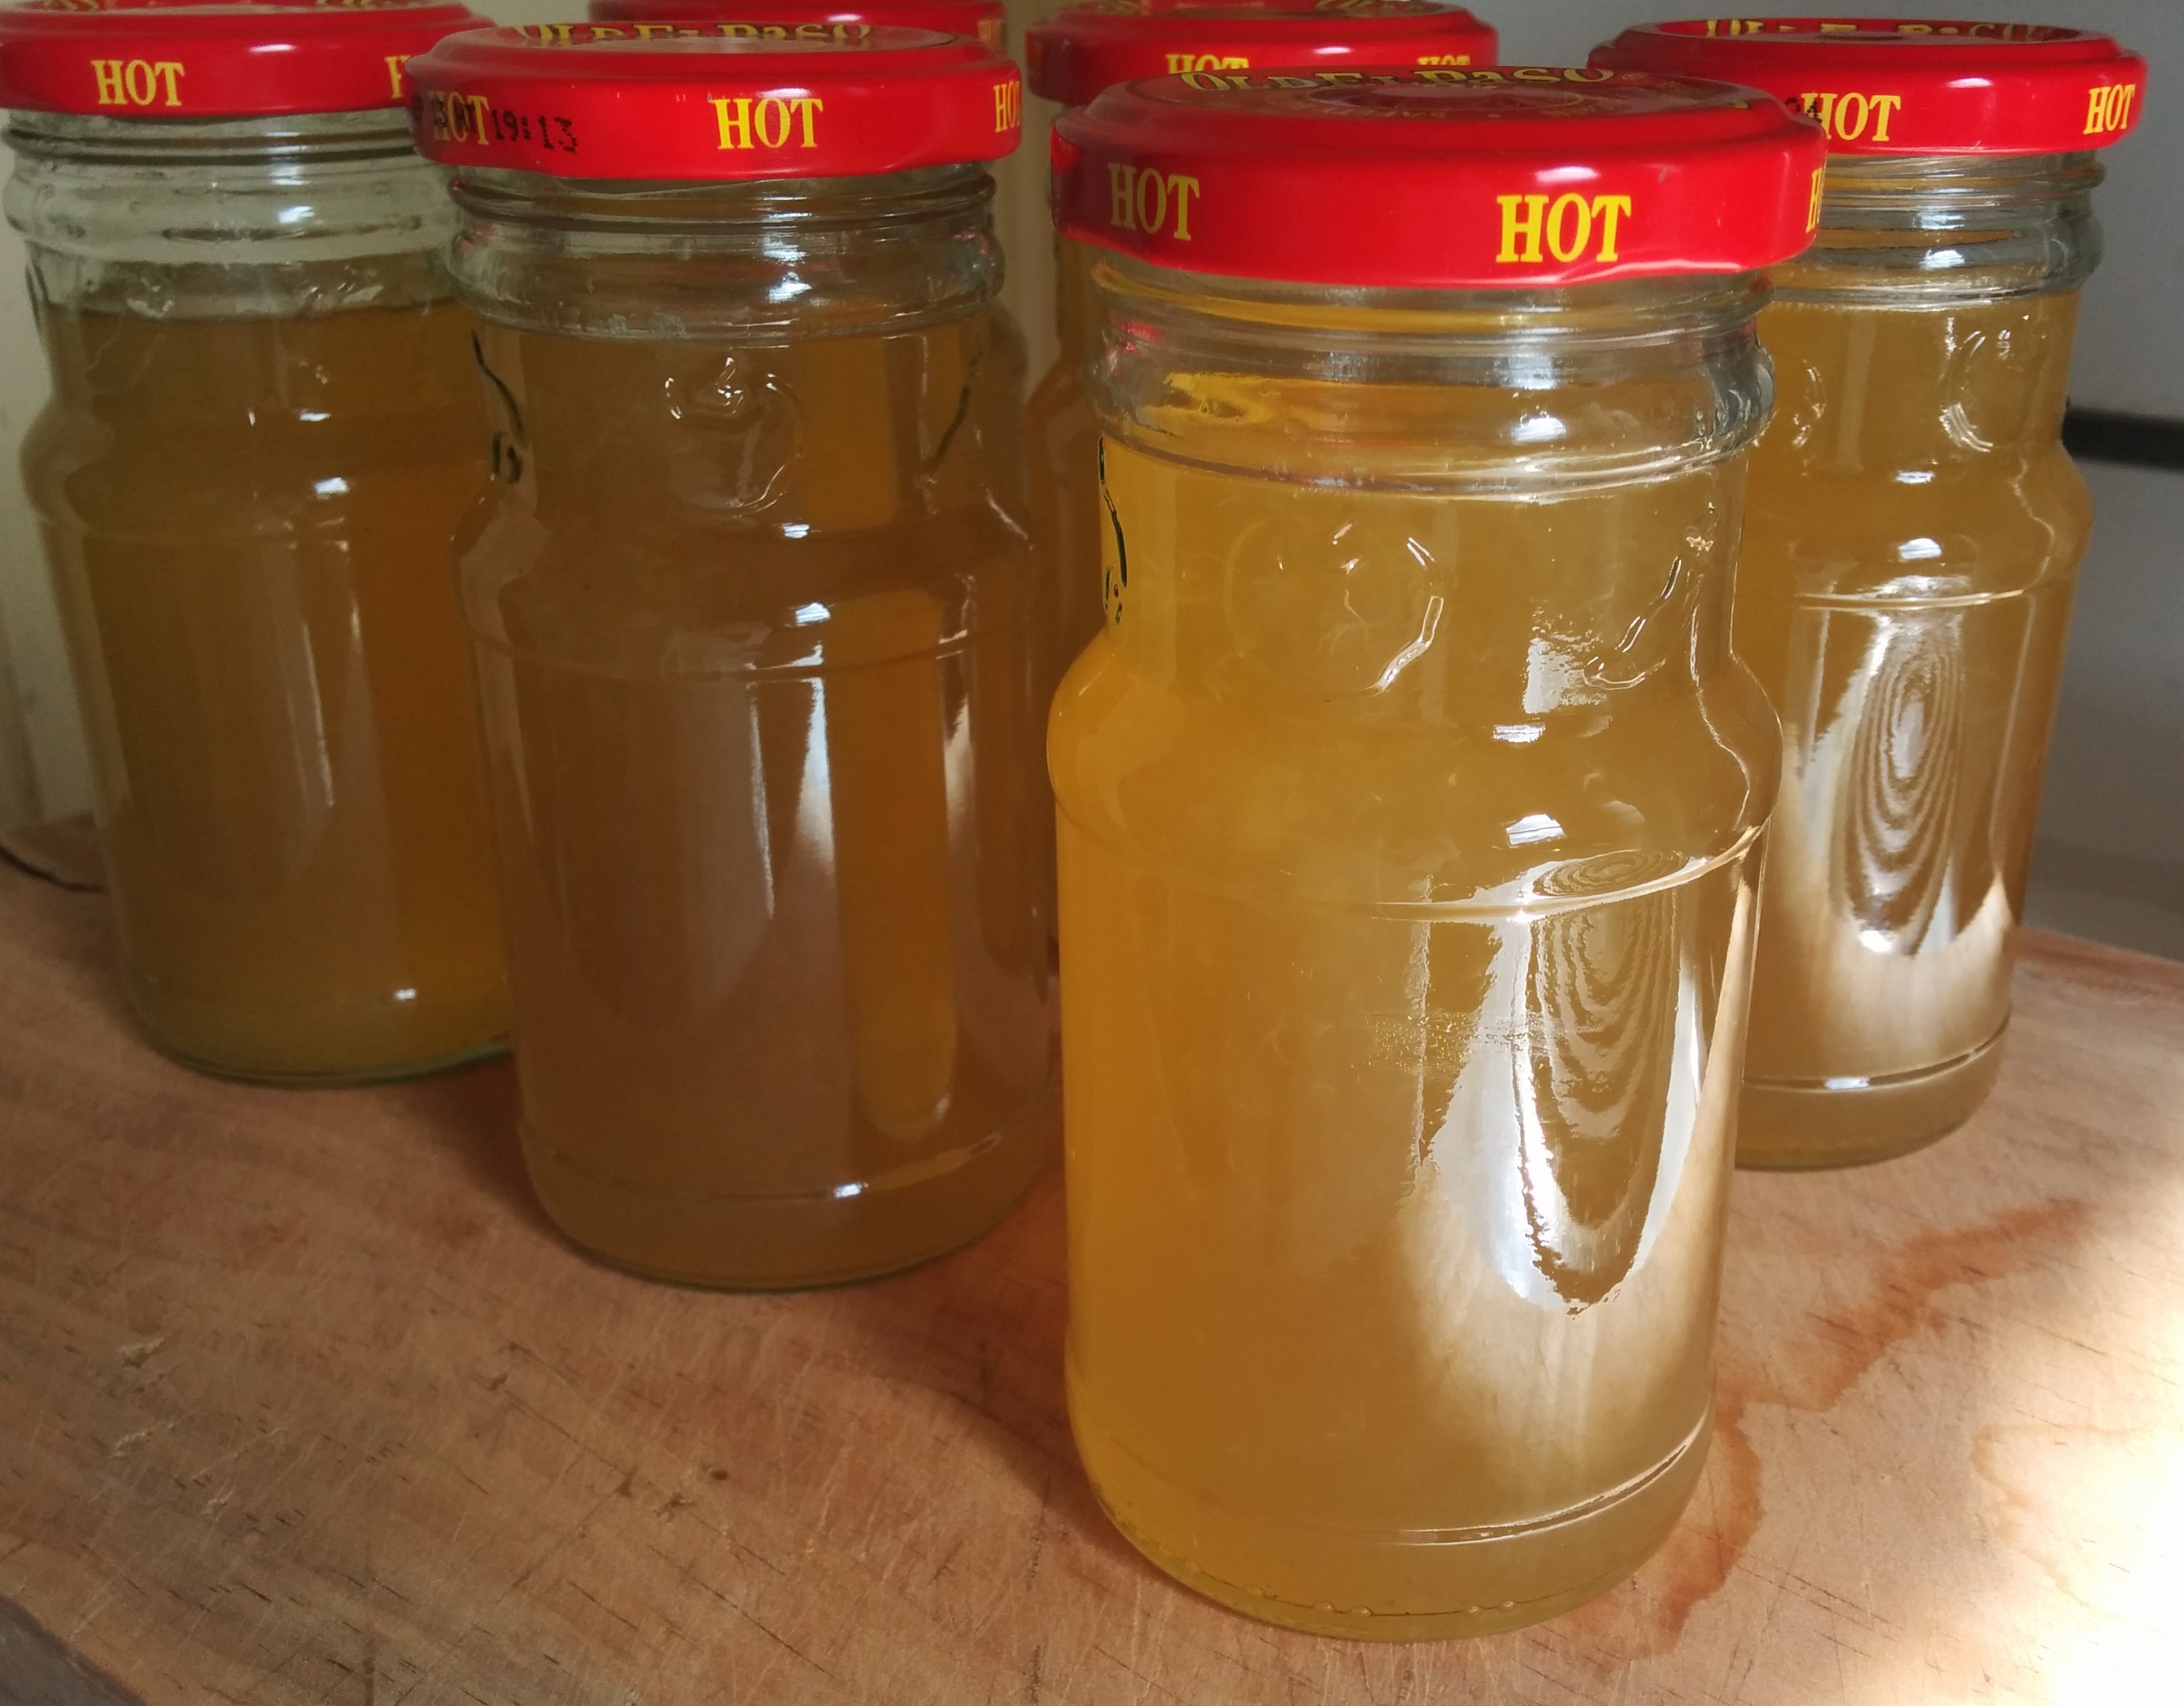
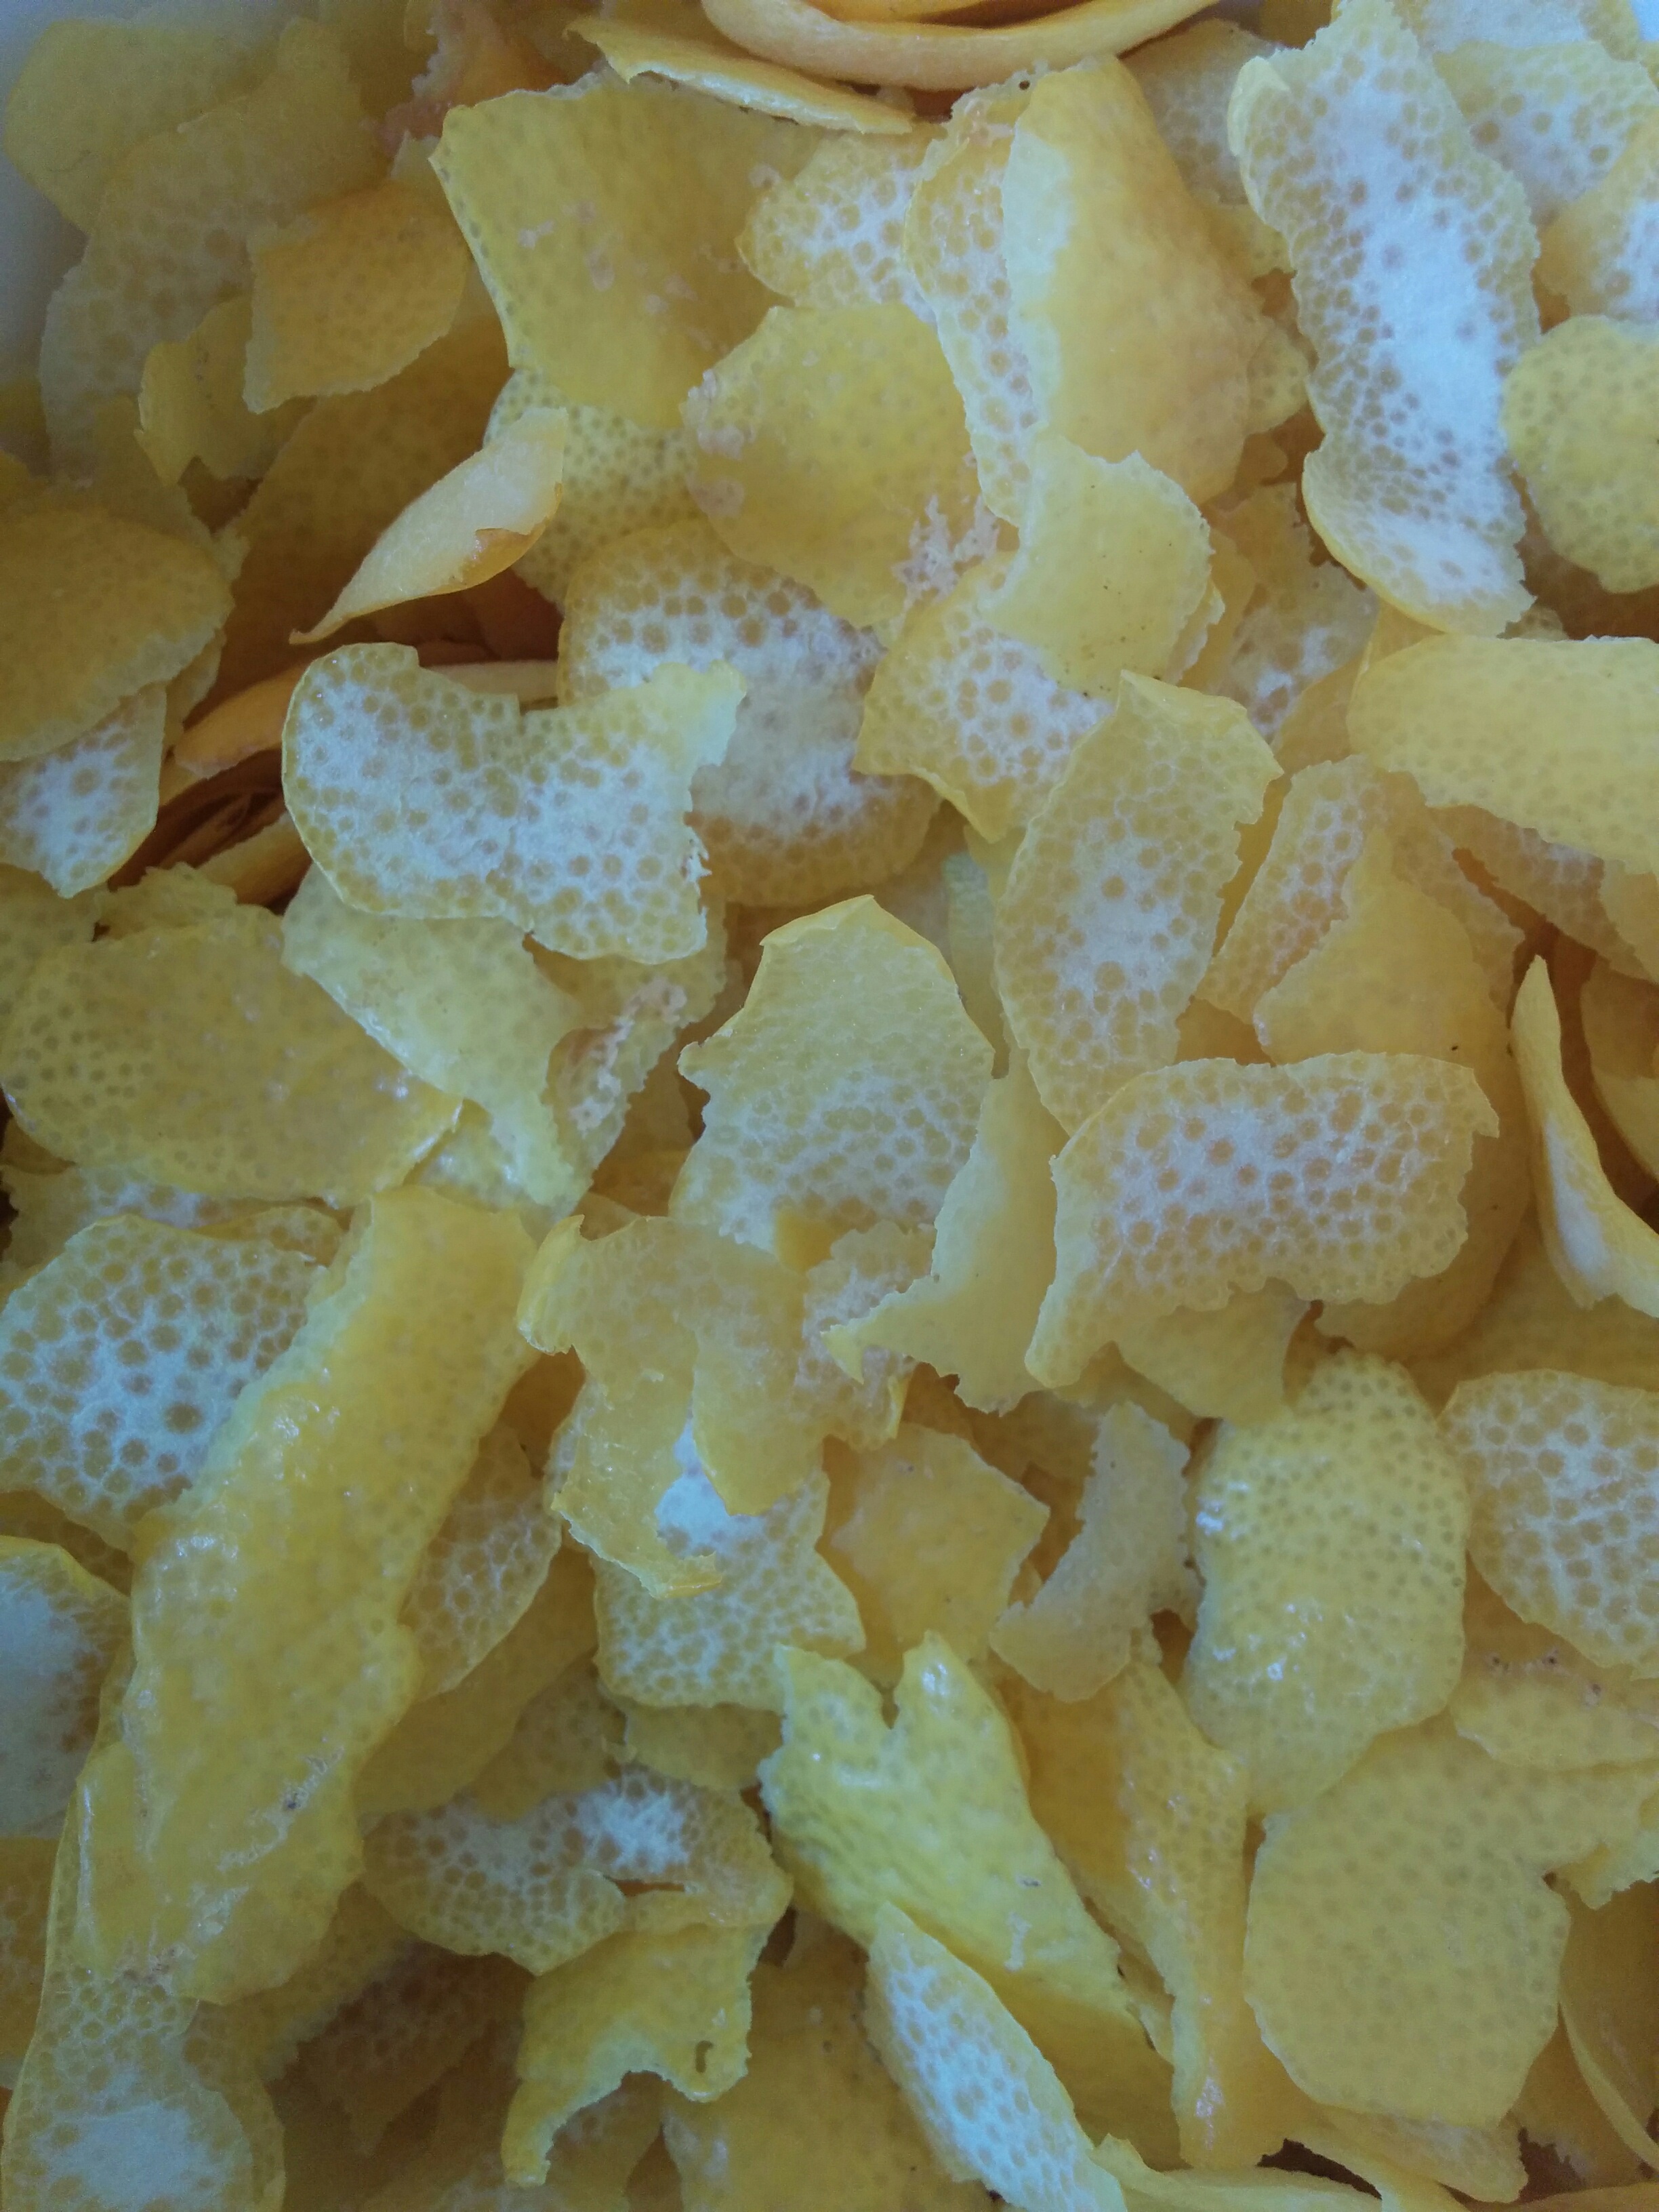
Well, I had a think about what works in my household. We’re not jam or marmalade eaters but dried fruit, cordials and syrups for drinks and ice cream are very popular. So I spent the afternoon peeling lemon zest for the dehydrator and making a simple Lemon Syrup with the juice.

I confess I lost count of the lemons but it was at least 20. After peeling the zest I put it in a non-metallic bowl overnight while I dealt with the poor denuded lemons – they look awful without their beautiful skins! Here’s my recipe, it’s really easy!

IMG_20160104_171135

Simple Lemon Syrup (makes about 6 cups)

3 1/2 cups fresh lemon juice       3 cups white sugar

Before beginning, sterilise glass jars in the oven and put their lids in a saucepan of boiling water on the back of the stove.

Next put the juice in a clean pan on medium heat with the white sugar. (I removed the pips but left some pulp in the juice – we like pulp). Keep stirring until the sugar is dissolved and simmer for about 10 minutes. Once the syrup is ready, take a couple of jars from the oven and carefully put them on a board or heatproof mat next to the syrup pan. Ladle it into the hot jars and seal immediately.

If you want to keep the syrup for a longer period of time, I recommend processing them in a water bath (canning method) for 10 minutes so they’ll be good on the pantry shelf for about a year – if it lasts that long!

IMG_20160104_171910

Dried Lemon Zest

This is really very simple and one of the best bonus uses for lemons you know have come from a chemical free garden. I have a dehydrator and my peelings were enough to put over three trays, lined with baking paper. In total it took about 10-12 hours to dry it all properly without cooking it. It it possible to do this in a conventional oven but it needs to be very cool.

My three large trays reduced down to a jar of wonderfully dry, aromatic peel. I’ll use this in baking, marinades and plan to crush some up fine for mixing with salt, and some with dried chillies as a herb rub.

Personally, I think it’s worth doing this just for the smell – it was heavenly!

IMG_20160109_141551

I’ll probably put another post up in the next few days about my favourite summer herb – shiso. Meanwhile, have a great weekend wherever you are and whatever you’re doing.

Debra ❤


Previous Older Entries Next Newer Entries