Hello friends,
It’s been a rough month. In fact, it’s been a really rough year and it’s only April. I confess I’ve been putting off writing this even though I know the act of doing so will be therapeutic.
In late February, my friend Jeff Weston passed away after a long illness, then another elderly friend passed away in early March. Late last month, my friend Leon Turner passed away peacefully up in New South Wales. I met him in the early 1980s through his youngest son Michael, who is a truly gifted songwriter and still the best rhythm guitarist I’ve ever had the pleasure of working with.
Leon was cheeky, irreverent and had a delightfully wicked sense of humour. I’m sad that I couldn’t make it up to his memorial service but he will not be forgotten by me and all who knew him. Vale to The Cuddly Man ❤

Leon Michael Turner 1930-2016
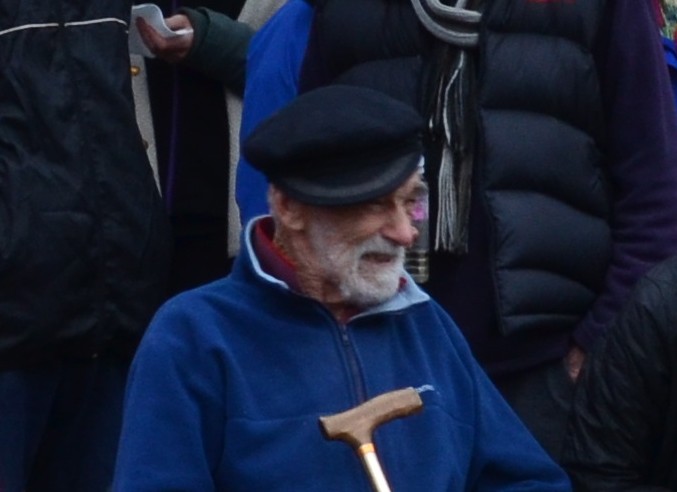
Then, last week my friend Kevin Gleeson passed away. Although he was a handy bass player, Kevin was best known in music circles across Tasmania and interstate for his fierce passion for live local music. There are very few musicians in the original scene statewide (and across all genres) who wouldn’t have come across Kevin as a sound engineer, gig promoter, or enthusiastic punter who just loved going to live gigs. He helped many of us any way he could and was always thinking of new gigs he could set up to showcase new acts as well as keep people like me with paid shows. He didn’t do it for any monetary gain, he did it because he loved the music and the people who made and performed it.
Last week, I went into 936 ABC Hobart with Katie Warren (another incredibly talented local muso) and we talked on air about Kevin and what he meant to us. It was undoubtedly one of the hardest gigs I’ve ever had to do. (Huge thanks to Jo Spargo for making this link available.)
Perhaps the most difficult thing about Kevin’s passing is how sudden it was, although he had been seriously ill for several years. And unlike the other folks I’ve been mourning, he was relatively young – a similar age to me. It hammers it home how precious and fleeting this life is. Vale my friend, may you rest easy ❤

Kevin Gleeson 1960-2016 [Photo by Mark Young]
So, my mantra is live your life well, with honesty and integrity and love unreservedly.
Life is short.